Yep, we're back at the flower shop again. I really can't seem to leave this stamp set alone. Again I've paired it with the Petite Petals stamp set and a few other goodies to round it out. I keep hoping that spring really is right around the corner here. No matter what the calendar says, when it's freezing or below outside and there's snowflakes fluttering around, it's not spring yet. So here's my happy spring-colored version of these stamp sets in action. Maybe it'll prod the weather outside to play nice and get warmer!
Stamps: Flower Shop, Petite Flowers, and Delightful Dozen
Ink: Primrose Petals, So Saffron, Blushing Bride
Paper: Whisper White, Pistachio Pudding, Garden Green, Primrose Petals, and Raspberry Ripple
Accessories: Big Shot with Hexagon TIEF, Circles Collection Framelits, Little Leaves Sizzlit, Pansy Punch, Petite Petals Punch, Itty Bitty Shapes Punch Pack, Tea Lace Doilies, Glue Dots, and Dimensionals
I really love adding the Tea Lace Doilies (or parts of them) to my cards lately. They give such a delicate, old-fashioned look to a card with very little effort. For this card, I just cut one of them in half and attached it to the Pistachio Pudding layer. I thought about adding a ribbon at the cut edge, but really didn't like any that I had on hand, so I went without. This look reminds me of a lace tablecloth hanging over the edge of the table and all you can see is the side of it. So we'll just go with that idea!
After adding the stamped flowers and the die-cut leaf sprays, it still needed a little more contrast in the colors used. After trying out several different ones, I tried the Raspberry Ripple Itty Bitty flowers and they were perfect. Just enough contrast without overpowering all the more pastel flowers. Don't you just love having so many colors to choose from that it's easy to come up with just the right one for any need?!
Ok, that's it for today. Still hoping for spring around here. I think I'd even be happy if the temperatures got up into the 40's! So longing for some sunshine!! Have a fabulous day. If it's cold where you are, try bringing a little spring into your life by stamping! It's sure to cure those winter blahs! Sharon
Showing posts with label spring. Show all posts
Thursday, March 27, 2014
Wednesday, January 29, 2014
Flowers and More Flowers
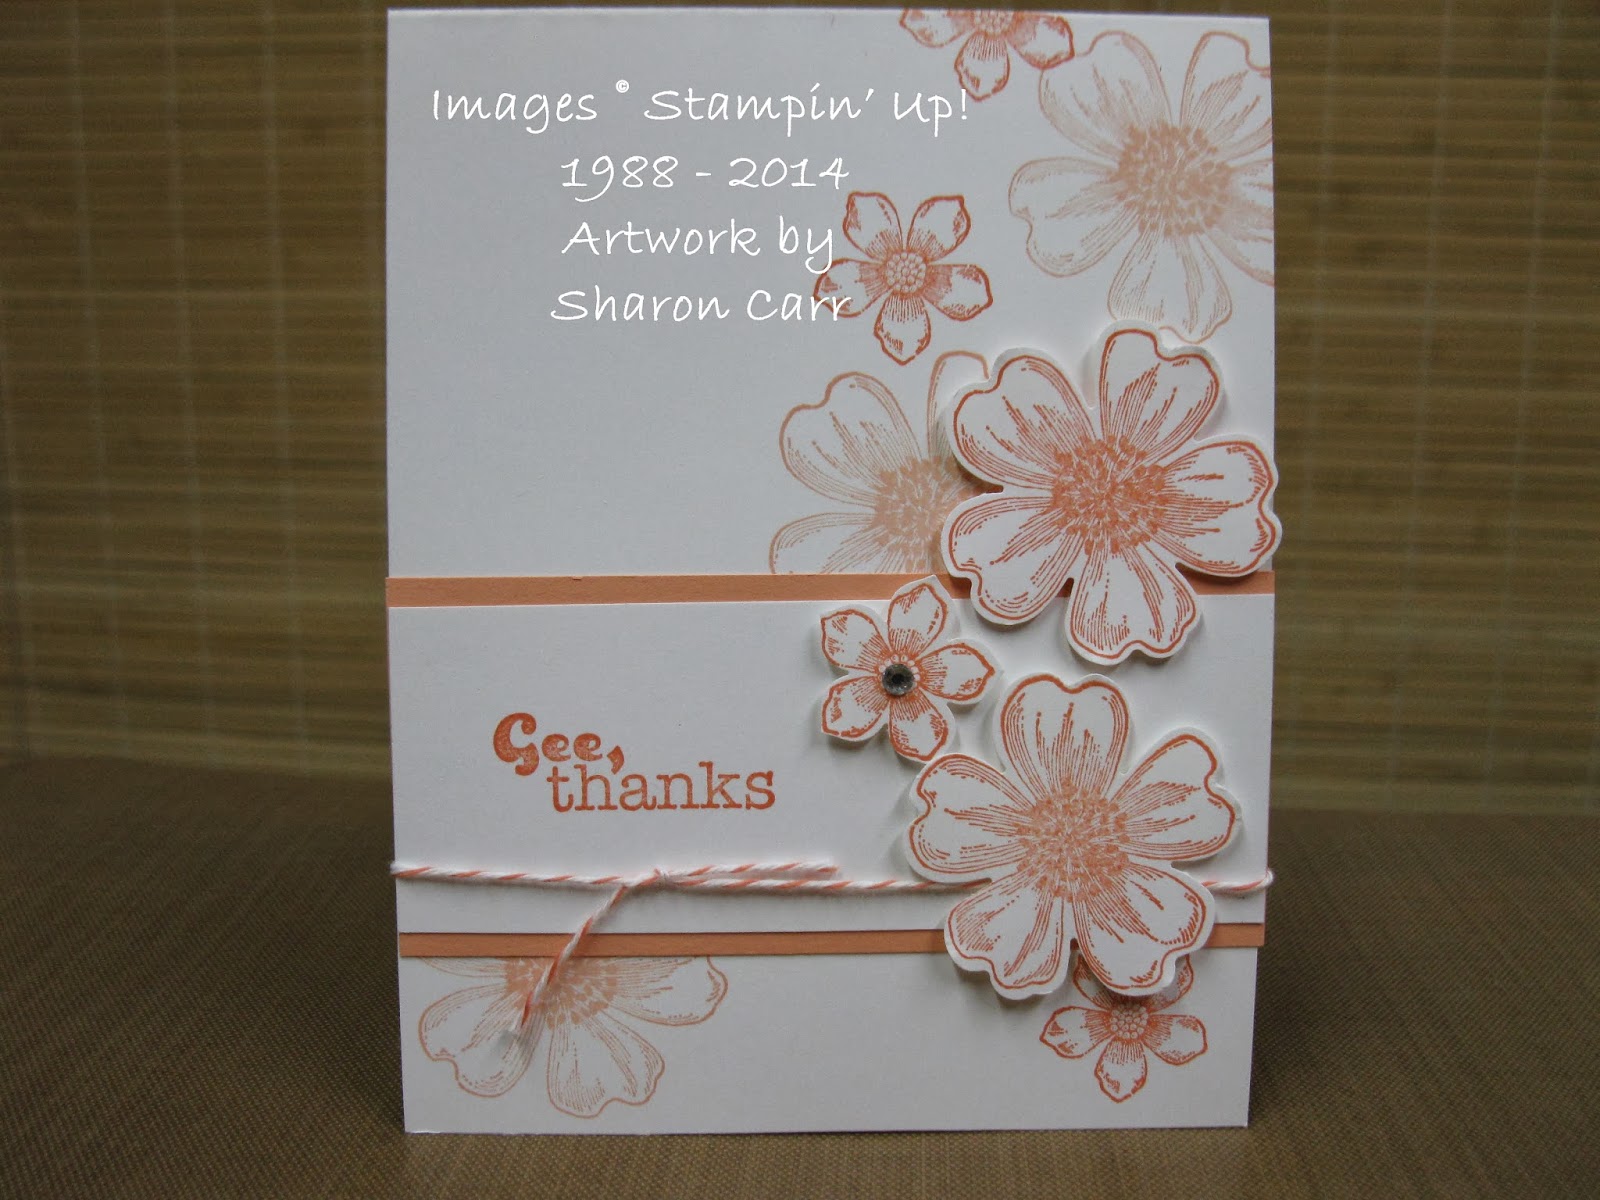
Who says I don't need any more flower stamps? Certainly not me! Of course I needed to get the new Petite Petals flower stamp and the coordinating flower punch when the new Mini Catalog came out earlier this month! Who doesn't love flowers especially when there's a punch to match so you don't have to cut out any accent flowers you want to use?! That's almost a no-brainer for me!! Last night my hostess club ladies made this card - well, at least the 2nd version of it. After making the first card, I thought it needed a little more contrast, so came up with the 2nd version. I'll share both with you so you can see the difference.
Stamps: Flower Shop, Petite Petals, and Really Good Greetings
Ink: Crisp Cantaloupe and Calypso Coral
Paper: Whisper White and Crisp Cantaloupe
Accessories: Pansy Punch, Petite Petals Punch, Calypso Coral Baker's Twine, Rhinestone Basic Jewels, and Dimensionals
This is the first version of the card I made. I only used the Calypso Coral ink on the sentiment. All the flowers were stamped with Crisp Cantaloupe ink. Even with popping up the flowers, it still looked a little boring to me. Soooo.....
On the second version, I added some of the flowers with Calypso Coral ink. Right away there was more contrast and interest to the card. It's interesting what the addition of just a little darker ink can do to a simple card. This version is much more visually appealing. I like making monochromatic cards using just one ink color, but this needed an added boost to suit me.
Hope you like the card idea today. With the freezing tempuratures and more snow predicted, I thought a little spring floral was a good idea. Hope you're staying warm and getting some time to stamp. Since Sale-A-Bration started yesterday, I hope you have time to check out the deals. Remember for any $50 order, you can choose one of the Sale-A-Bration items for free! And who doesn't love free?! If you're having trouble ordering on-line, feel free to email me at sharoncarr50@mgail.com I'd be happy to help you get your order placed so you can get your free goodies! Have a happy day... Sharon
Stamps: Flower Shop, Petite Petals, and Really Good Greetings
Ink: Crisp Cantaloupe and Calypso Coral
Paper: Whisper White and Crisp Cantaloupe
Accessories: Pansy Punch, Petite Petals Punch, Calypso Coral Baker's Twine, Rhinestone Basic Jewels, and Dimensionals
This is the first version of the card I made. I only used the Calypso Coral ink on the sentiment. All the flowers were stamped with Crisp Cantaloupe ink. Even with popping up the flowers, it still looked a little boring to me. Soooo.....
On the second version, I added some of the flowers with Calypso Coral ink. Right away there was more contrast and interest to the card. It's interesting what the addition of just a little darker ink can do to a simple card. This version is much more visually appealing. I like making monochromatic cards using just one ink color, but this needed an added boost to suit me.
Hope you like the card idea today. With the freezing tempuratures and more snow predicted, I thought a little spring floral was a good idea. Hope you're staying warm and getting some time to stamp. Since Sale-A-Bration started yesterday, I hope you have time to check out the deals. Remember for any $50 order, you can choose one of the Sale-A-Bration items for free! And who doesn't love free?! If you're having trouble ordering on-line, feel free to email me at sharoncarr50@mgail.com I'd be happy to help you get your order placed so you can get your free goodies! Have a happy day... Sharon
Thursday, May 16, 2013
Last Call
In many ways I don't like this time of year. When all the changes and retirements are listed for all the stamps and products I've used and grown to love in the past year. This year is no different than any of the others. I'm so disappointed to see some of my old favorites ( and some new favorites) be retired to make room for all the fun, new items coming up. Today's card uses a stamp set and a Sizzlit from the Spring Mini that won't make it to the new catalog. I thought they were lots of fun to use and have used them several times this spring. So I needed to share these items quickly before they were gone for good. If you like them too, you've only got til the end of the month to get them before they're gone! Here you go.....
Stamps: Wishes Your Way
Ink: Pacific Point
Paper: Pacific Point and Whisper White cardstock and Sunshine and Sprinkles Designer Series Paper, and Polka Dot Parade DSP
Accessories: Big Shot with Pinwheel Sizzlit, 1/8" Silver Mini Brads, Marina Mist Striped Organdy Ribbon, Dimensionals, and either a wooden skewer (or cute little coffee stir sticks that are white with primary color stripes)
I love how fun this card is! Don't you remember having those twirly pinwheels and running around so there was enough 'wind' to make them go around as fast as possible. Anyway, doesn't this bring back memories and make you feel young again?
I'll be honest and tell you the first time I tried to make one of these pinwheels, it was a real struggle. But now I've got an easy trick. Put the brad in through the back, fold in each point onto the brad all the way around, hold it tightly. Now for the trick - pull the brad out from the back and put into the front so you can see the head. Easy peasy.
I thought all these prints and colors just lent themselves to the whole pinwheel look. Very lighthearted and springy. Hope you have fun with this idea. If you like pinwheels, this sizzlit makes it soooooo easy. It cuts it and puts in all the holes needed to make it. Takes all the trouble out of it and leaves in all the fun. Get it while you can!
Ok, that's it for today. Thanks for all the lovely comments that have been left. I appreciate any input and comments you have for me. Happy stamping, Sharon
Stamps: Wishes Your Way
Ink: Pacific Point
Paper: Pacific Point and Whisper White cardstock and Sunshine and Sprinkles Designer Series Paper, and Polka Dot Parade DSP
Accessories: Big Shot with Pinwheel Sizzlit, 1/8" Silver Mini Brads, Marina Mist Striped Organdy Ribbon, Dimensionals, and either a wooden skewer (or cute little coffee stir sticks that are white with primary color stripes)
I love how fun this card is! Don't you remember having those twirly pinwheels and running around so there was enough 'wind' to make them go around as fast as possible. Anyway, doesn't this bring back memories and make you feel young again?
I'll be honest and tell you the first time I tried to make one of these pinwheels, it was a real struggle. But now I've got an easy trick. Put the brad in through the back, fold in each point onto the brad all the way around, hold it tightly. Now for the trick - pull the brad out from the back and put into the front so you can see the head. Easy peasy.
I thought all these prints and colors just lent themselves to the whole pinwheel look. Very lighthearted and springy. Hope you have fun with this idea. If you like pinwheels, this sizzlit makes it soooooo easy. It cuts it and puts in all the holes needed to make it. Takes all the trouble out of it and leaves in all the fun. Get it while you can!
Ok, that's it for today. Thanks for all the lovely comments that have been left. I appreciate any input and comments you have for me. Happy stamping, Sharon
Tuesday, April 12, 2011
Luncheon Favors
Today I want to share with you some pictures of the favors I made for our Ladies Spring Luncheon at church last Saturday. It started out small and about a week before the date the numbers of attendees rose to about 90. Whew - time to start cranking out those favors that I was asked to make. We had decided on what they would be and how they'd be filled. Now it was just a matter of getting them all made - all 92 of them!
Here's a picture of the boxful - at least one layer of 30 of them. Don't they look pretty, feminine, and definitely ready for spring? Stamps: none Cardstock: assorted Designer Series Papers that were in yummy spring colors Ink: none Accessories: Big Shot with Large Scallop Circle Die, retired Double Rectangle Punch, lots of ribbons that were in my stash, cello bags for suckers, and tons of pastel M&M candies to fill them
Here's a better shot of a few of them to get a general idea of the way they looked. I used so many different colors and prints of retired papers from many different packs including: Tea Party, Bashful Blue, Apricot Appeal and Regal Rose Pattern Packs, Petals and Paisley, Delicate Dots, and many more that I can't even remember the names anymore. Such a pretty collection they made!
Thought I'd share a few pics of the rest of the table decoration so you could see how pretty it all looked together. This set-up looked like going to one of the lovely tea rooms in the area for high tea which I love to do. One of the ladies made up the all-in-one menu and program. They were so cute that many of the attendees took them home with them.
Here's a quick look at the appetizer table. The veggies were so fresh and colorful - yummy too. And I'm still waiting for a copy of the spread for the crackers. It had cream cheese, pineapple, and green onions with some other goodies - so scrumptious! I forgot to take a pic of our plates when they came. Chicken Almond Salad, with orange slices, fresh pineapple chunks, grapes, and a flaky croissant. It was plenty filling, but not heavy. Just perfect.
Lastly, I thought I'd share a picture of the center piece which also featured our desserts. These perfect little cupcakes were so cute we hated to bite into them! Each of the cakes were baked into these floral paper holders. There was a choice of lemon, strawberry, or raspberry. Each of them had a fruit jelly type of filling and a swirled buttercream frosting with delicate pastel sprinkles. And I can't forget that each of them had an edible little candy bug at the top. Aren't they just adorable? For our speaker, we had a comedian by the name of Evelyn Smallbladder. I have to tell you I was laughing so hard my sides hurt afterwards and I was mopping up the tears! Check her out on Google if you'd like to hear more about her and listen to a little clip. She is just hilarious!! Well, hope you enjoyed hearing about our luncheon. Wish you could have been there to share the day with me. It was such a fun way to spend an afternoon with friends. Thanks for letting me share it with all of you! Happy spring! Sharon
Saturday, March 27, 2010
Rose & Apricot Floral
Regal Rose and Apricot Appeal are two of my very favorite colors separately, but when you put them together - oh my goodness!! I think I'm in color-heaven. They are just so yummy, almost like ice cream or sherbet colors. And so springy!! Are you getting an idea about just how much I like these two colors?! If not, you really haven't been paying attention the last few minutes. How about I show you just what I'm talking about???
Here's a prime example of how luscious these colors are together. And the stamp set lends itself to this application very nicely, if I do say so myself!
Stamps: With All My Heart (found in the Occasions Mini until the end of April)
Cardstock: Apricot Appeal, Regal Rose, Old Olive, and Whisper White
Ink: Apricot Appeal and Regal Rose
Accessories: XL Fancy Flower Punch, Small Oval Punch, Scallop Trim Border Punch (free in SAB til the end of March!!), Regal Rose 5/8" Grosgrain Ribbon, Pretty in Pink Corduroy Buttons and Brads (in Occasions Mini), Piercing Tool and Mat Pack, and Stampin' Sponge quarter, and Dimensionals
Isn't it fabulous how these colors blend together? And the little touch of Old Olive just makes them sing! If you change up the sentiment on this card, you'd be set for just about any occasion big or small with this lovely card. Why not make up a few yourself. If you need to order some of the supplies for this card (especially the ones that won't be around too much longer!), just click on the button on the right for ordering and I'd be happy to help you get these supplies.
Enjoy the lovely spring weather outside. But remember, you can always stamp your own spring inside, no matter what the weather's like outside. Happy stamping!
Sharon
Sunday, March 21, 2010
Sunday Surprise
That's right. Today I have a surprise for you. Since I've been doing such a hit or miss job on posting this past month or two, I'm going to rectify that problem and give you a bundle. Several of us met on Saturday for a shoebox swap. For my card, I had all the ladies make the punch art tree card I posted on Friday. Today I'll show you all the awesome ideas the other ladies had for us to make. Really great ideas, and we had so much fun together. Sorry you missed out on our time together. Here's what else we made....
Since I'm sharing so many today, I won't be giving you all the details. Just some highlights. This first card was designed by Rose D. Don't you love the fact that the M&Ms match the cardstock and ink?? I've got to get some of these for class. The ladies would love this idea!
Stamps used were from the Something Sweet set in the Occasions mini. You can still get this set until the end of April. The sentiment is this same set too.
Next we have a great idea for the more formal times of your life. Isn't this black & white format elegant? This card was designed by Terry M. It's easy but really nice. Thanks for the idea!
The stamp set used is I {Heart} Hearts and the sentiment is from Teeny Tiny Wishes. Both of these sets are must haves and can be used on so many different occasions throughout the year.
Michelle G. shared this adorable card featuring the Tote-ally Tess set. Wouldn't you love to get this card to help you celebrate your birthday? Love the up-to-date khakis and pink shirt Tess is wearing! We spent time thumbing through the catalog to see how many sets had an imaage we could pair up with Tess! How silly, but it was amazing how many things we found!
The DSP in the background is from the Shades of Spring DSP set. They fit just perfectly with our trendy Tess!!
Next we have a card that started with Phyllis D. but had to be changed up because the Abundant Hope stamp set was left home. So after much consulting, we came up with this version to Phyllis' card. (Hope you don't mind too much Phyllis!!!)
The stamp sets are Vintage Vogue and Well-Scripted. These two sets go together so nicely and can be made with so many different colors. So far I've probably seen over 100 cards made with Vintage Vogue and have liked every single one! This is definitely a must have stamp set - get it before the end of April if you want it!!
OK, last card, but certainly not the least! This lovely creation was designed by Beth O. Perfect spring card, isn't it? And Beth was kind enough to give us a mini tutorial on using the corner and border punches together too that was very helpful.
Stamps used are from the Great Friend set which is one of my favorites. And isn't the Pawsitively Prints DSP used on the background and the Trio Flower Punch flowers on the side just perfect for the card? Love it Beth! It's a winner!!
Well, there you have it. A whole slew of ideas to boggle your mind and start you on a stamping frenzy. At least I hope you enjoyed looking at these as much as I enjoyed making them. Have a splendid Sunday evening and renew yourself before the craziness of the week starts.
Sharon
Monday, February 22, 2010
Thinking a Little Green
I have a friend who is Irish, and every year about this time she hosts a workshop for me. We always have lots of fun, and absolutely have to make something green. This year was no exception for us! Her workshop was fun, and yes, we did stamp a little green. I thought she'd really like the 'Go Green' single stamp so that's what I started out with. Then I realized that I don't have anything with a shamrock on it! What to do? Hmmmm...... Let's get that thinking cap on and play a little. We're sure to come up with something that works! What do you think of this??
Well, it's definitely got a lot of green going on!!! There's no way you could take this for anything other than a St. Paddy's Day card. So here's how it was made....
Stamps: Go Green
Cardstock: Green Galore, Glorious Green, and Whisper White
Ink: Glorious Green
Ink: Glorious Green
Accessories: Big Shot with both the Perfect Polka Dot and Finial Press Embossing Folders, Wide Oval Punch, Heart to Heart Punch, 1/2" Circle Punch, Black Satin Ribbon, 5/16" Neutral Brads, Sponge Dauber, and Dimensional
If you're looking at this trying to figure out where I used the 1/2" Circle Punch, it's behind the points of the heart to hold them together and pierce the brad through. Can you just see it peaking out there on this picture? It seemed to be the best way to hold it all together while working with it.
Also, the brad was sponged with a bit of Glorious Green ink, but it really doesn't show up on the picture. Don't know why that is, because you can see it in real life. Hmmm, another one of those strange anomalies in life that I may never figure out. But that's ok. It just keeps me guessing.
Hope this card gives you some ideas for St. Paddy's Day. It's nice to have a bazillion stamps that cover every holiday, but you don't always have to have a holiday specific stamp set. You can use a little creativity to come up with something that still works. And have fun too!!
Wishing you some green inky fingers today! Have fun stamping
Sharon
Thursday, January 14, 2010
Spring Fling
I'm lovin' these bright, wintery days we're having and making the most of them. And I'm also lovin' all the new Occasions and Sale-A-Bration stamps and accessories!! Woo Hoo! Stampin'Up! really outdid themselves coming up these new products. When I planned this card for class, I didn't think the new Beautiful Wings Embosslit would be here in time. The card looked a bit plain to me, but couldn't be helped. Lo and behold, my order came on Monday afternoon, so I promptly added a couple of embossed butterflies to the card. Oh, so much better! I couldn't believe how quick and easy it is to emboss and cut out those darling little butterflies all at once! It works just like magic!! Anything that enhances your paper-crafting experience is a good thing as far as I'm concerned. Here's what you need to make one of your own...
Stamps: Well Scripted (new!), and Very Vintage Jumbo Wheel (new!)
Cardstock: Certainly Celery, Bashful Blue, Apricot Appeal, and Whisper White cardstock with Bashful Blue Patterns Designer Paper 3 (Hostess Level 1)
Ink: Certainly Celery
Accessories: Big Shot with Beautiful Butterflies Embosslit, Jumbo Handle, Scallop Oval Punch, Wide Oval Punch, Butterfly Punch, Buttons Latte', Soft Subtle Mini Brads, Bashful Blue Striped Grosgrain Ribbon, Sponge Dauber, Distressing Tool, Mini Glue Dots, and Dimensionals
Isn't this a fun, little card with a real feel of spring. (for those of us that are having trouble waiting for spring!) I love all the extra texture that's added with the little embossed butterflies. Can you tell I'm just in love with this new product? lol
Just a little note for bookkeeping purposes. For those of you who placed an order through me in December and are wondering who won the drawing for that month, well wait no more. Roni picked a name for the drawing and the winner is Lynda Jones! Congratulations, Lynda!! Your sister will be bringing the stamp set to you! (missed you at class - hope you're feeling better!)
I'll be having a drawing again after the end of January. If you want to be part of the drawing, just place an order with me during the month of January either on line or give me a call. This is my way of thanking you, my wonderful customers and friends.
Enjoy the day and make sure you find time to stamp!
Sharon
Saturday, December 12, 2009
Sneak Peak look at Easter
Can you believe you just read "Easter" already??? Yes, the 2010 Occasions Mini Catalog will be arriving in mailboxes in another week or two. And yes, there are so many cute and lovely Easter ideas shown along with all the other holidays it has. But today I'm focusing on just Easter.
When I got my first look at the new Mini, I fell in love with a set called 'Abundant Hope'. The set has a beautiful line-art image, some very meaningful sentiments, and a tiny accent border piece. I must admit it was love at first site for me. I love watercoloring images and love, love, love pastels. So this was the first set I ordered, and the first set I played with too!! And while you're reading this today, my downline is probably making this card right now during our Shoebox Swap. he he

Isn't it just lovely?? Spring always means Easter to me and one of my favorite things at this time of year is all new flowers bursting out of the frozen ground and springing to life. (I know we're just getting into the beginnings of winter here, but I can always dream, can't I?) I've had daffodils growning along my fence for years, so this was the perfect reminder of spring.
Stamps: Abundant Hope acrylic-mount stamp
Cardstock: Barely Banana, Certainly Celery, Very Vanilla
Ink: Stazon Jet Black, So Saffron, Certainly Celery, Pumpkin Pie
Accessories: Apricot Appeal Grosgrain Ribbon, Modern Label Punch, Scallop Oval Punch, the brand new Scallop Trim Border (that you'll be able to earn free during Sale-A-Bration starting January 5th!!), Aqua Painter, sponge quarter, and Dimensionals

I just had to share with you a close-up of the new border punch. Isn't it great? And there's a corner punch to co-ordinate with it too!!! Am I excited about these new products? Oh yeah! I can hardly wait to share them with you. Won't you consider booking a party with me to play with all these awesome new products? Or if you're not in the area, you can always order online from me. Just click on the button on the right to go shopping. Now remember, you have to wait until January 5th to order any of these new items. Yah, I know - gotta save some of those Christmas dollars to use next month!! LOL
Have a Merry Christmas and enjoy the holidays!
Sharon
When I got my first look at the new Mini, I fell in love with a set called 'Abundant Hope'. The set has a beautiful line-art image, some very meaningful sentiments, and a tiny accent border piece. I must admit it was love at first site for me. I love watercoloring images and love, love, love pastels. So this was the first set I ordered, and the first set I played with too!! And while you're reading this today, my downline is probably making this card right now during our Shoebox Swap. he he

Isn't it just lovely?? Spring always means Easter to me and one of my favorite things at this time of year is all new flowers bursting out of the frozen ground and springing to life. (I know we're just getting into the beginnings of winter here, but I can always dream, can't I?) I've had daffodils growning along my fence for years, so this was the perfect reminder of spring.
Stamps: Abundant Hope acrylic-mount stamp
Cardstock: Barely Banana, Certainly Celery, Very Vanilla
Ink: Stazon Jet Black, So Saffron, Certainly Celery, Pumpkin Pie
Accessories: Apricot Appeal Grosgrain Ribbon, Modern Label Punch, Scallop Oval Punch, the brand new Scallop Trim Border (that you'll be able to earn free during Sale-A-Bration starting January 5th!!), Aqua Painter, sponge quarter, and Dimensionals

I just had to share with you a close-up of the new border punch. Isn't it great? And there's a corner punch to co-ordinate with it too!!! Am I excited about these new products? Oh yeah! I can hardly wait to share them with you. Won't you consider booking a party with me to play with all these awesome new products? Or if you're not in the area, you can always order online from me. Just click on the button on the right to go shopping. Now remember, you have to wait until January 5th to order any of these new items. Yah, I know - gotta save some of those Christmas dollars to use next month!! LOL
Have a Merry Christmas and enjoy the holidays!
Sharon
Sunday, June 14, 2009
Playing with the new stuff...
But I can't show you just yet! Isn't that horrible? No, I'm not toying with your emotions. My camera batteries are dead! Oh woe!! How can this be? It just can't be happening now. But sadly, it is the truth. So until this problem is rectified, I'll have to post a card I made last week before my new friends (insert stamps and accessories!) came to live with me. Sorry! But it really is a nice card anyway.
See, isn't this a lovely little number? I was looking for something springy (is that a word?) and this is what I came up with. I think brown and pink and such a wonderful color combo, so that was my starting point. The "Branch Out" set is so adorable, just about anything works when you use it. Several times I've noticed people using a Jumbo Eyelet for the tire swing so that was added too. All in all, I think this card passes muster and is mail-ready.
All stamps and materials are by SU!
Stamps: Branch Out and Teeny Tiny Wishes (New - love this set!!)
Cardstock: Pretty in Pink, Chocolate Chip, and Whisper White
Ink: Chocolate Chip, Mellow Moss, Pretty In Pink, Basic Black, and Regal Rose (tiny butterflies) and White Craft ink for background
Accessories: Pewter Jumbo Eyelet, Crop-a-dile, Word Window Punch, Soft Subtles Mini Brads, Dimensionals, and Pink Pirouette Striped Grosgrain Ribbon(retired!)
Well, I hope this tasteful goody will tide you over until I can take care of the battery situation. Have an excellent Sunday! I wish you God's blessings and peace!
Sharon
Sunday, April 19, 2009
Happy Sunday
What an interesting weekend it has been so far. Yesterday I met friends for breakfast at Panera's to discuss plans for a Mary Martha Tea next month at church. The breakfast was delish and we got many of the plans discussed and decided. The tea should be lovely with yummy home-cooked fancy tea sandwiches and desserts and hand-made decorations. This is going to be a bit of work, but it should be so worth it when it all comes together. I'll keep you posted as we move along.
Then in the afternoon, I was scheduled for a beginner class on using Copic Markers. I thought it would be a breeze, but boy was I wrong! They are so different than anything else I've ever used, that it was a real challenge to get the blending done properly. Of course, I had to purchase a 'few' colors so I could practice what I learned before I forgot everything! Only trouble was, the store was out of the Memento ink I needed for stamping. Big bummer! I went to two more stores, but neither of them had it either. How frustrating!! Arrrrgh! I keep telling myself that this will all be worth it when I can get the correct ink, practice, practice, and practice some more, and then get good enough with these that I can color like I see others do. We'll see....
Anyway, I do have a card to share with you today. This was colored my normal way of using ink and my AquaPainter. Frankly, I love coloring and just want to get better at any and all types. I hope you enjoy this offering and inspired to try some watercoloring too. This gorgeous new stamp set called Soft Summer is in the Occasions Mini and just begs to be colored. Since in has both the outline and solid images, there are many ways you can actually color. I'll be working on a few more ideas for this (if I can put down my AquaPainter and try something else!!)
All materials and stamps by Stampin' Up!
Stamps: Soft Summer
Cardstock: Pretty in Pink, Certainly Celery, and Whisper White
Ink: Stazon Black, Certainly Celery, Pretty in Pink, Regal Rose, So Saffron, Close To Cocoa, Sahara Sand
Accessories: AquaPainter, Oval Coluzzle, Rich Regals Mini Brads, Photo Corner Punch, and Piercing Tool
I usually haven't added shading to the outside of my images, but this one really needed it. It was just too white and the shading popped the image up from the background. For such a little work, the finished piece is so much the better for it. I debated with myself about using glitter, but decided I preferred the simple understated elegance without any bling. Hope you like it. If you use this idea but go for the bling, let me know. I'd really like to see what you do with it!
Happy stamping,
Sharon
Wednesday, April 8, 2009
Sticking with a Good Thing
Since I had so much fun with my new set 'Good Friend' yesterday, and since it was still sitting right there center front on my table, I figured I wasn't done with it just yet and got to work. The sun was shining today and it looked more like spring outside (even though it's still very cold). So out came the Soft Subtle colors to give the card a more spring-like look. After 2 days of snowing in April, I assumed mother nature needed a little help getting into the swing of spring. And I'm always willing to help matters like that along.
So here we are - ta da! There were a few extra touches used on this card that made it a little specialer. I guess that would be more special to any English teachers out there. Anyway....
All stamps and materials are by Stampin' Up!
Stamps: Good Friend
Paper: Almost Amethyst, Regal Rose, Certainly Celery, and Whisper White
Ink: Almost Amethyst, Certainly Celery
Accessories: Scallop Edge Punch, Eyelet Border Punch (on the Regal Rose corners), 1/2" Circle Punch, Crafters Tool Kit, Silver Mini Brads, Clear Rhinestone Brads, Button Bouquet, Mini Glue Dot, and Certainly Celery Narrow Grosgrain Ribbon.
Did you notice that I'm getting better at stamping the skinny stems on the flowers? Not a single double stem. Yeah! Practice always makes better - not sure about perfect!
I like how the rhinestone brad attaches right through the button. It draws attention to the flowers and adds a little bling too. I debated about doing all 5 flowers, but that was really overkill.
Maybe this afternoon I'll get started on that big bird stamp in the set. That is, after I run some errands and get to hear the birds singing outside to get me in the mood.
Happy stamping,
Enjoy the sunshine while you can!
Sharon
Saturday, April 4, 2009
I don't like taxes!
Most of today was spent working on my paperwork for taxes. How horrid! Did I mention I don't like doing (or paying!) taxes? It seems like such a monumental waste of time. Of course, if I was organized - which I definitely am NOT - I would have it all sorted, posted, and compiled months ago. Hmmm. I bet you're one of those organized neat freaks that always intimidate me and make me feel so scattered. And I can hear you laughing at me right now. I bet you're thinking "She should be smart this year and stay on top of it". Of course the paperwork always ends up in one big file folder and multiplies when I'm not paying attention. Then I have to organize and sort through it all the following year! When will I ever learn??? BTW, did I mention how much I hate taxes?
Ok, I need to calm down. Yes, have a little Pepsi and chocolate. (Jan Tink's taught me well that you really do need chocolate when you're stressed!)
I've been stamping with the Cheep Talk set lately. It's such a cute set and I love the words that are a part of it. They just fit so well. I did learn something important while stamping this week. It is very important to stamp on a hard surface. This card was stamped away from home and the table was sort of cushy. I tried a couple time to get the leaves to stamp well, but they didn't. Since this was the only set I brought with me to use, I decided to go ahead with the card anyway. Now that it's finished, it sort of looks like highlights on the leaves. Oh well, that's my excuse and I'm sticking to it.
I've been stamping with the Cheep Talk set lately. It's such a cute set and I love the words that are a part of it. They just fit so well. I did learn something important while stamping this week. It is very important to stamp on a hard surface. This card was stamped away from home and the table was sort of cushy. I tried a couple time to get the leaves to stamp well, but they didn't. Since this was the only set I brought with me to use, I decided to go ahead with the card anyway. Now that it's finished, it sort of looks like highlights on the leaves. Oh well, that's my excuse and I'm sticking to it.All materials and stamps by Stampin' Up!
Stamps: Cheep Talk
Paper: So Saffron, Pacific Point, Kiwi Kiss Textured, and Whisper White cardstocks
Ink: Pacific Point, Old Olive, So Saffron
Accessories: Summer Sun Corduroy Button, Linen Thread, Small Oval Punch, Apricot Appeal Grosgrain Ribbon, Distressing Tool from the Cutter Kit, Mini Glue Dots, and Snail Adhesive.
Have fun stamping and stop by again,
Sharon
Wednesday, April 1, 2009
I've had enough...
I'm quitting.
Ha! Fooled you! It's April 1st and there's no way I want to quit. I just love stamping way too much to even consider quitting at this point in time. Maybe when I'm old and gray. Oops, that fits me already! Oh well, never mind. I'm not going to quit just yet and that's all there is to it! So there!
I was invited by a lady at church to come and stamp with some other ladies last night. I had such a good time being creative with others, but having no pressures put on me to be a 'demonstrator'. Last night I got to be just one of the gals. What fun!
There's been this idea floating through my brain lately to do this card. My order of this cute little bird set came in the other day, so I just had to take it with me last night. You know, always take the new toys to play with! Isn't that what you'd do?
I know Sale-a-bration finished last night and I need to move on to the Spring Occasions Mini, but I just had to use this adorable Delicate Dots DSP one last time! I'm glad I have extra of the Delicate Dots DSP available in my private stash. I'm sure it will come in handy for all kinds of cards and scrapbook pages in the future. Anyway, if you have left-overs you want to use, here's the ingredient list:
All materials and images are Stampin' Up!
Stamps: Cheep Talk
Papers: Bashful Blue, Certainly Celery, Whisper White, and Delicate Dots DSP
Ink: Bashful Blue Pad, and Old Olive and Chocolate Chip Markers
Accessories: Apricot Appeal Narrow Grosgrain Ribbon, Sponge quarter, Mini Glue Dot, and Dimensionals
While stamping last night, I was inspired to try another bolder style with this set. I love the way it turned out, but I can't show you just yet. That card will be part of the up-coming classes in April and I don't want to spoil the surprise! If you're in the area and looking for some fun classes to try, get in contact with me and I'll get you all the information you need.
Happy stampin!
Sharon
Monday, March 30, 2009
Hey, what's going on?
Finally I could get back on this site. I don't know what was going on with either the site or my computer, but I was unable to log on the last couple days! What a bummer! And to make matters worse, I've had a stamping block lately. Nothing has been coming together the way I see it in my mind. Then there was the dentist appointment today. :( Plus it snowed overnight! Just what else is going to happen? Help!! My world is out of whack!
Ok, I need to calm down now. It must be time for Pepsi and chocolate. Ahhhh, that's a little better now.... Nice and easy....
I wanted to share two versions of a card today and get your opinion. I was in an Occasions Mini Swap and this is the set I chose to use. The images and coloring is identical (if that's even possible when something is hand made!), but one has an extra layer of cardstock. That's the only difference between the two. One is a much more softer look and the other has a punch of Ruby Red from the cardstock layer. I'm trying to figure out which one I prefer - the softer or the bolder. Please let me know which you prefer.
All images are by Stampin' Up!
Stamps: Scene is a Garden and Really Retro
Paper: Kraft, Baja Blue, Ruby Red (on one!), Chocolate Chip, and Whisper White
Ink: Basic Brown, Close to Cocoa, Ruby Red, Kiwi Kiss, Baja Blue
Accessories: Aqua Painter, Word Window Punch, Sponge quarter, Silver Mini Brad, Chocolate Chip 5/8" Grosgrain, Dimensionals, and Distressing Tool.
I really enjoyed coloring the images. It's my favorite way to color. I just couldn't decide on the layering. The softer colors remind me more of spring. Let me know your opinion. It's always helpful to have some feedback when you're in a quandary.
Thanks for stopping by.
Happy stamping,
Sharon
Sunday, March 22, 2009
A Lovely Sunday To You
Yes, it is lovely out there. Still a might bit chilly for me, but with the sun shining I can tolerate the cold better. Even though it doesn't feel like spring yet, it looks like it. The maple tree has had a zillion flowers on it. They don't last long, but they make a big mess on the driveway. Oh well. You have to take the good with the bad. My daffodils and narcissus are up about 3" so far, so that's a good thing. I'll take any step in the right direction towards spring and warm weather.
The cards I'm sharing with you today have a spring feel to them. The first one is using one of the Sale-a-bration sets called Polka Dot Punches. There's only another week to go where you can get this set for FREE! Don'cha just love those freebies?! If you still want to pick this set up, you can contact me and I'll put in an order for you, or you can order directly from my website. Be sure you go and check out the link on the side.
All stamps and materials by SU! of course.
Stamps: Polka Dot Punches, Sweet Little Sentiments
CS: So Saffron, Bashful Blue, and Whisper White
Ink: So Saffron, Bashful Blue, Certainly Celery, and Rose Red.
Accessories: Celery Twill Ribbon (SAB), 3/4" Circle Punch, and Dimensionals
This is just a quick, pretty card to send a note out to cheer someone up. Wouldn't you enjoy getting this in the mail instead of those dreadful bills?
This next card is really my style. I love pastels and pinks are a favorite. This has a splash of color with the layer of Raspberry Tart DSP that really gets your attention. The rest is sweet and demure, so it's a fun mix.
All stamps and materials by SU!
Stamps: Wonderful Watercolors and Sweet Little Sentiments again (can you tell I love this set?)
CS: Pink Pirrouette, Regal Rose, Rose Red, and Whisper White and Raspberry Tart DSP
Ink: Rose Red pad, and Regal Rose and Always Artichoke Markers
Accessories: Eyelet Border Punch, Ticket Corner Punch, Pretty in Pink 1/4" Grosgrain Ribbon, and Dimensionals.
Hope you enjoyed these ideas. Be sure to drop me a note and let me know what you think.
Happy stampin',
Sharon

The cards I'm sharing with you today have a spring feel to them. The first one is using one of the Sale-a-bration sets called Polka Dot Punches. There's only another week to go where you can get this set for FREE! Don'cha just love those freebies?! If you still want to pick this set up, you can contact me and I'll put in an order for you, or you can order directly from my website. Be sure you go and check out the link on the side.
All stamps and materials by SU! of course.
Stamps: Polka Dot Punches, Sweet Little Sentiments
CS: So Saffron, Bashful Blue, and Whisper White
Ink: So Saffron, Bashful Blue, Certainly Celery, and Rose Red.
Accessories: Celery Twill Ribbon (SAB), 3/4" Circle Punch, and Dimensionals
This is just a quick, pretty card to send a note out to cheer someone up. Wouldn't you enjoy getting this in the mail instead of those dreadful bills?
This next card is really my style. I love pastels and pinks are a favorite. This has a splash of color with the layer of Raspberry Tart DSP that really gets your attention. The rest is sweet and demure, so it's a fun mix.
All stamps and materials by SU!
Stamps: Wonderful Watercolors and Sweet Little Sentiments again (can you tell I love this set?)
CS: Pink Pirrouette, Regal Rose, Rose Red, and Whisper White and Raspberry Tart DSP
Ink: Rose Red pad, and Regal Rose and Always Artichoke Markers
Accessories: Eyelet Border Punch, Ticket Corner Punch, Pretty in Pink 1/4" Grosgrain Ribbon, and Dimensionals.
Hope you enjoyed these ideas. Be sure to drop me a note and let me know what you think.
Happy stampin',
Sharon
Thursday, March 5, 2009
Hey, I'm Back!
Boy, it's good to be back. I can't believe it's been so long since the last post. It has been really crazy though. The doctor told me I have pleurisy and that's why my ribs are hurting so bad. It won't clear up til I quit coughing. Riiiight. And then my hubby has been sick with the stomach flu the last couple of days, and it's hit him really hard. He so seldom gets sick, it's really something when he's totally down and out. But I think he's on the mend. He hasn't actually gotten sick (nice way of putting it :o) !) all day today, so I think there's hope for him yet.
This card I'm sharing with you today is from last Saturday. I spent the day with over 60 scrappers at an all-day crop at Guardian School. I was scheduled to do a make & take for the ladies to show them an idea for a quick card that you could expand on and use for a scrap page. I had just gotten my new Embosslits from SU! on Thursday, so of course we must use them! Isn't that how it works? I was tickled at how quick I could make cards with these two dies, and how elegant they looked. I was told that the ladies liked them too. So, on with the directions and 'ingredients' so you can make them too. :o)
All materials and stamps are by SU!
Stamps: Good Friend
CS: Barely Banana, Certainly Celery, Whisper White
Ink: Summer Sun, Regal Rose, Certainly Celery, VersaMark, and Regal Rose Marker
Accessories: SU! BigShot, Little Leaves Sizzlit Die, Flower Burst Embosslit Die, Sponge Daubers, Snail Adhesive, and Dimensionals
I don't know if you can see the star-burst from the Good Friend set that was stamped on the background with the VersaMark Pad to give it more texture. And did you notice how nicely the detail of the embosslit shows up with just a smidge of color burnished on it? Easy, but oh so cool! Since Saturday, I've made about a dozen of these in different colors and for different occassions. Some in lavender made up beautifully into sympathy cards. Yes, I'm still having a run on those this year. I hope it quits, 'cuz I don't want to lose anymore friends!
Anyway, that's about it for today. Back to the laundry and getting ready for my workshop tomorrow night. I'm sure glad my hubby is feeling better, because the ladies are coming here for the workshop. Wouldn't it be horrible if he was still rolfing??? On that happy note, I'm outta here.
Happy stamping and stay well,
Sharon
This card I'm sharing with you today is from last Saturday. I spent the day with over 60 scrappers at an all-day crop at Guardian School. I was scheduled to do a make & take for the ladies to show them an idea for a quick card that you could expand on and use for a scrap page. I had just gotten my new Embosslits from SU! on Thursday, so of course we must use them! Isn't that how it works? I was tickled at how quick I could make cards with these two dies, and how elegant they looked. I was told that the ladies liked them too. So, on with the directions and 'ingredients' so you can make them too. :o)
All materials and stamps are by SU!
Stamps: Good Friend
CS: Barely Banana, Certainly Celery, Whisper White
Ink: Summer Sun, Regal Rose, Certainly Celery, VersaMark, and Regal Rose Marker
Accessories: SU! BigShot, Little Leaves Sizzlit Die, Flower Burst Embosslit Die, Sponge Daubers, Snail Adhesive, and Dimensionals
I don't know if you can see the star-burst from the Good Friend set that was stamped on the background with the VersaMark Pad to give it more texture. And did you notice how nicely the detail of the embosslit shows up with just a smidge of color burnished on it? Easy, but oh so cool! Since Saturday, I've made about a dozen of these in different colors and for different occassions. Some in lavender made up beautifully into sympathy cards. Yes, I'm still having a run on those this year. I hope it quits, 'cuz I don't want to lose anymore friends!
Anyway, that's about it for today. Back to the laundry and getting ready for my workshop tomorrow night. I'm sure glad my hubby is feeling better, because the ladies are coming here for the workshop. Wouldn't it be horrible if he was still rolfing??? On that happy note, I'm outta here.
Happy stamping and stay well,
Sharon
Saturday, January 17, 2009
Boy, was I ever wrong!!
fast and furious out there. The first picture is the house across the street. Did you notice the snow on the shrubs in front of the house? Oh yeah, that's definitely snow-covered!
Our front porch is about 12" high and the snow is getting close to even with it. If I still skied, this would be the super skiing weather we prayed for - fresh powder. Brrrrrrr. I'm getting cold again just looking at the pictures.
Ok, enough of that! The card idea I wanted to share with you today is the one I made for my downline swap. The theme was spring, and I always think of new buds on the trees and little birds singing in the trees. This card is my version

of spring. Can you almost hear the birds twittering away?
I had lots of the outer frames from my chipboard scallop frames, so I thought this would be the perfect use for them. The frames were sponged with the Cameo Coral Craft ink and set aside to dry overnight. Since I had the new Sweetest Stem Embosslit, it just begged to be used for the card. I liked how it gave the card added texture and dimension without alot of bulk or weight.
All stamps and materials by SU!
Stamps: Spring Song, Sanded
CS: Confetti White, Apricot Appeal, Kiwi Kiss
Ink: Basic Black, Apricot Appeal, Cameo Coral (sponging)
Accessories: Big Shot and Sweetest Stem Embosslit, Aqua Painter, Watercolor Wonder Crayons - Earth Elements, Kiwi Kiss Striped Grosgrain, Wide Oval Punch, Tombow Multi-Purpose Adhesive, and Chipboard
I hope you enjoyed the idea and it inspires you to "Think Spring!"
Have a cozy, warm evening...
Sharon
Wednesday, January 7, 2009
Slip-sliding away in Michigan
Yes, winter is back with all it's cold and blustery charms. We have icy roads and cars, and actually pretty much everything outside. I needed to do some running around to various places so there I was shivering out there in the middle of it all. Oh bummer! I could be at Leadership in Orlando, enjoying the warmth, and stamping with friends! Woe is me!! I'm chomping at the bit to see the new catalog and all the new goodies I'll just HAVE to purchase! With my daughter's wedding this Saturday morning, going to Leadership was really out of the question. But that doesn't mean I'm not wishing I was there. I hope all of you "leaders" out there are having a great time and stamping your little hearts out!
Since I had to stay in Michigan, now is a good time to be doing a little "springtime stamping". Well, maybe it's not specifically spring, but it's for warmer weather dreaming. How's that?
This is my latest buzzin' bee card. I love the warm colors and the bees are just the cutest!
All materials and stamps by SU! of course!
Stamps: Just Buzzin' By and Itty Bitty Background
CS: More Mustard, Chocolate Chip, Ruby Red, and Very Vanilla
Ink: Basic Brown, More Mustard, Ruby Red, Blush Blossom, Chocolate Chip
Doncha just love those itty bitty bees? I think they just make the card. These colors are a little darker than the first 2 cards I made, so it seems to have totally different feel to it. Maybe that's just my imagination, but it does make me feel a little warmer inside too. Hope it gives you a warm and happy feeling too.
Have a happy stampin' day!
Hugs,
Sharon
Monday, January 5, 2009
Lovely January - so far
What a terrific day it is! The sun is shining and the sky is blue. It's a little on the chilly side, but all in all, it's not too bad. I know the winter weather will be striking again soon, but ya just gotta enjoy it while ya can! I was out shopping with my daughter today. She picked up her veil and a few other goodies for the up-coming wedding. She's so excited she's bouncing around on her seat just like when she was a little girl. I guess in our hearts we always have a little of that child still in each of us! Now on to what gets me excited...
I've been playing with the new SU! set Just Buzzin By. This set will be in the new catalog coming out later this month. To me, it just sings SPRING! It was one I just had to preorder because the bees are just too cute! So far I've made 3 cards and the colors are all very different. Today I'll show you the blue and pink versions. Later on I'll give you the other and whatever else there is to show. Anyway, let me give you a rundown of these two card ideas.
1st card-
Stamps: Just Buzzin By and Curvy Verses
CS: More Mustard, Brocade Blue, Garden Green and Whisper White
Ink: Basic Black, Blush Blossom, Brocade Blue
Accessories: AquaPainter, Watercolor Wonder Crayons (Earth and Regals), 2-Way Glue Pen, Dazzling Diamonds, Black Grosgrain, Sponge, Dimensional, and staple.
2nd card-
Stamps: Just Buzzin By
CS: Pretty In Pink, Kiwi Kiss, Whisper White
Ink: Basic Black, Kiwi Kiss, Blush Blossom
Accessories: AquaPainter, Watercolor Wonder Crayons (Earth and Regals), Apricot Appeal Grosgrain Ribbon, Corner Rounder Punch, Sponge, 2-Way Glue Pen, Dazzling Diamonds glitter
I wish you could see the wings better. None of the pictures I took really showed them off. The way they glitter makes them seem like they're fluttering.
It's time for me to get going now. There's still so much to stamp and so little time. Have fun creating something fun and frivolous today!
Sharon
Subscribe to:
Posts (Atom)


Accessories: Aqua Painter, Gold Mini Brad, Paper Snips, and Dimensionals