Friday, October 28, 2011

Serene Snowflake Card

Back to Christmas cards today. This is an updated version of a card I made last year. And I like this version better than the first one. Which is a good thing, wouldn't you agree? It would be a pitiful thing if I updated an old card and didn't like the newer version. Of course if that happened, you can be sure I wouldn't be posting it here for you to see. Gotta hide all the rejects, you know! Anyway, on to the new and improved snowflake card. Ta Da...

Stamps: Serene Snowflakes, and Bells and Boughs
Cardstock: Crumb Cake, Early Espresso, and Very Vanilla
Ink: Early Espresso
Accessories: Big Shot with Northern Flurry Embossing Folder, Smooch Accent Ink Illuminate Top Coat, Extra Large Oval Punch, Victoria Crochet Ribbon, Sponge Dauber, and Dimensionals


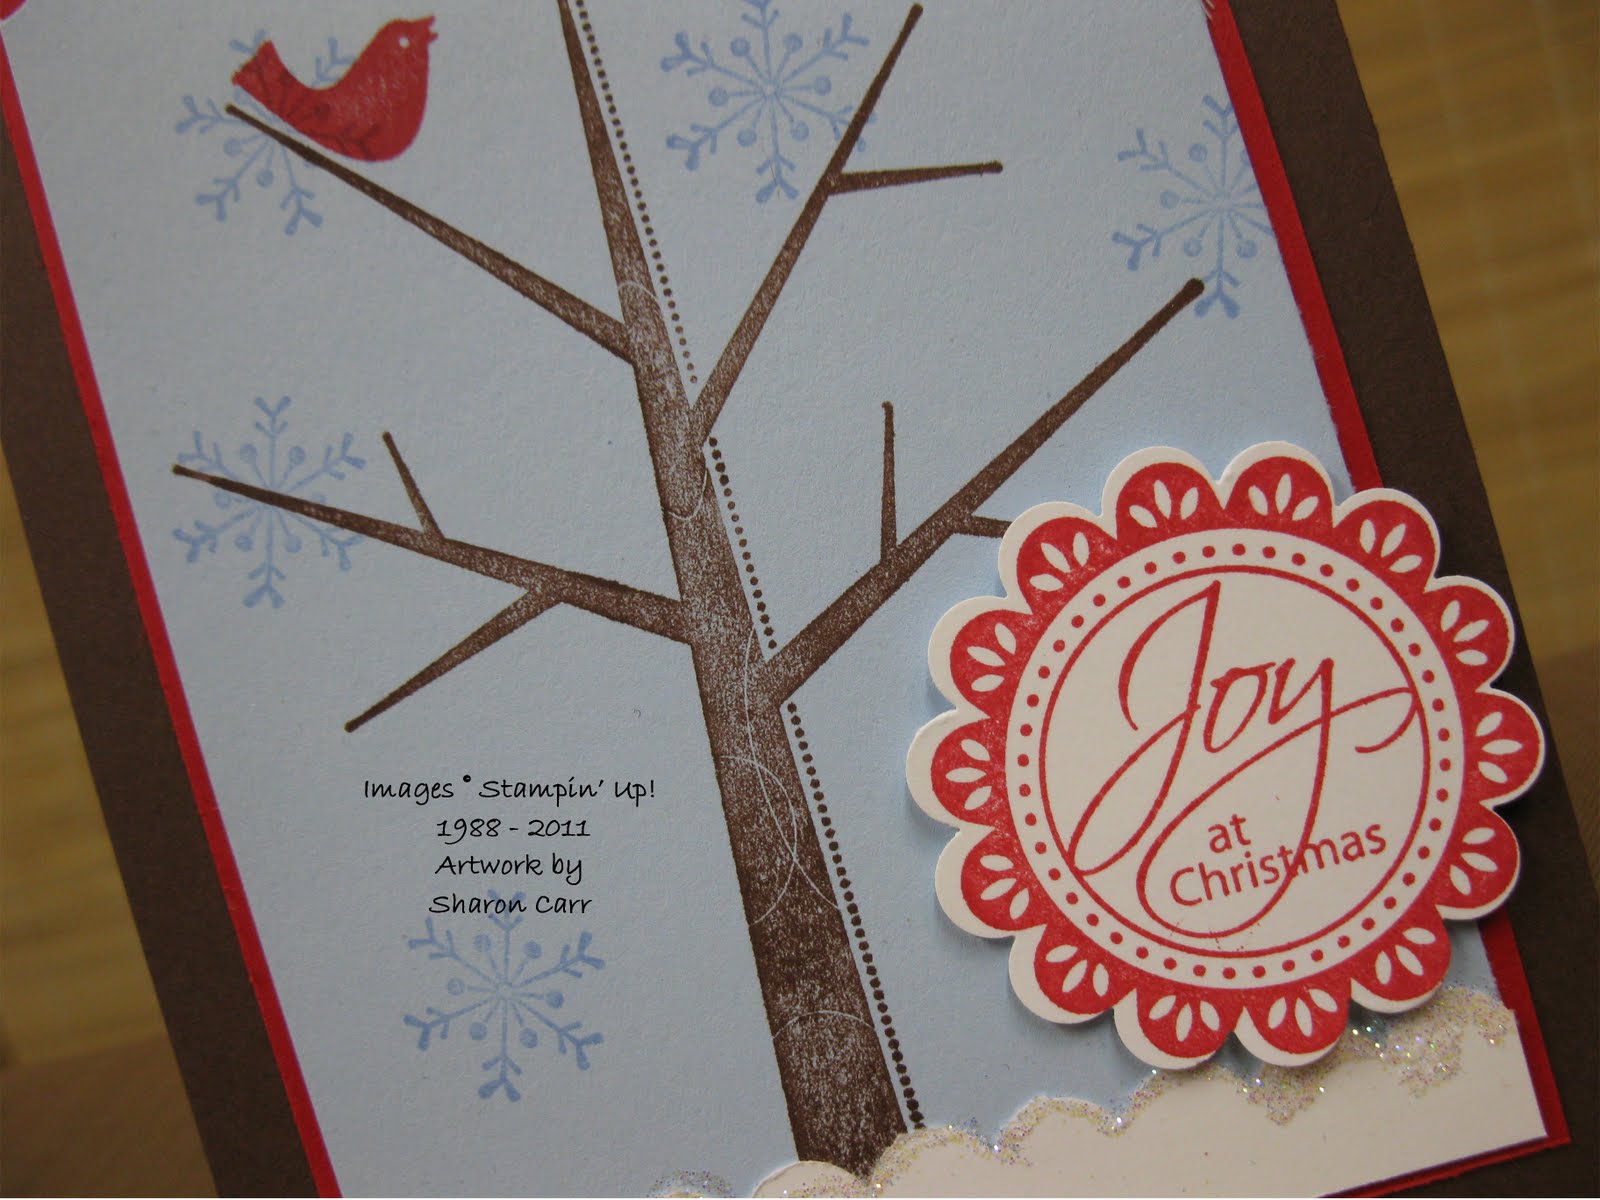
This angle shows off the Northern Flurry Embossing really well. It's pretty enough to stand on it's own if you do a white-on-white card. Now wouldn't that be lovely? (Hmmm, file that in the brain for future reference.) But this card has more of a laid-back country feel to it with the crochet trim and earthy colors. I thought the swirly sentiment from Bells and Boughs set went very nicely with the swirly designs of the stamped snowflakes. This angle doesn't show off the lovely Smooch Accent Ink touched on the embossed snowflakes, so...


I took this shot to show you how delicately shimmery the embossed snowflakes really are. Very soft and subtly done with the Illuminate Top Coat. Of course this part took the longest to do. It dried very quickly, but was a little putzy puting all the small dots on. So I won't be making dozens of this card, but maybe a few more for some special friends. We'll see.

Thanks for taking time out to stop in again. This has been a great week for getting some cards made. Hopefully I have time and this creative streak continues on. It's fun having new things to post for you a little more regularly. Have a wonderful day! Sharon

Thursday, October 27, 2011

Last Halloween Card

Last night I finally finished up the last of the Halloween cards I'm sending out. Ladies in class made a version of this card earlier this month as one of the projects. It just took me a little while to get around to making mine up to send out. This card is pretty much copied from "Stampin' Success" which is Stampin'Up!'s magazine for demonstrators. They showed a card using the new Simply Scored Scoring Tool which I totally luv!! Of course I changed it so I could use what I had on hand to give me a similar look. This is the finished card...

Stamps: Batty For You and Grateful Greetings
Cardstock: Concord Crush, River Rock, Old Olive, and More Mustard with Brights Pattern Pack of Designer Series Paper
Ink: Basic Black
Accessories: Simply Scored Scoring Tool, 1 3/4" Scallop Circle Punch, 1 3/8" Circle Punch, Paper Snips, Sticky Strip, and Multi-Purpose Glue


I just love the color combination of purple and orange. They are just perfect foils for each other. And the River Rock is a good accent color instead of either White or Vanilla.

I think I've mentioned how easy and fun the Simply Scored Tool works. Using the stylus does a great job of keeping the lighter weight DSP from tearing through when you score. I've found that using the smaller end for cardstock and the larger end for all your lighter weight papers works just right. This piece was scored every 1/4". For larger medallions, it's fun to score every 1/2" for a much more substantial piece like ornaments or extra bling for your gift packages. Just something to think about since Christmas seems to be just around the corner and creeping up fast. (now that's scary!)

Have fun putting the final touches on your Halloween decorations and costumes. If the weather is cooperating, we'll be joining our kids taking our grandson out for trick or treating this year. Doesn't that sound like fun? Spooooky greeeeetings! Sharon

Wednesday, October 26, 2011

Gently Falling Again

Goodness! I just can't leave this stamp set alone! It keeps calling out to me that Christmas can wait just a little bit longer and I can play with my leaves just one more time. Or maybe two, um, or even three more times. Who knows, I'm just not ready to move on yet!

Stamps: Gently Falling and Grateful Greetings

Cardstock: Not Quite Navy, Cajun Craze, Very Vanilla with Well Worn Designer Series Paper

Ink: Not Quite Navy, Cajun Craze, More Mustard, and Early Espresso

Accessories: Simply Scored Scoring Tool, Big Shot with Square Lattice Embossing Folder and Scallop Squares Duo Bigz Die, Stamp-a-ma-jig, Scallop Oval Punch, Large Oval Punch, and Sponge Dauber


Have I mentioned the Simply Scored Scoring Tool yet? Well let me tell you - it's simply fabulous! I can't tell you how many gate-fold cards I've made since getting this tool. It makes it so easy to do any scoring you need, whether it's just scoring the fold on a regular card, a fancy fold card, or one of the fan-fold paper medallions that are so much fun to make! This is one of the best purchases I've made in a long while! Hmmm, I wonder if SU! might come out with a certain addition to this tool (hint, hint) that I'd love to have. We'll just have to wait and see.


Back to the card now. I just love the Well Worn DSP with these leaves. I've used a couple of different prints from this paper pack with the leaves and different inks. All I can say is 'yummy'! So many great prints in this pack and they are perfect for those masculine cards you always need. It's a good DSP pack to have on hand.


If you look closely, you'll see the outlines of the leaves shows up rather lightly. I didn't add it until after the cardstock had been put through the Big Shot with the Square Lattice Embossing Folder. That way the details only showed up on the upper texture of the cardstock. I chose to use a Stamp-a-ma-jig to get them lined up just the way I wanted. And then adding the sponging over this just enhanced the detail of the embossing perfectly.


Hope you enjoy the latest in the never-ending usage of my Gently Falling stamp set. Yes, right now it's at the top of my absolute favorite stamp list. Wonder what's going to push it out of the top spot? You never know! Stay tuned for the continuing saga, blah, blah, blah.

Sharon

Sunday, October 23, 2011

Grandson's Halloween Card

Thought I'd share another Halloween card with you since there's another week to go before the 'spooky day' arrives. I just did a simple little card for my grandson. As he's just under 18 months, I didn't think he'd care about fancy techniques or lots of embellishments. So this card is sweet and simple in the extreme! And I confess I went scrounging around in my retired stash looking for a cute purple cardstock to use. So, here it is...

Stamps: Jack of All Trades, and Autumn Apparitions (retired)
Cardstock: Basic Black, Tangerine Tango, and Vintage Violet (retired)
Ink: Tangerine Tango, Old Olive, and Basic Black
Accessories: Paper Snips and Dimensionals


It's so funny that I can't even tell you the names of the DSP that I used! They were from the time when our DSP was printed only on one side and white on the back. How long ago was that? And I only had a few smaller pieces still left. So what was it I used - I have absolutely no idea!! But it went nicely with the Tangerine Tango that I wanted to use for the pumpkin, and that's all I needed to know.

I forgot to take a pic of the inside where I used the spider and bat along with the sentiment from the Autumn Apparitions set. Hope he likes his little card. It's only a 4 1/4" square little card - just his size.

Thanks for stopping in and seeing what's new (or sometimes old!). Hope you're having a serene and relaxing Sunday. There's something so refreshing about going to church in the morning and then relaxing on a Sunday afternoon. It's my favorite day of the week! Enjoy! Sharon

Saturday, October 22, 2011

Simple Christmas

Yes, I thought it was time to get off my autumn kick and get started thinking about Christmas. Oh yeah, it's right around the corner and if I don't start thinking about cards now, it's gonna be too late for me! To get me in the spirit, I thought I'd start out with a set that I've used throughout the year because it's almost a no brainer for me. Maybe that will get the holiday creativity going and I'll feel inspired to go on from there. We'll see how that works out.


Stamps: Season of Friendship and Perfect Punches
Cardstock: Chocolate Chip, Real Red, Bashful Blue, and Whisper White
Ink: Chocolate Chip, Bashful Blue, and Real Red
Accessories: 1 3/4" Scallop Circle Punch, Ticket Corner Punch, Scallop Edge Border Punch, 2-Way Glue Pen, Dazzling Diamonds Glitter, and Dimensionals


I'm always a sucker for clean and simple Christmas cards because when you're making a pile of cards, simple is always better. Right? Each one of the elements making up this card can be easily done whenever you have a little time on your hands, then put all together in one quick sitting. That's my idea of making Christmas cards. So this one will go into my 'possibilities' file for this year's family card. Who knows which one of my 'possibilities' that I'll actually choose for my cards. That'll be decided on down the road.

Thanks for stopping by today. Hope you're enjoying this weekend. We're heading out to the pumpkin patch because the day is gorgeous and sunshiny. A perfect day to be out of doors and picking pumpkins. (And getting cider and doughnuts too!) Have a lovely day! Sharon

Sunday, October 16, 2011

Falling Again

Oh, not me - I'm not falling. At least I don't think so! Instead, I'm talking about leaves from the Gently Falling stamp set that was used on this card. Have I mentioned how much I love this time of year? Well, yesterday was definitely not one of those fall days that I love so much. It was so windy outside it could almost knock you over. It would be called one of Pooh's blustery days I think. I was at a friend's house and we were sitting in the kitchen visiting. As we were talking, we kept seeing her heavy patio chairs go zooming across the deck. It was so funny! At first we thought we were seeing things and maybe her husband was playing tricks on us! But no, it really was that windy outside. Definitely a good day to be inside and doing a bit of stamping with a friend too!

Stamps: Gently Falling and Grateful Greetings

Cardstock: Early Espresso, Crumb Cake, and Very Vanilla with Spice Cake Designer Series Paper

Ink: Crumb Cake, More Mustard, Bravo Burgundy

Accessories:2 1/2" Circle Punch, Dotted Scallop Ribbon Border Punch, Mat Pack and Piercing Tool, Gold Brads, Sponge Dauber, and Dimensionals


You might be wondering why I chose to use Bravo Burgundy on the card as it's not one of the colors on the Designer Paper. Well, it's like this. I tried the outline stamp with Soft Suede, Early Espresso, and even Cajun Craze and none of them looked the way I wanted. This was the last color I tried and decided to stick with this one. It actually looks browner on the card than it does in the photo. Wonder why that is?


The addition of the outline stamp inked with Crumb Cake on the background was the perfect touch to give it some interest without drawing too much attention to it.

Well, hope you're enjoying your Sunday. After the bustle and bluster of yesterday, today's nice a quiet - just right for a Sunday afternoon. Have a great week and I'll be talking to you soon.

Sharon


Friday, October 14, 2011

Gently Falling Leaves

Hey there peeps! Glad to be back with another post. All's quiet in the grandson's room so maybe I'll get this post finished while he naps. At least that's the plan. We'll see how it goes. Today's card uses the fabulous Gently Falling stamp set from the Holiday Mini. I just love this set. I think fall is my favorite time of year with the crisp air, crunchy leaves on the ground, and the wonderful colors of autumn. So on with today's look at some 'colorful' leaves.

Stamps: Gently Falling and Grateful Greetings
Cardstock: Crumb Cake, Pool Party, More Mustard, and Very Vanilla
Ink: Pool Party, Lucky Limeade, More Mustard, Crumb Cake, and Early Espresso
Accessories: Stamp-a-ma-jig, Metallic Brads, and 1/8" Taffeta Ribbon


You really don't have to use the Stamp-a-ma-jig to use these wonderful 2-step stamps, but on this occasion I did. This strip of printed paper that I made is really just a small part of the whole. I randomly stamped an entire sheet of Very Vanilla cardstock, then was able to cut portions of it to use on 10 different cards. This idea is called a "One Sheet Wonder" and makes it so very easy to make a good number of cards quickly.
The layout of the cards I made wasn't all the same as this one, and the layering colors I used weren't just these two that I used on this card either. But that's what makes this "One Sheet Wonder" idea work out so nicely.

By the way, did you notice that I added a few speckles onto the Crumb Cake card base? That's a quick way to fix a boo boo like dropping a stamp onto a totally finished card. Yes, that's what happened. The card was all done and ready for picture time. I was just cleaning up the last of the stamps when I dropped it right on the card. Yikes! Instead of throwing it away, I just inked up a little corner of a stamp with the Early Espresso ink and added a few more spots. Whew!! Now if I hadn't told you that was from a mistake, would you have guessed it?

Thanks for stopping by today. I can hear the munchkin grunting (instead of talking) over the monitor so it just a matter of time before he gets a little impatient with waiting for me. It's been a busy week with a workshop and classes going on, but the weekend looks a little more tame. So hopefully there will be another post or two on the horizon!
Sharon

Monday, October 10, 2011

French Foliage Revisited

I've been in love with the French Foliage stamp set ever since it came out last year. The sheer look of the images when they're stamped makes them fabulous for layering up in a collage type look. So I wanted to share a new card idea using one of the new In Colors to make a fall card. And instead of choosing a green or coral color, why not choose a soft blue? Here's my take on an updated fall color combo...

Stamps: French Foliage and Grateful Greetings

Cardstock: Early Espresso, Crumb Cake, Pool Party, and Whisper White

Ink: Early Espresso, Crumb Cake, and Pool Party

Accessories: Big Shot with Scallop Squares Duo, Square Lattice Embossing Folder, Postage Stamp Punch, Scallop Oval Punch, Large Oval Punch, Early Espresso Quilted Satin Ribbon, and Dimensionals


I liked the crispness of the colored images so I didn't do any sponging on this card. And don't you just love this color combo for fall? The Pool Party blue reminds me of the skies on a not-quite-sunny day. Makes me feel it's almost time to get out there and rake leaves. Well, maybe not for another couple of weeks yet! And I'm sure I won't be so chipper about it when my back's hurting from all the raking!! LOL

Hope you enjoyed my card for today. Thanks for checking in. Hope you're having a wonderful day. Sharon

Saturday, October 8, 2011

Leaves of Gratitude

Last night it seemed as though nothing was going right and I ended up having a full-blown melt down. (sorry honey!) So I gave up and ended up going to bed at 7:30. I've just been too tired and stressed lately to function normally at all. Anyway, that's why I was up at 3:30 am finishing the card and now it's being posted at this unbelievable time of day (or is it still night, hmmm). Anyway, the card came together nicely finally and I'm happy to share it with you.

Stamps: Day of Gratitude, Falling Leaves, and Netting


Cardstock: Sahara Sand, Riding Hood Red, Lucky Limeade, Early Espresso, and Whisper White


Ink: Riding Hood Red and Lucky Limeade


Accessories: Big Shot with Houndstooth Embossing Folder, Scallop Trim Border and Corner Punches, Word Window Punch, Modern Label Punch, and Dimensionals


I hope you can see the stamping on the raised portions of the embossed background. That technique gives the card much more depth to the embossing. Love the look and so glad I tried it!


I had tried different ribbons, brads, buttons, but nothing seemed to look right on the card. Lastly I just added the strip of Early Espresso cardstock and really liked that splash of dark to offset all the brighter colors.


Hope you like the clean and simple look of the card. Once I got some sleep, I enjoyed making it! Thanks for stopping by for a look-see. Have a great day!


Sharon

Tuesday, October 4, 2011

Simple Christmas

It's good to have a chance to make a card for myself for a change. The past week has been devoted to planning cards to make for our soldiers. And while they're nice cards and all, most of them use retired papers and stamps. So you're probably tired of seeing ideas that really aren't available to you unless you happen to have those retired items. So this morning during nap time, I hustled to my stamp cave and made a card for me. I'm so tickled I get to share it with you right away!

Stamps: Christmas Collage

Cardstock: Always Artichoke, Cherry Cobbler, River Rock, Very Vanilla, Old Olive

Ink: River Rock pad, and Always Artichoke marker

Accessories: Eyelet Border Punch, Very Vanilla 1/8" Taffeta Ribbon, Basic Pearls, and Mini Glue Dots


I kept the card clean and simple to showcase the Christmas Collage background stamp. This stamp is a little larger than a 1/4 sheet of cardstock, so you never get the full image unless you make a larger size card than usual. But there are so many fun sections on this background stamp that you can highlight with another ink color (or even use just that little part of the stamp). It's like having more than one stamp to play with!


When putting the card together, I tried several different ribbons and such to add to it, but nothing seemed to work. I happened to have the 1/4" strip of Old Olive just sitting there leftover from another card, so I laid it on the card and voila! It worked and seemed to pull it all together. So I put it all together and there you are! My first Christmas card for this year. Now how many more are there to make???? Aww, who cares - at least I got started!

Sharon