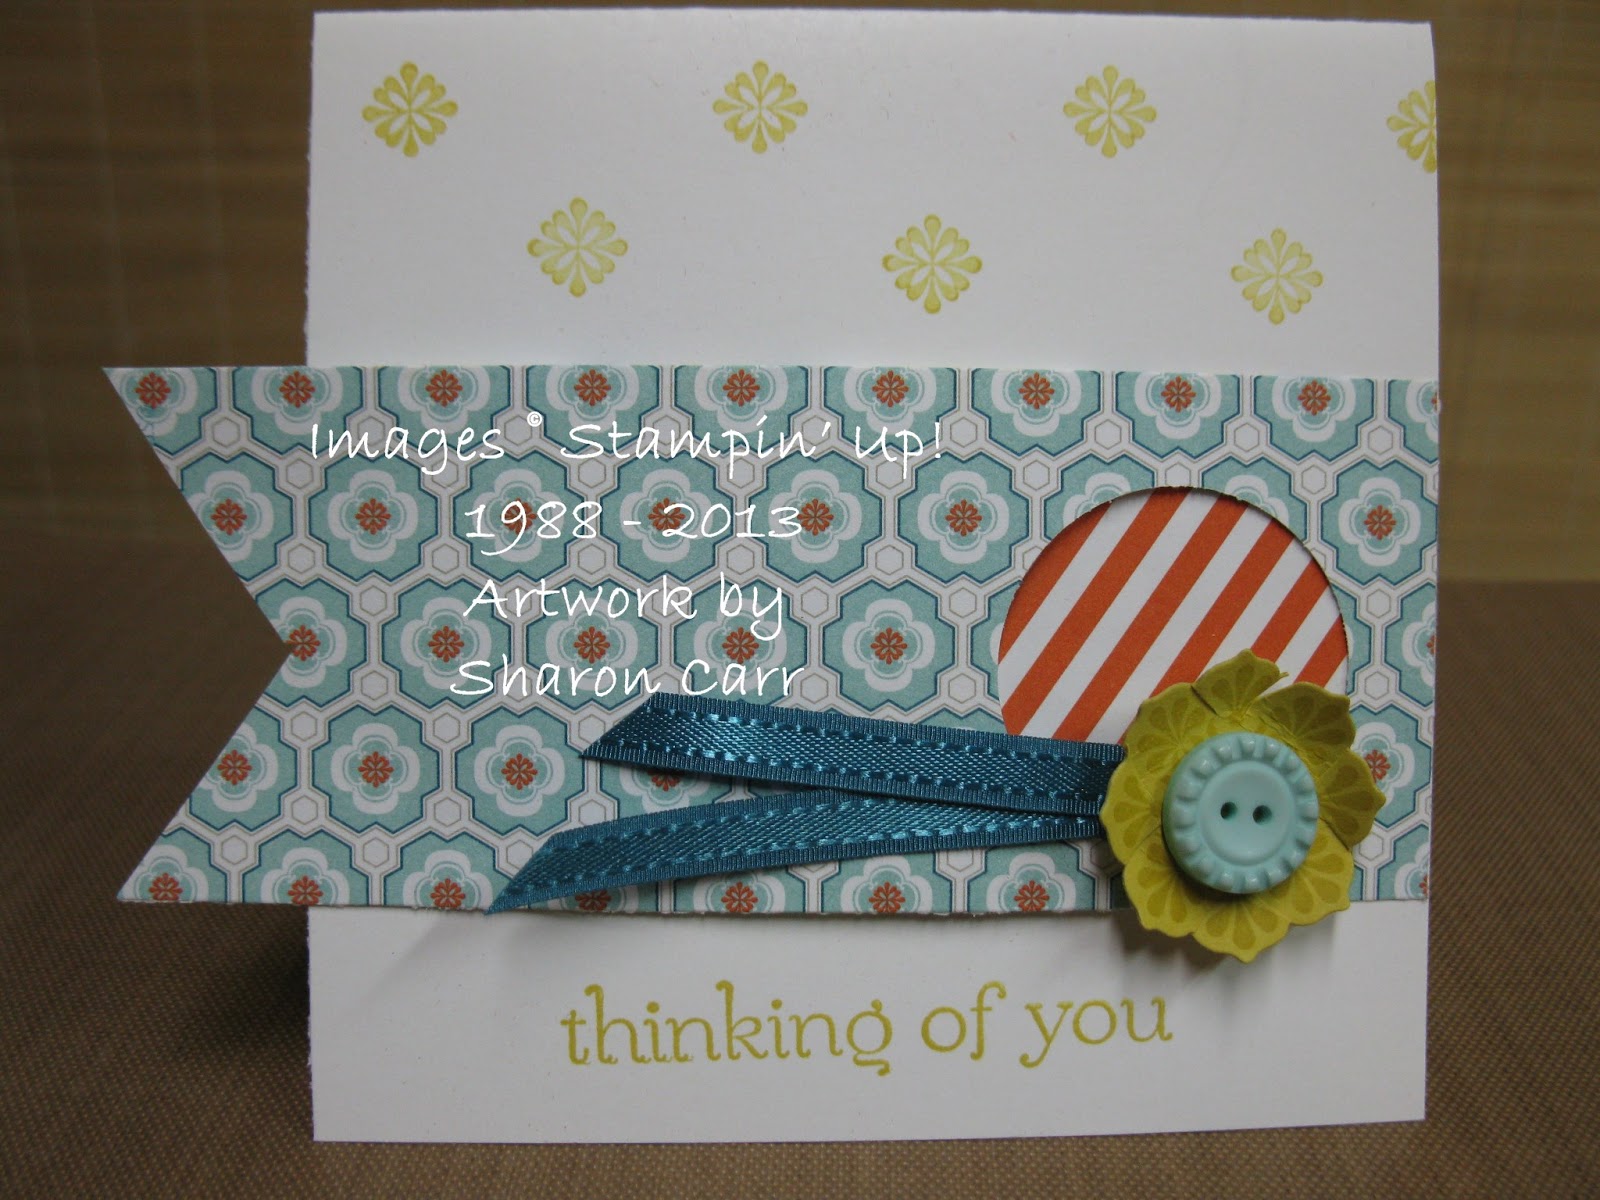
Hi gang! Today I have another card using the free Sale-A-Bration set called Petal Parade. I've been having so much fun using this lately and I wanted to share another idea with you. This set seems to work well with all kinds of color combos and I've been using some regular ones and some not so regular. This card was made using some of the newest In Colors and adding So Saffron and Pool Party to keep it nice and gentle looking. Here's what I did....
Stamps: Petal Parade, Four You
Ink: Pool Party, So Saffron, Crisp Cantaloupe, Pistachio Pudding, and Basic Gray
Paper: Crisp Cantaloupe, Pool Party, and Whisper White
Accessories: Big Shot with Decorative Dots TIEF, Simply Scored Board, Rhinestone Basic Jewels, Sweet Sorbet Accessory Pack, and Petite Petals Punch
This is a simple and sweet card that's quick and easy to make when you're in a big hurry to get something in the mail. When I was finished making it, I was surprised at how many free Sale-A-Bration items were used to make it! There's the stamp set of course, but also the embossing folder and the twine from the accessory pack.
I added the lines of dry embossing to give it a little more interest since so much of the card is blank. I added a layer of Whisper White cardstock inside the card for writing your note. I also added the same flowers in the corner of the envelope and inside the card to match. All that white plain white just bothers me and I have to add something! grin
That's it for today. I had a little free time because of the little one's nap and took advantage of it. Hope you like this simple card and will try something similar. Thanks for stopping in today. Sharon
Showing posts with label SAB cards. Show all posts
Thursday, February 27, 2014
Saturday, February 15, 2014
Pretty Petal Parade
I just love the card I have to share with you today. The colors are soft and muted but blend wonderfully together. It reminds me of a dusky evening with the mist rolling in to soften all the colors. Hope you enjoy this one. The main stamp set is a freebie too from Sale-a-Bration which is going on right now. You don't want to miss the great products you can get free with a $50 purchase. And who doesn't like something free?! Here's the card idea to get you thinking of possibilities....
Stamps: Petal Parade(SAB), Remembering Your Birthday, and Itty Bitty Banners
Ink: Pool Party, Pear Pizzazz, Crumb Cake, and Basic Black
Paper: Crumb Cake, Basic Black, and Whisper White
Accessories: Big Shot with Large Scallop Edgelits, Natural 5/8" Chevron Ribbon, Sweet Sorbet Accessory Pack(SAB), Rhinestone Basic Jewels, Paper Snips, and Dimensionals
I almost didn't share this with you because the Basic Black ink didn't stamp very cleanly and solid. But the more I looked at the card, I think I prefer the softer look of the black not being so solid and stark. Everything else is much lighter and the really dark solid black might have been too much.
Love the added ribbon and twine. The chevrons on the ribbon really tie in with the arrows stamped on the card. And the twine is just a nice added bonus to the look.
I worked the inside of the card to match the front, adding the arrow and flowers to finish it off nicely. I really liked the arrow highlighting the YOU. It was a fun touch to add.
Hope you like today's card idea. It's away fun to create using products you get for free. If you want to take advantage of Sale-a-Bration, click on the button at the right to go directly to the catalog and see what you can get today.
Thanks for stopping by today. Hope you're having a fabulous weekend. Enjoy! Sharon
Stamps: Petal Parade(SAB), Remembering Your Birthday, and Itty Bitty Banners
Ink: Pool Party, Pear Pizzazz, Crumb Cake, and Basic Black
Paper: Crumb Cake, Basic Black, and Whisper White
Accessories: Big Shot with Large Scallop Edgelits, Natural 5/8" Chevron Ribbon, Sweet Sorbet Accessory Pack(SAB), Rhinestone Basic Jewels, Paper Snips, and Dimensionals
I almost didn't share this with you because the Basic Black ink didn't stamp very cleanly and solid. But the more I looked at the card, I think I prefer the softer look of the black not being so solid and stark. Everything else is much lighter and the really dark solid black might have been too much.
Love the added ribbon and twine. The chevrons on the ribbon really tie in with the arrows stamped on the card. And the twine is just a nice added bonus to the look.
I worked the inside of the card to match the front, adding the arrow and flowers to finish it off nicely. I really liked the arrow highlighting the YOU. It was a fun touch to add.
Hope you like today's card idea. It's away fun to create using products you get for free. If you want to take advantage of Sale-a-Bration, click on the button at the right to go directly to the catalog and see what you can get today.
Thanks for stopping by today. Hope you're having a fabulous weekend. Enjoy! Sharon
Monday, March 11, 2013
Ears to You Bunnies
Have you seen and stamped with this adorable single stamp called Ears to You yet? If not, you don't know what you're missing! These cute bunnies are all patterned differently and just a clean silhouette of each one, so they can be used in so many different ways. The card today was going to be one of the class projects for this week until I realized I didn't have enough Pool Party cardstock or satin ribbon on hand. Dog-gone it! It's such a pretty card and I know everyone would have loved making it. Oh, well. I guess I'll just let them 'look' at it instead. Aren't I nasty? ha ha Here you go. You get to 'look' at it too!
Stamps: Ears to You
Ink: VersaMark, Pool Party and Wisteria Wonder
Paper: Pool Party, Wisteria Wonder, and Shimmer White
Accessories: Big Shot with Lacy Brocade TIEF, Heat Embossing Tool, Clear Embossing Powder, Sponge Daubers, Sycamore Street Ribbons and Buttons(SAB)
I took several pictures to try and show the lovely look of the Shimmer Paper underneath the sponging and embossing, but couldn't get it to show up. Needless to say, this card is so ymmy and soft looking - just like pretty Easter candy colors.
The bunnies and sentiment were embossed first and color sponged over using the ink-resist technique. Thought this would look nice because of each of the different prints on the bunnies. Sponging over the embossing makes all the tiny details just pop.
I loved the texture of the Lacy Brocade embossing on the background. It just fits with all the other prints. And I can't imagine what I'll do when this pretty ribbon isn't available after Sale-A-Bration. Boo hoo! I think I need to get another order in before SAB is over on March 22nd. Have to get me some more of this ribbon!!!
Thanks for stopping by. I spent the weekend stamping and I've got lots to share with you, so come on back soon. Happy stamping, Sharon
Stamps: Ears to You
Ink: VersaMark, Pool Party and Wisteria Wonder
Paper: Pool Party, Wisteria Wonder, and Shimmer White
Accessories: Big Shot with Lacy Brocade TIEF, Heat Embossing Tool, Clear Embossing Powder, Sponge Daubers, Sycamore Street Ribbons and Buttons(SAB)
I took several pictures to try and show the lovely look of the Shimmer Paper underneath the sponging and embossing, but couldn't get it to show up. Needless to say, this card is so ymmy and soft looking - just like pretty Easter candy colors.
The bunnies and sentiment were embossed first and color sponged over using the ink-resist technique. Thought this would look nice because of each of the different prints on the bunnies. Sponging over the embossing makes all the tiny details just pop.
I loved the texture of the Lacy Brocade embossing on the background. It just fits with all the other prints. And I can't imagine what I'll do when this pretty ribbon isn't available after Sale-A-Bration. Boo hoo! I think I need to get another order in before SAB is over on March 22nd. Have to get me some more of this ribbon!!!
Thanks for stopping by. I spent the weekend stamping and I've got lots to share with you, so come on back soon. Happy stamping, Sharon
Saturday, March 9, 2013
Get Well Floral Card
I mentioned yesterday how much I've been enjoying the Pop-up Posies Designer Kit and I've used it for today's card as well. This time I've used only the punched out flowers and nothing else. This whole kit is so versatile, and I seem to be using bits and pieces of it separately - not all of it together as it's shown in the Summer Mini Catalog. Wish I could get the different elements of the kit separately because I've just about used up the Pool Party flower used in today's project. Now let's see just what that project is...
Stamps: Mixed Bunch and Delightful Dozen
Ink: Pool Party and Island Indigo
Paper: Crumb Cake, Island Indigo, Whisper White cs, and Subtles Collection Paper Stack
Accessories: Pop-up Posies Designer Kit, Sycamore Street Ribbon and Button Pack, Blossom Punch, Extra-Large Oval Punch, Boho Blossoms Punch, Sponge Daubers, and Glue Dots
I like the play of different designs and colors used in the layers here. It all draws your eyes to the sentiment and flower as you want it to. Can you see all the layers on the flower? First the Mixed Bunch flower is stamped on white cs with Pool Party ink, punched out with coordinating punch, then sponged on the edges. The next layer is just one of the Pop-up Posies from the kit. This is sponged with Pool Party ink also. Next comes a Boho Blossoms punched flower from Island Indigo cardstock. Lastly is one of the free buttons that come in the Sale-A-Bration Sycamore Street Ribbon and Button Pack. Don't all those pieces work well together?
The ribbon from the same Sale-A-Bration freebie is used across the card to tie it all together. Don't you love it when you can make good use of the free Sale-A-Bration items, and they add the perfect finishing touches? That seems to be what has happened with this card. Hope you enjoyed this idea and it gives you more ideas to try on your own. Thanks for stopping in again today. I appreciate any comments you share with me. Have a fun, creative weekend and get stamping! Sharon
Stamps: Mixed Bunch and Delightful Dozen
Ink: Pool Party and Island Indigo
Paper: Crumb Cake, Island Indigo, Whisper White cs, and Subtles Collection Paper Stack
Accessories: Pop-up Posies Designer Kit, Sycamore Street Ribbon and Button Pack, Blossom Punch, Extra-Large Oval Punch, Boho Blossoms Punch, Sponge Daubers, and Glue Dots
I like the play of different designs and colors used in the layers here. It all draws your eyes to the sentiment and flower as you want it to. Can you see all the layers on the flower? First the Mixed Bunch flower is stamped on white cs with Pool Party ink, punched out with coordinating punch, then sponged on the edges. The next layer is just one of the Pop-up Posies from the kit. This is sponged with Pool Party ink also. Next comes a Boho Blossoms punched flower from Island Indigo cardstock. Lastly is one of the free buttons that come in the Sale-A-Bration Sycamore Street Ribbon and Button Pack. Don't all those pieces work well together?
The ribbon from the same Sale-A-Bration freebie is used across the card to tie it all together. Don't you love it when you can make good use of the free Sale-A-Bration items, and they add the perfect finishing touches? That seems to be what has happened with this card. Hope you enjoyed this idea and it gives you more ideas to try on your own. Thanks for stopping in again today. I appreciate any comments you share with me. Have a fun, creative weekend and get stamping! Sharon
Sunday, February 17, 2013
More Sycamore Street Ideas
Well, I did warn you that I'd be posting more ideas with the Sycamore Street DSP and also the Ribbon and Button Pack that are two of the free items you can get during Sale-A-Bration. I'm finding these two items are turning into my very favorite supplies when I sit down to stamp lately. Whatever will I do when Sale-A-Bration is over March 22nd?? Definitely be having withdrawals, that's for sure! (Maybe I just need to get another pack or two before they're gone.....) sigh Ok, enough pining away, let's get on with the ideas.....
Stamps: Perfectly Penned
Ink: Basic Black
Paper: Whisper White, Island Indigo, and either Summer Starfruit or Pool Party along with Sycamore Street DSP (SAB)
Accessories: Sycamore Street Ribbon and Button Pack, Island Indigo Baker's Twine, Glue Dots, and Dimensionals
Isn't this just the cutest card ever? Love the ribbon and buttons with the Baker's Twine little bows on them. Is the Summer Starfruit card base too much of a good thing? I keep second-guessing myself on whether it's too much or not. I almost used a Whisper White card base and just a layer of the Starfruit. What do you think?
This card still uses the same idea with DSP and the strip of buttons on the ribbon, but changed it from portrait to landscape and used a much larger layer of the printed DSP. Since the card was using Pool Party, I changed the middle button from Tangerine to the Pool Party to match.
I really haven't decided which one I like better. They both are so fresh and happy looking to me. I think one of the very best things about this DSP is that it's forcing me to step out of my comfort zone of pastels and start embracing these amazing bright and lively colors! And that's been a really good change for me. I'm lovin' it!!
Happy stamping to you. Get out there and try something new today!! It's fun - Sharon
Stamps: Perfectly Penned
Ink: Basic Black
Paper: Whisper White, Island Indigo, and either Summer Starfruit or Pool Party along with Sycamore Street DSP (SAB)
Accessories: Sycamore Street Ribbon and Button Pack, Island Indigo Baker's Twine, Glue Dots, and Dimensionals
Isn't this just the cutest card ever? Love the ribbon and buttons with the Baker's Twine little bows on them. Is the Summer Starfruit card base too much of a good thing? I keep second-guessing myself on whether it's too much or not. I almost used a Whisper White card base and just a layer of the Starfruit. What do you think?
This card still uses the same idea with DSP and the strip of buttons on the ribbon, but changed it from portrait to landscape and used a much larger layer of the printed DSP. Since the card was using Pool Party, I changed the middle button from Tangerine to the Pool Party to match.
I really haven't decided which one I like better. They both are so fresh and happy looking to me. I think one of the very best things about this DSP is that it's forcing me to step out of my comfort zone of pastels and start embracing these amazing bright and lively colors! And that's been a really good change for me. I'm lovin' it!!
Happy stamping to you. Get out there and try something new today!! It's fun - Sharon
Saturday, February 16, 2013
Sycamore Street CASE
I know, I've been checking out other blogs again, and boy did I get inspired! Selene Kempton is a very talented stamper and I always find some idea on her blog that makes me grab my stamps and ink. You can find her blog here. I'm sure you'll be amazed at her talent too. Anyway, I did CASE one of her cards the other day. I made some adjustments to fit what I wanted and this is what I made...
Stamps: Bloomin' Marvelous (SAB)
Ink: Island Indigo and Rich Razzleberry pads, and markers to match
Paper: Whisper White, Tangerine Tango, Rich Razzleberry with Sycamore Street Designer Series Paper (SAB)
Accessories: Sycamore Street Ribbon and Button Pack (SAB), Pearls Basic Jewels, Bitty Butterfly Punch, and Dimensionals
I love the clean, crisp look of this card with lots of white space and bright splashes of color. I wasn't too sure about all the colors of this print, but on this card I've totally fallen for them! Maybe it's just this print, or maybe it's the whole pack of the Sycamore Street DSP that I just can't get enough of!! And getting these items free with a $50 order through March 22nd is just the icing on the cake. Doesn't everyone like freebies?!?
Did you notice the little strip of pearls on each of the butterflies? They add just the perfect touch of class to the card.
That's it for today. I think I'll be sharing a few more Sycamore Street ideas with you soon. I haven't put the paper away yet. It's still laying on my table just tempting me to come play some more. What can I do? Think I need to get back down there for a little more stamping, don't you?
Happy stamping - Sharon
Stamps: Bloomin' Marvelous (SAB)
Ink: Island Indigo and Rich Razzleberry pads, and markers to match
Paper: Whisper White, Tangerine Tango, Rich Razzleberry with Sycamore Street Designer Series Paper (SAB)
Accessories: Sycamore Street Ribbon and Button Pack (SAB), Pearls Basic Jewels, Bitty Butterfly Punch, and Dimensionals
I love the clean, crisp look of this card with lots of white space and bright splashes of color. I wasn't too sure about all the colors of this print, but on this card I've totally fallen for them! Maybe it's just this print, or maybe it's the whole pack of the Sycamore Street DSP that I just can't get enough of!! And getting these items free with a $50 order through March 22nd is just the icing on the cake. Doesn't everyone like freebies?!?
Did you notice the little strip of pearls on each of the butterflies? They add just the perfect touch of class to the card.
That's it for today. I think I'll be sharing a few more Sycamore Street ideas with you soon. I haven't put the paper away yet. It's still laying on my table just tempting me to come play some more. What can I do? Think I need to get back down there for a little more stamping, don't you?
Happy stamping - Sharon
Thursday, February 14, 2013
Similar, but...
How often do you see an idea and really love it, but... Yeah, it's that but... that gets me every time. When I first saw the Sale-A-Bration flyer, I loved the card sample shown using the Sycamore Street Designer Series Papers and Ribbon & Button Packs. You can get either of these items free when you place a $50 order. Considering that I love the colors these items were showcasing, I had to get them! You know how that goes, don't you! Well, I finally got around to CASEing that card sample with my take on it, and that's what I have to share with you today.
Stamps: Madison Avenue and Sweet Essentials
Ink: Summer Starfruit
Paper: Whisper White, Summer Starfruit cardstock and Sycamore Street DSP
Accessories: 1 3/8" Circle Punch, 1 1/4" Scallop Circle Punch, Sycamore Street Ribbon and Button Pack, Mini Glue Dots, and Dimensionals
I started out with a 4 1/4" square card which is larger than the original sample, so that was the first change. Next I added a sentiment on the bottom of the card with Summer Starfruit ink. Then I stamped the tiny floral stamp from the Madison Avenue set on the top portion of the white card because it just seemed like too much white going on. Other than those few changes, I think I followed the idea pretty closely.
Have you checked the great patterns and colors in the Sycamore Street DSP yet? They are so user-friendly and I've been having lots of fun using them. And from the looks on other blogs, I think that's pretty much the sentiment out there. I've been seeing many, many great ideas and they've inspired me to get stamping with more of these papers while I still can! I'm surprised that I've already used up 90% of my pack of DSP and all of the Pool Party ribbon and buttons. Must be about time to place an order and get another pack free!! If you'd like to place an order to get yours free, either click on the button on the right to order online, or contact me to place the order for you. Either way, I know you'll love these papers, ribbons, and buttons.
.
Well, that's it for now. Kids are stirring sofree time nap time is just about over for today. Hope you'll find time to stamp and come back again soon. Any comments would be appreciated. I love to hear what you think about my ideas. Take care... Sharon
ps - Happy Valentines Day to you! Can't believe I almost forgot. Oh my, and not even sharing anything with hearts on it either! I'm really slipping here!!
Stamps: Madison Avenue and Sweet Essentials
Ink: Summer Starfruit
Paper: Whisper White, Summer Starfruit cardstock and Sycamore Street DSP
Accessories: 1 3/8" Circle Punch, 1 1/4" Scallop Circle Punch, Sycamore Street Ribbon and Button Pack, Mini Glue Dots, and Dimensionals
I started out with a 4 1/4" square card which is larger than the original sample, so that was the first change. Next I added a sentiment on the bottom of the card with Summer Starfruit ink. Then I stamped the tiny floral stamp from the Madison Avenue set on the top portion of the white card because it just seemed like too much white going on. Other than those few changes, I think I followed the idea pretty closely.
Have you checked the great patterns and colors in the Sycamore Street DSP yet? They are so user-friendly and I've been having lots of fun using them. And from the looks on other blogs, I think that's pretty much the sentiment out there. I've been seeing many, many great ideas and they've inspired me to get stamping with more of these papers while I still can! I'm surprised that I've already used up 90% of my pack of DSP and all of the Pool Party ribbon and buttons. Must be about time to place an order and get another pack free!! If you'd like to place an order to get yours free, either click on the button on the right to order online, or contact me to place the order for you. Either way, I know you'll love these papers, ribbons, and buttons.
.
Well, that's it for now. Kids are stirring so
ps - Happy Valentines Day to you! Can't believe I almost forgot. Oh my, and not even sharing anything with hearts on it either! I'm really slipping here!!
Sunday, February 10, 2013
A Twitterpated Elephant
Hope you all enjoyed your weekend, since it's almost gone as I'm writing this. Where does the time go? I had all these great ideas of what I'd get accomplished this weekend, and most of it never got around to happening. Of course, there's always a good reason for that, or so it seems at the time. But still, it's impossible to cram 4 days worth of "busyness" into a two day weekend! So instead of posting both days, there's only one little post tonight. Maybe I'll get the other one posted tomorrow if all goes according to plans. Now, don't go holding your breath waiting - I don't want anyone passing out, you know?!! Ok, here's my slightly 'twitterpated' post for today...
Stamps: Patterned Occasions and Curly Cute
Ink: Basic Gray pad, Basic Black, Real Red, and Lucky Limeade markers
Paper: Whisper White, Real Red, and Twitterpated Designer Series Paper
Accessories: Lucky Limeade Ruffled Ribbon, Decorative Label Punch, Eyelet Border Punch(ret), and Dimensionals
This is a fairly simple card, but it still has a lot going on. I love all the prints here between the two DSP prints and the elephant itself. It just looks so happy and friendly. Wish I would have thought of making this card for the baby shower I went to this afternoon. Wouldn't it have been cute?
This little elephant is part of the Patterned Occasions stamp set that you can earn for FREE during Sale-A-Bration - my favorite time of year!! All the stamps in this set are just so dog-gone cute and are very versatile. The wording on this one is for a thank you card, but why stop at that? Think of all the other times you might need this little guy, not to mention the rest of the stamps in the set!
The little chunk of Real Red punched with the retired Eyelet Border Punch was just sitting in my scrap stash. Thought it worked out nicely framing the little elephant. The Lucky Limeade ribbon was the end of the spool and didn't quite make it around the front, so I just angle cut it and taped it where it is. Normally I would have attached it in back and added on another small piece for the tie. But this way looks nice and uncluttered instead. (What is that old saying about necessity being the mother of invention or something like that???)
Well, that's it for my Sunday musings. Thanks for stopping by and seeing what's happening here. Have a creative week! Sharon
Stamps: Patterned Occasions and Curly Cute
Ink: Basic Gray pad, Basic Black, Real Red, and Lucky Limeade markers
Paper: Whisper White, Real Red, and Twitterpated Designer Series Paper
Accessories: Lucky Limeade Ruffled Ribbon, Decorative Label Punch, Eyelet Border Punch(ret), and Dimensionals
This is a fairly simple card, but it still has a lot going on. I love all the prints here between the two DSP prints and the elephant itself. It just looks so happy and friendly. Wish I would have thought of making this card for the baby shower I went to this afternoon. Wouldn't it have been cute?
This little elephant is part of the Patterned Occasions stamp set that you can earn for FREE during Sale-A-Bration - my favorite time of year!! All the stamps in this set are just so dog-gone cute and are very versatile. The wording on this one is for a thank you card, but why stop at that? Think of all the other times you might need this little guy, not to mention the rest of the stamps in the set!
The little chunk of Real Red punched with the retired Eyelet Border Punch was just sitting in my scrap stash. Thought it worked out nicely framing the little elephant. The Lucky Limeade ribbon was the end of the spool and didn't quite make it around the front, so I just angle cut it and taped it where it is. Normally I would have attached it in back and added on another small piece for the tie. But this way looks nice and uncluttered instead. (What is that old saying about necessity being the mother of invention or something like that???)
Well, that's it for my Sunday musings. Thanks for stopping by and seeing what's happening here. Have a creative week! Sharon
Monday, February 4, 2013
Honeycomb Happiness
One of the new products in the Spring Mini Catalog is the Honeycomb Texture Impressions Embossing Folder. How cool is that? It's a great background for so many different types of cards just the way it is. But why stop there? Have you seen it used with little hexagons of DSP tucked into some of the design? I loved the look, but wasn't sure how to do it. After giving it lots of thought, (and wondering why SU! didn't have a punch for this!!!) I finally figured it out. It was one of those 'duh' moments. Come on now, you know what I'm talking about! Anyway, here's my card and afterwards I'll explain how easy it is to do!
Stamps: Patterned Occasions
Ink: Island Indigo, Pool Party, and Calypso Coral markers
Paper: Whisper White, Pool Party, and Calypso Coral with Sycamore Street DSP
Accessories: Big Shot with Honeycomb TIEF, Decorative Label Punch, Calypso Coral Ruffled Ribbon, and Dimensionals
Now for unveiling the secret of getting the DSP just the right size to fit inside those little hexagons. Have a strip of DSP and run it through the Honeycomb embossing folder and your Big Shot. Just follow the embossed lines and cut out as many of the little hexagons as you need and attach them to your card. How easy is that?! It was so simple and I was trying to make it so hard by cutting and measuring, etc. Oh, why do I always try to make things harder than they have to be?
Anyway, now that I know this trick, I'm sure I'll be using it often. It's just so dog-gone cute! Oh yes, I've got to remind you that the DSP I used and the stamp set too are items you can get free when you order $50 from either the yearly SU! Catalog and/or the Spring Mini. Isn't it great to have such fabulous products you can get free? If you're interested, you can order directly from my website by clicking on the icon on the side or contact me and I'd be happy to host a party for you or just help you place your order.
Back to the card, you can see I've opted for my favorite go-to colors again. These three colors and also Primrose Petals seem to be what I've been grabbing to use every time I sit down and stamp lately! I think 'pastel' might be my middle name or something. Ok, that's it for today. There's a ladies meeting at church tonight that I don't want to miss. It's the ladies group's birthday party with dinner and Bunco following, so it's going to be lots of laughter and fun. I'm outa here til tomorrow. Hope to see you then. Sharon
Stamps: Patterned Occasions
Ink: Island Indigo, Pool Party, and Calypso Coral markers
Paper: Whisper White, Pool Party, and Calypso Coral with Sycamore Street DSP
Accessories: Big Shot with Honeycomb TIEF, Decorative Label Punch, Calypso Coral Ruffled Ribbon, and Dimensionals
Now for unveiling the secret of getting the DSP just the right size to fit inside those little hexagons. Have a strip of DSP and run it through the Honeycomb embossing folder and your Big Shot. Just follow the embossed lines and cut out as many of the little hexagons as you need and attach them to your card. How easy is that?! It was so simple and I was trying to make it so hard by cutting and measuring, etc. Oh, why do I always try to make things harder than they have to be?
Anyway, now that I know this trick, I'm sure I'll be using it often. It's just so dog-gone cute! Oh yes, I've got to remind you that the DSP I used and the stamp set too are items you can get free when you order $50 from either the yearly SU! Catalog and/or the Spring Mini. Isn't it great to have such fabulous products you can get free? If you're interested, you can order directly from my website by clicking on the icon on the side or contact me and I'd be happy to host a party for you or just help you place your order.
Back to the card, you can see I've opted for my favorite go-to colors again. These three colors and also Primrose Petals seem to be what I've been grabbing to use every time I sit down and stamp lately! I think 'pastel' might be my middle name or something. Ok, that's it for today. There's a ladies meeting at church tonight that I don't want to miss. It's the ladies group's birthday party with dinner and Bunco following, so it's going to be lots of laughter and fun. I'm outa here til tomorrow. Hope to see you then. Sharon
Sunday, January 27, 2013
A Little Bloomin' Marvelous
I've been having fun using two cute little Sale-a-bration sets lately. The idea I have to share with you today uses both of them on the card along with several other Sale-a-bration goodies. What's not to like when you can make a darling little card using mostly items that are free? Gotta love it! This card is also one of my little square cards too. Love the smaller size, but it still packs a punch!
Stamps: Bloomin' Marvelous and Madison Avenue
Ink: Island Indigo, Tangerine Tango, and Pool Party
Paper: Whisper White
Accessories: Big Shot with Vine Street TIEF, Scallop Squares Duo Bigz Die, 1 1/4" Scallop Circle Punch, Brights Buttons, Island Indigo Bakers Twine, Sycamore Street Ribbon and Button Pack, Sponge quarters, Glue Dots, and Dimensionas
This is a surprisingly simple card to put together. It only takes a little time, a little embossing and stamping, and some of those free items from Stampin' Up! during Sale-a-bration. If you're interested in getting some of these items for yourself, check out my website to place an order or contact me. I'd be happy to help you place an order, or host a party if you'd like. Either way, you can earn these stamps and accessories when you place an order. Can't get easier than that!
Thanks for stopping in today. Hope you had a fun and restful weekend. My weekend was so much fun at a party with a new friend I just met - Darlene. We had a great time at her party! But now it's almost time to get back watching the grandkids in the morning. Have a great week!! Sharon
Stamps: Bloomin' Marvelous and Madison Avenue
Ink: Island Indigo, Tangerine Tango, and Pool Party
Paper: Whisper White
Accessories: Big Shot with Vine Street TIEF, Scallop Squares Duo Bigz Die, 1 1/4" Scallop Circle Punch, Brights Buttons, Island Indigo Bakers Twine, Sycamore Street Ribbon and Button Pack, Sponge quarters, Glue Dots, and Dimensionas
This is a surprisingly simple card to put together. It only takes a little time, a little embossing and stamping, and some of those free items from Stampin' Up! during Sale-a-bration. If you're interested in getting some of these items for yourself, check out my website to place an order or contact me. I'd be happy to help you place an order, or host a party if you'd like. Either way, you can earn these stamps and accessories when you place an order. Can't get easier than that!
Thanks for stopping in today. Hope you had a fun and restful weekend. My weekend was so much fun at a party with a new friend I just met - Darlene. We had a great time at her party! But now it's almost time to get back watching the grandkids in the morning. Have a great week!! Sharon
Monday, February 20, 2012
Little Boy Easter
Now that Valentine's Day is well in the past, it's really time to start thinking about Easter. When I first saw the Heaven Blessed stamp set in the Occasions Mini Catalog, I knew I needed to get it. The children were so cute, and the bunnies and chicks would be so much fun to stamp. I've shared the first card I made with the set early on, but then got busy with other things and didn't get to stamp with it again for quite awhile. Well, that has been remedied and I've got another card to share with you using the cute little boy stamp. (He reminds me of my grandson, so...)
Stamps: Heaven Blessed
Cardstock: Very Vanilla and Lucky Limeade, with Everyday Enchantment Designer Series Paper (SAB)
Ink: Stazon Jet Black, Lucky Limeade, Pool Party, Calypso Coral, and Crumb Cake
Accessories: Aqua Painter, Scallop Trim Border Punch, Word Window Punch, Modern Label Punch, Mat Pack and Piercing Tool, Everyday Enchantment Brads & Ribbon (SAB), and Dimensionals

This lovely DSP is so soft and gentle that I decided to watercolor the image with just a hint of the same colors keeping the card very delicate looking. I love the added ribbon and brad that coordinate nicely with the Designer Paper. It's fun to have a card that is at least half made up of free Sale-a-bration items. It gives me such a good feeling when I can say that something is 'free'. Guess that's why I love Stampin'Up! and especially Sale-a-bration time!! Make sure you get some of these great items free when you order $50 or more until the end of April. Hurry up - times running out.Sharon
Stamps: Heaven BlessedCardstock: Very Vanilla and Lucky Limeade, with Everyday Enchantment Designer Series Paper (SAB)
Ink: Stazon Jet Black, Lucky Limeade, Pool Party, Calypso Coral, and Crumb Cake
Accessories: Aqua Painter, Scallop Trim Border Punch, Word Window Punch, Modern Label Punch, Mat Pack and Piercing Tool, Everyday Enchantment Brads & Ribbon (SAB), and Dimensionals

This lovely DSP is so soft and gentle that I decided to watercolor the image with just a hint of the same colors keeping the card very delicate looking. I love the added ribbon and brad that coordinate nicely with the Designer Paper. It's fun to have a card that is at least half made up of free Sale-a-bration items. It gives me such a good feeling when I can say that something is 'free'. Guess that's why I love Stampin'Up! and especially Sale-a-bration time!! Make sure you get some of these great items free when you order $50 or more until the end of April. Hurry up - times running out.
Monday, March 14, 2011
Bright Cupcake Card
Hi there! Today I was in a gray mood and got out the new Ice Cream Parlor DSP to cheer me up. The colors and patterns are so bright and cheerful, I just knew they'd do the trick! These are not colors that I'd normally choose to use together, but they're all on the paper so why not? Usually if I use alot of one bright color, I offset the brightness with some more subdued colors. Or just use a small amount of bright for a little pizzazz. But not on this card - it's so bright I almost need my sunglasses on! lol See what I mean?
Stamps: On Your Birthday
Cardstock: Daffodil Delight, Whisper White, Pink Pirouette, Early Espresso, with Ice Cream Parlor Designer Series Paper, and Red Glimmer Paper
Ink: Basic Black
Accessories: Build A Cupcake Punch, Decorative Label Extra-Large Punch, 1 3/4" Circle Punch, and Dimensionals

I think this might be one of the fastest cards I've ever made! When all the detail on the card is punched and layered up, it takes really no time at all. And it definitely is bright and cheerful! Like I said, you almost need sunglasses! But that's what makes this card so fun. Can't you just imagine sending this to a child on your card list, or maybe someone who's 'young at heart' instead!
Thanks for stopping by to get a little cheer! Have a fabulous day. And get out those stamps if you can - it's just what you need to stay bright and cheerful yourself!
Toodles,
Sharon
Stamps: On Your BirthdayCardstock: Daffodil Delight, Whisper White, Pink Pirouette, Early Espresso, with Ice Cream Parlor Designer Series Paper, and Red Glimmer Paper
Ink: Basic Black
Accessories: Build A Cupcake Punch, Decorative Label Extra-Large Punch, 1 3/4" Circle Punch, and Dimensionals

I think this might be one of the fastest cards I've ever made! When all the detail on the card is punched and layered up, it takes really no time at all. And it definitely is bright and cheerful! Like I said, you almost need sunglasses! But that's what makes this card so fun. Can't you just imagine sending this to a child on your card list, or maybe someone who's 'young at heart' instead!
Thanks for stopping by to get a little cheer! Have a fabulous day. And get out those stamps if you can - it's just what you need to stay bright and cheerful yourself!
Toodles,
Sharon
Saturday, January 23, 2010
Neighborly Get Well
I have a friend who has had surgery on her knee, so of course that called for sending a hand-made card. Right? So after looking around at all my new stamps and also finding Gretchen Barron's blog challenge, the idea for her card was born. I hadn't even put my new 'Good Neighbors' set together yet, so this seemed like the time to do it! Then the thought of adding some of the new coordinating cute 'Welcome Neighbor' Designer Series Paper to the mix was a given. Hope you like what I came up with...

Stamps: Good Neighbor and Teeny Tiny Wishes
Cardstock: Bermuda Bay, Soft Suede, Crushed Curry, Dusty Durango, Whisper White cardstocks and Welcome Neighbor DSP
Ink: Dusty Durango, Soft Suede, Bermuda Bay pads, and Bermuda Bay, Soft Suede Markers
Accessories: Pinking Hearts Border Punch, Word Window Punch, Mat Pack and Piercing Tool, Soft Suede Polka Dot Ribbon, and Dimensionals

Of course I carried the theme into the inside of the card by stamping the house and trees again. It just makes the inside of the cards so much more fun!
Just in case I haven't mentioned it earlier, most of this card was made with products from either the Occasions Mini or the Sale-A-Bration catalogs. Don't you just love those freebies during SAB? Did I mention this is one of my favorite times of the year?! Now get out those stamps, start creating, and show them some love!
Have a great Saturday...
Sharon

Stamps: Good Neighbor and Teeny Tiny Wishes
Cardstock: Bermuda Bay, Soft Suede, Crushed Curry, Dusty Durango, Whisper White cardstocks and Welcome Neighbor DSP
Ink: Dusty Durango, Soft Suede, Bermuda Bay pads, and Bermuda Bay, Soft Suede Markers
Accessories: Pinking Hearts Border Punch, Word Window Punch, Mat Pack and Piercing Tool, Soft Suede Polka Dot Ribbon, and Dimensionals

Of course I carried the theme into the inside of the card by stamping the house and trees again. It just makes the inside of the cards so much more fun!
Just in case I haven't mentioned it earlier, most of this card was made with products from either the Occasions Mini or the Sale-A-Bration catalogs. Don't you just love those freebies during SAB? Did I mention this is one of my favorite times of the year?! Now get out those stamps, start creating, and show them some love!
Have a great Saturday...
Sharon
Wednesday, January 20, 2010
New Birdhouse
Ever since I saw the new punch with the 2-step bird and branch, I've had this little idea floating around in my brain. Today it came home to roost. Or something like that anyway!! LOL I love birds and birdhouses as decorating accents, so I thought I would make a cute little birdhouse card. No problem - an easy afternoon project. It took me awhile to put together a card that would actually fit into an envelope that we sell. I didn't think that would be much of a problem. But when you're engineeringly (is that a word?) challenged, it's the little things that cause all the problems and take up all my time. A little trim here, measure again, another snip off that edge, measure again, and so on. Good grief! Almost 4 hours later I finally have a finished card! Hallelujah!!
And after all that, here's my masterpiece. Well at least it's my finished card even if it isn't quite a masterpiece! Hope you like it...
Stamps: Baroque Motif
Cardstock: Kraft, Taken with Teal, Sage Shadow, Chocolate Chip, Old Olive, Cameo Coral cardstocks with Welcome Neighbor Designer Series Paper (SAB freebie!)
Ink: Chocolate Chip for sponging, VersaMark pad, and Basic Black Marker
Accessories: Stampin' Pastels, Scallop Border Punch, Small Heart Punch, Extra Large Two-Step Bird Punch, Scallop Circle Punch, 1 1/4" Circle Punch, White Gel Pen, Dimensionals, and a sponge quarter
Well, what do you think? The final dimensions let the card just barely fit into a 5 1/2" square envelopes that Stampin' Up! sells so it can actually be mailed. So that's good.
The swirly design is so soft because I used the "poppin' pastels" technique. It's been ages since I cracked open my pastels, but they worked very nicely on this card. This is one of those techniques that seem to be forgotten most of the time, but always look lovely when used.
And in case I forgot to mention, half of the punches are all new ones from the Occasions Mini Catalog. I just love all the new products that are available. If you don't have the mini catalog yet and would like to see one, you can click on the button to the right to see it online right now, or contact me and I'd be happy to mail you one. Either way, you'll be impressed by all the new stamps and accessories that are now available!
Well, that's about it for today. I hope the next project I tackle doesn't take quite so long to finish. But sometimes what you get is worth all the extra effort. Thanks for stopping by. And leave a comment 'cuz I just love reading them!
Sharon
Wednesday, December 30, 2009
Simply Bella Bleu
Today we spent some time at my sister's house. We planned on a relaxing day of lunch and games. We started with playing Chinese Checkers. Have you ever played that game? It was one of the games we grew up playing and made me feel very nostalgic. My hubby didn't like that one at all and griped just about every move he made. (He didn't win at it either!) So we moved on to playing UNO. Now that one he likes. And he should because by the time I had 500 points and lost, he still had fewer than 200 points. How come he only likes playing the games he wins at? hmmm... If I only played games I always won, I'd never play any games anymore! Yeah, that's right. I'm horrible at most games!! Now you know one of my deep, dark secrets. Don't tell anyone, ok?
Since getting home this evening, I've been spending time planning for the next time the ladies get together to stamp for 'From Our Hearts'. I usually try to come up with simpler cards as some of the ladies joining us are not really stampers at all. I don't want to overwhelm them with anything too technical, but make sure everyone has a good time and we get as many cards made as possible.
With that in mind, this is one of the cards I made this evening. I really like so many of the prints in the Bella Bleu Designer Series pack. Very vintage looking and pretty. The card is simple, but not too plain I hope! Here's how it's made.
Stamps: Sweet Little Sentiments (retired)
Cardstock: Bordering Blue, Very Vanilla cardstock with Bella Bleu Designer Series Paper
Ink: Bordering Blue
Accessories: Big Shot with Simple Flower Embosslit, Scallop Trim Border Punch (new Sale-A-Bration free item!!), Pretties Kit, Paper Trimmer, Sponge Dauber, and Mini Glue Dots
I hope you liked the simplicity of this card. I thought it would be a great way to start winding down the year.
Enjoy the rest of the year! Be safe and happy!!
Sharon
Sunday, February 15, 2009
Sunday Punches
Blessings this Sunday afternoon. Let's get right down to stampin' business. I have a card to share with you that was one of the make & takes at my workshop on Friday night. I had just gotten an order in on Friday afternoon, but wanted something to share with my ladies that night using my new Sale-a-bration set, Polka Dot Punches, and the gorgeous new Delicate Dots Designer Series Paper that is also one of the freebies. I just love the colors and prints of this paper, so I had to come up with something quick. I used the color combo from the DSP as a guide to card colors. All images and materials by SU! of course.Stamps: Polka Dot Punches (SAB)
CS: Sahara Sand, Certainly Celery, Bashful Blue, and Barely Banana
Ink: So Saffron, Certainly Celery, Bashful Blue, and Sahara Sand Pads, Sahara Sand Marker
Accessories: Full Heart Punch (new), Delicate Dots DSP (SAB), Bashful Blue Narrow Grosgrain Ribbon, and Dimensionals
This card went together very quickly because we're able to punch out the hearts, and can be used for any number of occassions.
Today I got out the same set and pretty much the same colors and made another card. The components of the card are quite similar just using a different stamp from the set and the co-ordinating punches for it. The DSP is even the same sheet I used last time, just turned it over. Here is the list of punches I used to go with the stamps: Scallop Circle, 1" Circle, 3/4" Circle, Word Window, and Large Oval.
I love how quick and easy it is to punch all the pieces of the card. Just layer them up and you're good to go. Hope these two cards gives you an idea for when you're strapped for time, but still need something home-made from the heart.
Hugs,
Sharon
Subscribe to:
Posts (Atom)