Showing posts with label Watercolor. Show all posts

Saturday, March 22, 2014

Another Easter Card

I promised yesterday that I would share another card using the Blessed Easter stamp, so here I am again.  This one again is pretty quick to make when you have the pieces of DSP sitting on your worktable already cut and just sitting there waiting for me to come up with an idea.   So here goes.....

Stamps:  Blessed Easter
Ink:  Stazon Jet Black, Pink Pirouette, Strawberry Slush, Wild Wasabi, and Pistachio Pudding
Paper:  Whisper White, Pistachio Pudding, Pink Pirouette, and Strawberry Slush with Wild Wasabi paper from Subtles Designer Series Paper (ret)
Accessories:   AquaPainter
Today's card uses a mix of pinks and greens that look really fresh and sweet.   I had all these pieces of dotted Wild Wasabi DSP that has been retired sitting on my desk from another project.  Since I still had all this leftover, I figured I needed to start using it up because I'm running out of space for it all and can't keep buying new without using the old!  I just cut some up into rectangles to give a tiled effect to the background.  Just a little different than a full layer of DSP.

I again used a watercolor technique to color the tulips.  I started with a layer of Pink Pirouette ink on the flowers then added light touches of Strawberry Slush ink to add contrast and depth to them.  The leaves are painted the same way with Pistachio Pudding first, then adding touches of Wild Wasabi ink.  Love how delicate it all looks.

Well, that's it for today.  While you're  reading this I'm soaking up some teachings at our church retreat today.  I'm expecting to come back tired but refreshed too!  Hope you're enjoying your weekend so far.  Remember to relax and find some time to stamp.  I find that's always a good way to refresh myself and it puts me in a good frame of mind.  Have a good day!           Sharon

Friday, March 21, 2014

Blessed Easter cards

When the Occasions catalog first came out, I fell in love with a single, simple Easter stamp.   The tulip line-art is so pretty and the sentiment has a really nice font that fits it perfectly.  I liked it so much that this stamp was on my first order!  And yes, I have used it several times already, but haven't gotten around to sharing any with you yet.  Today, that problem is being rectified.  In fact, I will share a couple versions with you today and another one tomorrow.  Does that work for you?  Hope so, and hope you like these cards too!

 Stamps:  Blessed Easter, with Abundant Hope(ret) and Crosses of Hope(ret) inside
Ink:  Stazon Jet Black, Daffodil Delight, Calypso Coral, and Garden Green
Paper:  Watercolor Wonder Designer Notecards and Envelopes
Accessories:  Pearls Basic Jewels, and AquaPainter
Don't you just love the look of the watercolor background on these notecards?  There are 5 different watercolor designs in the packet and they're all soft and lovely.  Of course, the oval inset on this first card is my very favorite and they've all been used up already.  I sure wish I could do the backgrounds myself as nicely as these are done.  But since I can't, I'm happy I can purchase them!!  Woo hoo to Stampin'Up!  for coming up with this product for us!!   Yay!

For the sentiment inside my cards, I dug out some of my retired SU! sets to use.  The sentiments come from the Abundant Hope set.  I lined them up on a large block with enough room in between for stamping the lovely cross image from the Crosses of Hope stamp set.  Together they work out perfectly for me.  No wonder I hang on to so many of my retired stamps!  (I just can't bear to part with so many of them!!)

This version of the card was made with the same stamps inside and out, but a different design from the Watercolor Wonder Designer Notecards set.  I still went with the yellows and corals on this card because there are a few background dots in those colors.  The Daffodil Delight Stitched Ribbon really brightens up this card!  Either version of the card works for me and I'll be sending them out to family in a short while.

Hope you liked these cards.  They're so quick and easy when you start out with the Watercolor Wonder Notecards.  They literally just take minutes to make.  Hope you find time to do a little stamping over the upcoming weekend.  I'll be attending a church retreat tomorrow that I'm really looking forward to.  It should be interesting and insightful.  Have a great weekend!     Sharon

Wednesday, July 17, 2013

Pleasant Poppies

Hello again!  Today's card is another bright and summery card.  I was scoping out the fabulous cards on Stampin' Connection which is a showcase for demonstrators to share their creations with other demonstrators.  I came across a card that I thought was pretty made by Leathea Woodruff.  She cased it from last year's catalog.  So I thought I would case it from both!  Of course, I've added my own twists and touches to make it a little different.  But basically, it follows the ideas fairly closely.

Stamps:  Pleasant Poppies, Four Frames, Petite Pairs, and Papillon Potpourri
Ink:  Stazon Jet Black, Daffodil Delight, Tangerine Tango, and Old Olive
Paper: Daffodil Delight, Tangerine Tango, and Whisper White cardstock with Gingham Garden Designer Series Paper
Accessories:   Blender Pens, Daffodil Delight 1/4" Stitched Grosgrain Ribbon, Decorative Label Punch, Butterfly Punch,  Dotted Scallop Ribbon Border Punch, Glue Dots, and Dimensionals

This card was so much fun to color with the Blender Pens!  I haven't thought of using them for awhile, and forgot how easy they were to use.  Makes coloring these lovely poppies soooo easy!

When I was casing this card, first I added a card base of Daffodil Delight and changed the DSP to the new Gingham Garden.  Such pretty prints!  Then I added the sentiment on the cardfront differently from what I had seen.  I also added the little bow to the sentiment.  Thought it needed a little touch of ribbon. 

Now, the butterfly addition was another story.  During classes some time or another, the card landed on an open ink pad.  I surely didn't want to scrap the card.  Soooooo, the butterfly is covering the boo-boo.  Otherwise, I don't think I would have placed it in quite that place.  But it worked out just fine this way.  Thank goodness for these little butterflies!  Can't tell you how often they come to the rescue for those little problems!

That's it for today...  This has been a public service reminder to look at the samples in the catalog and use them for a jumping off place when you get stuck for ideas.  Believe me, there are great ideas just waiting for you to stamp them!!  Have fun stamping....     Sharon

ps - happy birthday to my sweet daughter!  Love you honey!!

Wednesday, November 7, 2012

Simple Greeting Card Kids

One of the sets in the catalog is a favorite of mine because the kids are so dog-gone cute.  I'm talking about the Greeting Card Kids set.  Each one of them is adorable and I find myself using this set every season I can.  So here's my Christmas card using the cuddly little girl with her wagon and tree.  Hope you like it as much as I do!
Stamps:  Greeting Card Kids and Greetings of the Season
Ink:  Stazon Jet Black and Watercolor Wonder Crayons
Paper:  Whisper White, Raspberry Ripple, and Old Olive
Accessories:   Big Shot with Window Frames Framelits, AquaPainter, White Organza Ribbon, Old Olive 1/8" Taffeta Ribbon, and Dimensionals
I've really been leaning towards the cleaner, leaner looking cards lately without lots of layers  and doodads on them.  This still looks like it has the clean lines that I like even though there are several layers of cardstock and 2 layers of ribbon. 

I'd thought of using the die-cut layers lined up straight, but decided it was more interesting with them set at angles instead.  I used both the Subtles and Regals Watercolor Wonder Crayons for this card.  They're so simple to use just by touching the tip of the AquaPainter to the crayon and painting away.  I always did like to color when little, and  still haven't outgrown it yet!

Thanks for checking it again!  I appreciate any and all of your comments.  Leave me an email address so I can reply to you personally.  When you comment you really inspire me want to do even better!  Thanks,
Sharon

Saturday, August 18, 2012

Shabby Chic Romance

Today you're getting a twofer - two versions of basically the same card.  The first card I'm sharing with you was from class this week.  Usually I cut a few extra pieces of whatever is needed 'just in case'.  And as usual, some of those extras were used.  So the second card I'm sharing is a little different because the fabric strip is missing so I adjusted.  Here, let me show you what I mean...

Stamps:   Bordering On Romance and Friendly Phrases
Ink:  Stazon Jet Black, Riding Hood Red, Certainly Celery, and So Saffron
Paper:  Certainly Celery, Riding Hood Red, Very Vanilla, and Watercolor Paper
Accessories:  Big Shot with Adorning Accents Edgelits, Twitterpated Flawless Fabric, Piercing Tool and Mat, Essentials Paper-Piercing Pack, AquaPainter, Curly Label Punch, Baker's Twine, Sponge Dauber, and Dimensionals

I haven't used fabric on my cards too often, but I really love the soft look and feel it adds to them.  It was an interesting accent for this card.  The edgelit die and the piercing pack that coordinates with it are wonderful.  I just love the look of piercing, and now I can use it to accent so many edges.  Doesn't it really add to the shabby chic look here?

One of the fun parts of classes is seeing how others' cards are the same but still different.  On this card, some ladies made the watercolored flowers a very pale pink and some were deep and very intense.  How fabulous that you can get such different looks with just one ink pad color!

Now here's the pared down version.  There's no fabric layer, but I still didn't want it too plain, so I added a bit of embossing with the Perfect Polka Dots TIEF.  Still has most of the same components, but a much cleaner, simpler look.  Either way, I'm really happy with this card.  Hope you enjoy it too!

Thanks for stopping by.  It's the weekend, so take some time to create!  Hugs, Sharon

Friday, July 20, 2012

Christmas 3rd Time Around

Ok, hope you aren't too tired of my Christmas in July samples 'cuz there's another one today.  This one will be the last one for awhile.  I really need to start thinking about the fall holidays coming up first and not get so carried away with Christmas.  So enjoy this one - there won't be anymore for a little while.

Stamps:  Christmas Blessings
Cardstock:  Very Vanilla, Gumball Green, Cherry Cobbler, with Be Of Good Cheer Designer Series Paper
Ink:  Stazon Jet Black, Gumball Green, and Cherry Cobbler pads, Daffodil Delight marker
Accessories:  AquaPainter, Pearls Basic Jewels, Victoria Crochet Lace Trim, and Dimensionals
When the catalog had just come out,  I knew this would be one of the first stamp sets I'd purchase.  The artwork is just lovely, and the sentiment and fonts used for it are perfect!  Can't tell I like it very much, can you?!

Even with the watercoloring, this card is very quick to put together once all the layers are cut and ready to put together.  It looks involved and time consuming, but actually it would be a great card to make up in multiples.  In fact, I think I just might!
Thought you'd want to see the inside here too.  Nothing too special, but nice words and a bit of color to set it off.

That's it for my Christmas in July theme.  Hope you enjoyed the ideas.  Definitely different styles and colors to think about.  Now it's time to start thinking about pumpkins and ghosties.  I should be back from conventions and ready to stamp by Monday.  Hopefully there will be goodies to share soon!  Sharon

Monday, August 1, 2011

Soft Elements of Style

Hey, can you believe it? I'm back again today! Think this might be a cause to celebrate. And after the day I've had, I think I need to celebrate that I made it through in one piece! Our grandson is sure giving me a run for my money. Do you have any idea how wiggley a toddler can be when he wants to get out of your arms and run around a bank? For being so small, he sure is strong. And when he's twisting around and pushing away, it's really hard to keep him in my arms. After we got out of the bank, he played outside and really wore me out. After he was picked up I just flopped on the couch and got nothing else done. Hmmm.... Do you think I'm getting too old for this?? Naw, not just yet, but I'm getting close!
Anyway, today I'd like to share one of my favorite stamp sets done in a soft, Victorian style. Or is it a shabby chic kind of style? Or maybe it's a cross between the two styles. Yeah, I think that's what I'm going to go with here.

Stamps: Elements of Style
Cardstock: Crumb Cake, Early Espresso, Pretty in Pink, and Very Vanilla
Ink: Basic Brown (retired), Crumb Cake, Pretty in Pink, Old Olive, and Soft Suede pads, and Soft Suede marker
Accessories: Frost White Shimmer Paint, Sponge quarter, Aqua Painter, Basic Pearls, Color Spritzer Tool, and 3/8" Taffeta Ribbon


I love the look of the Shimmer Paint lightly sponged all over the stamped and colored images. It gives it such a pretty mother-of-pearl look to the card and makes it quite lovely. There were quite a few color layering techniques used on this card. First the stamping and watercoloring. Then the edges were sponged with Crumb Cake to give it a more antique feel. Then came the sponged on Shimmer Paint. Give it a few minutes to dry nicely, then for the final touch. Adding a spritzing of color with the Soft Suede marker. Love the very delicate overall speckling effect you get with the Spritzing Tool. Just the perfect finishing touch for a vintage style card.

For this card I decided not to put any kind of sentiment on the front. This was it can be used for any occasion that comes along.

Thanks for coming by today. Hope you find time to stamp. My evening will be finished up with getting together one more card idea for stamping tomorrow night. I've got the idea in my head already. Hope it actually comes together when I get the stamp, paper, and ink out to make it!
Toodles - Sharon

Wednesday, June 29, 2011

Melon Mambo Floral

Last night was our hostess club get-together and we had so much fun going over the retiring lists one more time and getting those last items we just can't do without. You know there's always something you put off getting and then it's not going to be available anymore and you panic! How can it be retiring when you haven't even gotten it yet?! But that's the way it is in life. So this is fair warning - tomorrow is the LAST day you can order any retiring items. No, it's not too late yet and most things are still available. So if there's anything you still want - now's the time. You can easily click on the ordering button on the right and pick up those last minute items. Now on to the new(er) stuff!! This is another idea from my wonderful sister Connie! She has such great ideas - usually very crisp and clean lines and that's what this has going for it.


Stamps: Flower Fest and Curly Cute
Cardstock: Melon Mambo, Basic Black, Glossy White, and Brushed Gold
Ink: Stazon Jet Black
Accessories: Watercolor Wonder Crayons, Aqua Painter, Big Shot with Beautiful Wings Embosslit Die, Basic Black Satin Ribbon, Fire Round Rhinestone Brads, Mat Pack and Piercing Tool, and Dimensionals


I have to admit I would never have chosen glossy cardstock to watercolor on, but it's interesting. It shows up sort of 'flat' on the glossy paper so that makes it rather unique. I changed up her design a bit by using the wide satin ribbon to play up the gloss from the cardstock instead of her narrow grosgrain. Either style of ribbon works nicely though.

I just love the bright color offset by the bit of black to make everything so eye-catching. I love your idea Connie and the ladies last night did too! Thanks so much for your wonderful expertise. And thank you for coming by to see what's new today. So far it's been a really productive week. I think I'm back in the groove again. At least, I surely hope so!!
Sharon

Sunday, February 20, 2011

Perky Today

Well, at least my card is "perky" today! I finally got a chance to check out the Stamping 411 blog today. As soon as I saw the sketch they had posted for this weekend, I just knew what I wanted to make with it. For some reason it really got my mojo in gear and I really wanted to get downstairs and stamp today. Besides, it was snowing and blowing again outside, so who wanted to go out grocery shopping on a day like this? So, down to the stamp cave I went and started poking through my stash of designer papers to see what was there. Oh, this was fun today. Matching stamps and colors to a sketch - what could be better than that? Here's what their sketch inspired me to make....

Stamps: Morning Cup
Cardstock: Baja Breeze, Cherry Cobbler, Whisper White with Greenhouse Gala Designer Series Paper
Ink: Stazon Jet Black, More Mustard, Cherry Cobbler, Baja Breeze
Accessories: Aqua Painter, Neutrals Watercolor Crayons, Word Window Punch, White Striped Organza Ribbon, Sponge Daubers


Of course, I had a little problem following the sketch as it was. You know I just have to play around with ideas! I stood the sketch up on end, and changed around the ribbon idea. Instead of tying the ribbon around the card, I just cut the ends fish-tail style. I added the little sentiment to the corner of the main layer to 'perk it up'!

I love these colors together. Truthfully, I would never have chosen them to go together. Instead I needed to check in the Color Coach to give me a wow color combo, and this really seemed to work great.

Hope you like this idea, and I appreciate you stopping by to see it. Have a great Sunday and get a little time set aside to stamp. It really does 'perk' you up! OK, enough about the perky comments. I'll try to get them under control before my next post. lol
Sharon

Sunday, February 13, 2011

Blessings Card

Life has been crazy lately. Our little grandson is pulling himself up on the furniture now and crawls quicker than I do! Whew, grammy's gettin' worn out. But I wouldn't miss this for anything. Nothing brings out the sunshine quicker than one of his smiles! But that doesn't help me get any cards made now, does it? Seems like the inspiration bug hasn't hit in awhile. Of course, not being downstairs in my stamping cave might just have something to do with that little problem. I've been trying to come up with some great ideas for a workshop next week. This is an idea that I've been playing around with. Whatd'ya think??


Stamps: Herb Expressions
Cardstock: Whisper White, Rich Razzleberry with Brights Patterns Designer Series Paper
Ink: Stazon Jet Black, Old Olive, and Rich Razzleberry pads, and Rich Razzleberry marker
Accessories: Big Shot with Finial Press Emboss Folder, Pretty in Pink Taffeta Ribbon, Aqua Painter, Basic Pearls, Sanding Block, and Dimensionals


I love the look of embossed and sanded designer papers. Sort of a print on top of a print look. The polkadot print is so subtle that you really have to pay attention to notice it.

And what do you think of the ribbon? I just ran the Razzleberry marker across the pink ribbon. It dried almost instantly and came out almost as an ombre look. Really neat when you see it in person.

I added just a little strip of the designer paper on the inside to give it a little more interest. All in all, I'm happy with the look and think I'll be sharing this with the ladies next week. Hope they like it too!

Thanks for stopping by today. I appreciate you taking the time to leave comments. They always make my day!!
Sharon

Wednesday, December 15, 2010

Happiness Shared Case

Hey there! It's snowy outside and Christmas is just around the corner, but this week's classes were focused on just about anything but Christmas! The ladies all said they'd already decided on their cards and didn't want any more ideas to make them want to change their minds at this late date. So instead we had birthdays, sympathy, thinking of you, etc., etc. It was a fun break from everything holiday.


The first class project was very feminine and elegant. This card was sent to me by my sister Connie. She had used it for a class project a couple of months ago and it was a big hit for her. So, why reinvent the wheel when you've already got a winner?? Of course, there was a little tweak or two, but not many changes. It definitely looks harder to make than it is as long as you have some directions. And that's what I'm here for!


Stamps: Happiness Shared
Cardstock: Basic Black, Pink Pirouette, Pretty in Pink, and Whisper White
Ink: Stazon Jet Black, Wild Wasabi, Pink Pirouette, Rose Red, and So Saffron
Accessories: Corner Rounder Punch, 1 3/8" Circle Punch, Curly Label Punch, Aqua Painter, and Striped Organza Ribbon

I had thoughts of dry-embossing the Pink Pirouette layer, but decided I liked the simplicity and clean lines as it was. Instead of the sentiment from the set across the front, several ladies chose to use either a birthday or sympathy sentiment. Each of those worked equally well with the card design and colors, so I'd say this was one very versatile design and I'll probably be making more or these to keep on hand. Thanks Connie for sharing such a fabulous card idea with me!!! The ladies in class all loved it!

Hope you give this idea a try too. Clean, simple, and absolutely lovely! Thanks for stopping by. Have a cozy evening and try to stay warm.
Sharon

Sunday, November 14, 2010

Bells and Boughs Again

This has got to be one of my very favorite stamp sets in the Holiday Mini. Oh, what? Did I say that already about another set? Or two, or three maybe??? Yeah, I can't help myself! This mini has been the absolute worst one for my pocketbook in awhile! I just want it all!! Hey SU!, can you just ship me one of everything?? Ok, let's be serious now for just a moment. As much as I would like it, I really can't have one of everything. But I can sure have fun with what I did get, right?
While planning for class, I just hit a brick wall with the last card for them to make. Urgggghhh! I just hate when that happens! But ta-da!! Stampin' Connection to the rescue! There was a totally fabulous card there by Jennifer Weide that would be perfect for my ladies. Of course I had to give it a little tweak here and there, but the colors, design, stamps used, and layout was all hers. I just made it a bit simpler so my class ladies wouldn't lynch me and refuse to stamp anymore 'cuz they thought it was too hard for them. It still remains true to her idea. Thanks Jennifer - it's so lovely!

Stamps
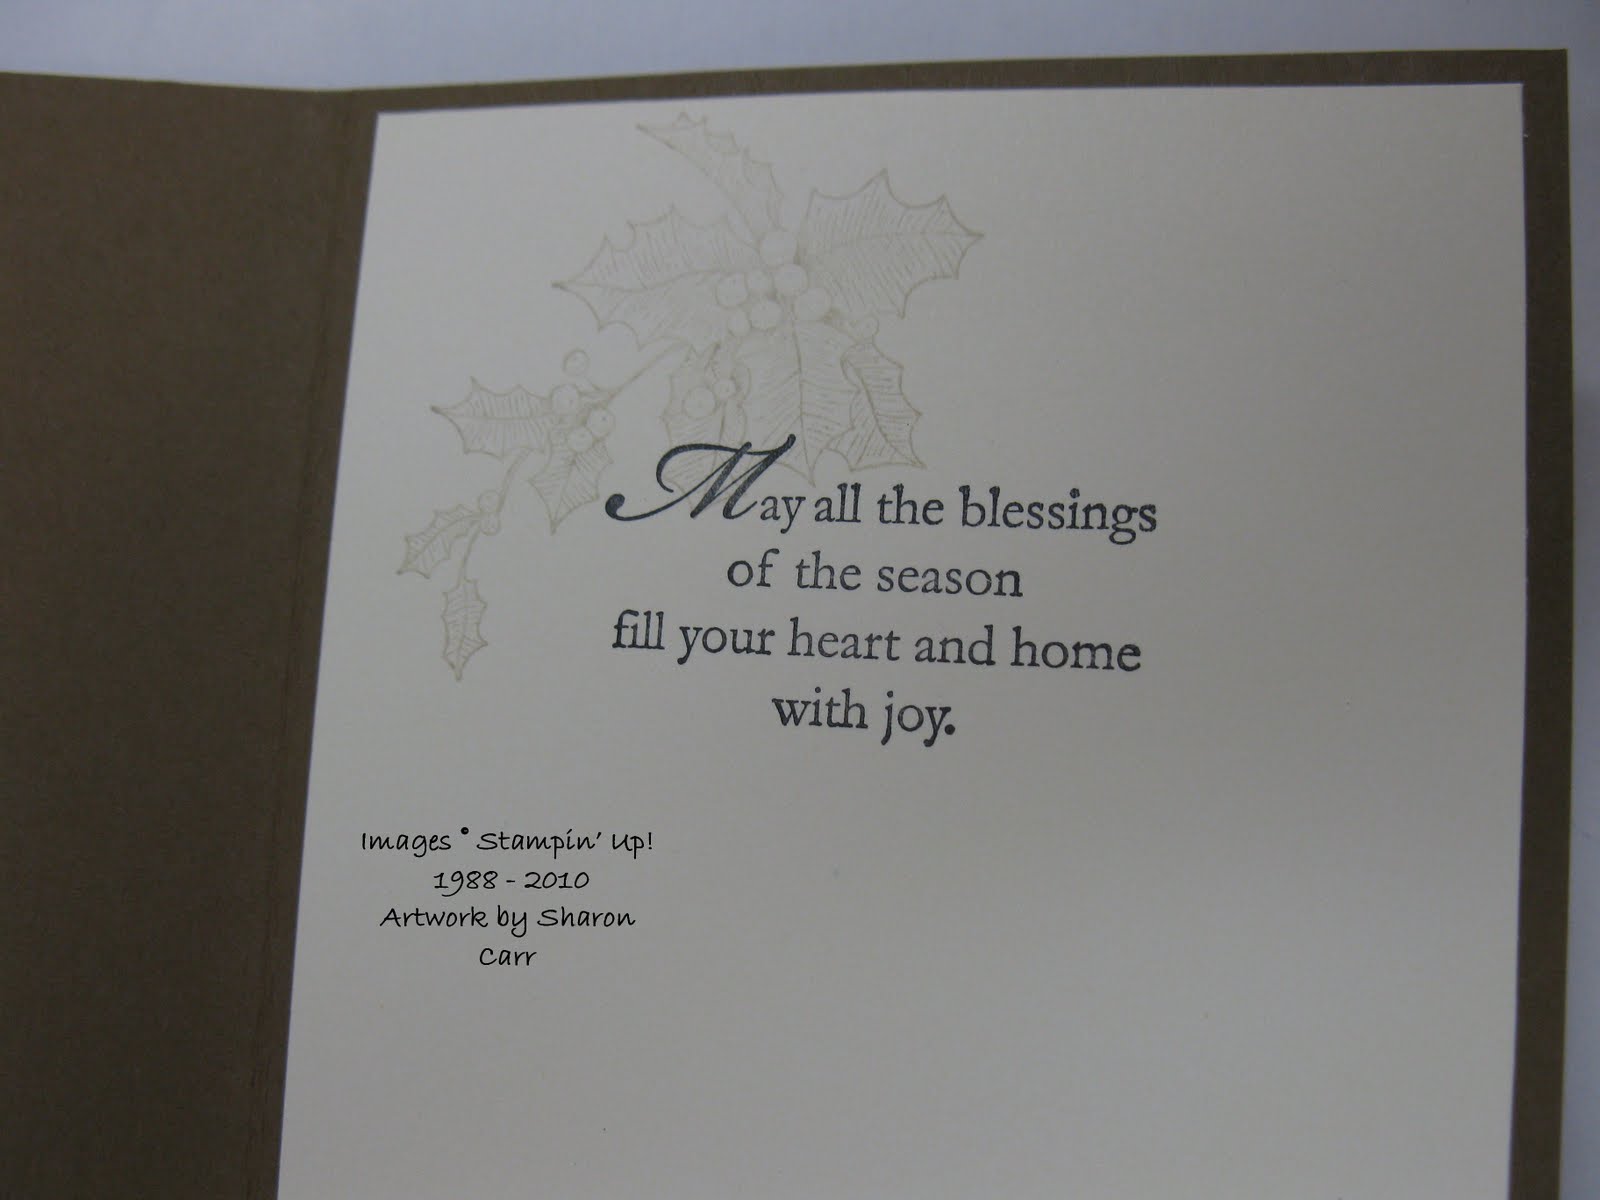
: Bells and Boughs and A Cardinal Christmas for the words inside
Cardstock: Soft Suede, Crumb Cake, Cherry Cobbler, Always Artichoke, and Very Vanilla with Deck the Halls Designer Series Paper
Ink: Stazon Jet Black, Cherry Cobbler, Always Artichoke, Wild Wasabi, and Crumb Cake
Accessories: Sticky Strip, Champagne Glass Glitter, Scallop Border Trim Punch, Aqua Painter, Mini Glue Dots, Sponge, and Dimensionals


Isn't it pretty? The changes I made were minor. Jennifer had stamped two of the poinsettia & pine images on the layer and I only did one. I added the scalloped edges on the sentiment. See, very minor changes.

You know I'm a sucker for anything with watercoloring, so I had to do this card. First touch with the Aqua Painter to the poinsettia, and yikes I thought I'd blown it with color way too dark. But as more color was added in, I loved the different depths of color on the petals. I'd love to get this whole card framed for a Christmas accent piece. Hmmm, I'll have to look into that....


This is the first time in ages that I'd done a strip of tape and glitter on a card. This Glass Glitter in the Holiday Mini is just beautiful. It's chunkier than normal, but didn't feel sharp. That sounds odd, but it was very smooth to the touch. And the Sticky Strip holds in onto the card like magic. Anyway, I'm now hooked on this stuff and I'll have to find more places to use it! Hope this glitter makes it into the catalog - it's the best!

Inside I added a light image of the holly and berries tucked over the sentiment. It seemed to be just enough to offset all the old-fashioned elegance of the card.

Well that's it for today. Maybe I can check in on one of the Challenges and get some stamping in today. Have a great Sunday!
Sharon

Thursday, October 14, 2010

More Fall Leaves

I just can't seem to get away from these leaves! I know I need to get crackin' on the Christmas ideas, but for some reason I seem to be wallowing in fall leaves! Just love the crisp air and the actual smells of autumn. So bear with me a little longer while I roll around in the piles of leaves I've been making. lol I promise I'll get out some Christmas stamps and papers this weekend!! So if you're not too tired of fall leaves yet, come join me for another stroll in the leaves and kick a few around!

Stamps: Autumn Splendor, Grateful Greetings, and Bright Blessings Jumbo Wheel
Cardstock: Crumb Cake, Old Olive, Pumpkin Pie, and Naturals Ivory
Ink: Basic Brown (retired), Pumpkin Pie, Old Olive, Cajun Craze, and VersaMark
Accessories: Aqua Painter, Jumbo Handle, Paper Corrugator, Designer Label Punch, Curly Label Punch, Paper Snips, and Dimensionals


One of the things I like most about this card is how the cardstock curled up like crazy after it was watercolored and then cut out. All of the little edges are curled up naturally. It's just as curly as a real oak leaf!

I also like the Bright Blessings Jumbo Wheel. Sometimes I just wheel it on scrap cardstock and trim out words that I want to use. Ane there's a lot of nice words and phrases on that wheel! Just think of it as getting a whole set of words and phrases for a tiny price.


Just had to show you another view of that awesome leaf. Wouldn't it be cool to cover that leaf with Crystal Effects and make a pin out of it? And I've got just the jacket that this pin should go on. Wouldn't that be lovely? Hmmmm..... Doggone it, there those ideas go again! And it's another leaf idea!! Will they never end??

Oh well, maybe I'm not ready to give up my leaves just yet. Maybe next week, or ummm, how about the week after that??? Stay tuned, you may just be surprised! Have a great evening!
Sharon

Friday, September 24, 2010

Candy Cane Christmas

Ok, this is the last fabulously gorgeous card I have for you. I wish I had lots more, but alas, you'll just have to look at what I create after today, not what my talented friends whip up in their spare time! lol Unfortunately it's true, I hang out with people that are so much more creative than I am. And I keep hoping some of it will rub off on me. It's bound to soon, don't you think? Osmosis or something like that??

Anyway, here's the last card of the talented ladies that I was stamping with last Saturday. This card was designed by Kendra Diserens. When I first saw it, candy canes jumped to my mind so that's the title I gave it. I just wish there was some little girl I could send this to on Christmas. Wouldn't it be perfect for a little rosy-cheeked darlin'? Well, since I have a cute little BOY grandbaby, I'll have to think of someone else to treat with this little Victorian snowgirl.


Stamps: Greeting Card Kids, Season of Joy
Cardstock: Blushing Bride, Cherry Cobbler, and Whisper White with Candy Cane Christmas Designer Series Paper
Ink: Stazon Jet Black, Cherry Cobbler, Marina Mist, Wild Wasabi, Soft Suede pads, and Daffodil Delight Marker
Accessories: Big Shot with Square Lattice Embossing Folder, Real Red Satin Ribbon, Aqua Painter, 2-Way Glue Pen, Dazzling Diamonds Glitter, and Coluzzle (retired)


Isn't she just the cutest little girl? And can't you just about feel the cold breezes and pepperminty goodness? It makes me want to check the stores for candy canes! I just love peppermint candy canes, and this card makes me think I can taste them! Thanks Kendra for designing a very special card. I love it!

Well, there you have it. The tri-fecta of awesomely gorgeous Christmas cards. From now on it's back to my quick and easy designs. And yes, I'll be having more to share with you very soon.

Thanks for stopping by today. I really appreciate you taking the time to stop by and I love to read your comments, so keep them coming. Come on back soon, I'll work on getting something new up for you to peruse.
Sharon

Thursday, September 23, 2010

Bells and Boughs Card

Ok, ready for the next installment of some absolutely fabulous Christmas cards? Well, I promised that you wouldn't be disappointed, and I'm pretty sure that is very true. What?
You don't want me babbling on??

Just get on with the card?
Is that what you just said???
My goodness, some of us are getting just a little impatient there, aren't we? All right, here's the 2nd installment of some fabulously awesome Christmas cards. This one was designed by Phyllis Dahlstrom. She almost always has some cut-out layers on her cards that really make them a 'cut above' the rest.
Anyway, it's lovely, isn't it?
Stamps: Bell and Boughs
Cardstock: Always Artichoke, Cherry Cobbler, and Very Vanilla with Deck the Halls Designer Series Paper
Ink: Stazon Jet Black, Cherry Cobbler, Always Artichoke, Crumb Cake, and Soft Suede
Accessories: Aqua Painter, Wide Oval Punch, Always Artichoke Grosgrain Ribbon, Sponge Daubers, and Dimensionals
I love the vintage feel of this card. All the colors and images are working together to make it just gorgeous. And that fabulous Deck the Halls DSP - wow - really makes this card look rich!
Cutting out the bells and ribbon was a bit of work, but so very well worth the time. Having them popped up over the holly sprig really makes them stand out.
If you like the vintage look, consider getting this stamp set, and absolutely get the Deck the Halls DSP! It's a 'must-have' on my list for making cards this Christmas!!!
Ok, are you ready for one more fabulous Christmas design? Come on back tomorrow for the last of the awesome, gorgeous cards we made last Saturday. Have a terrific evening...
Sharon

Saturday, August 28, 2010

Witchy Girl

Have I mentioned lately how much I like SU!'s cute little kids? They have some of the cutest ones available, and I'm such a sucker for them! Today I have another sneak peak of a set coming out in the new Holiday Mini Catalog. (If you don't have one yet, I'd be happy to mail one out to you - just contact me about it!!) Anyway, the cute little witch in the Fang-tastic set is my muse for today. She might be a witch, but she looks pretty darn cute and not scary at all.


Stamps: Fang-tastic
Cardstock: Pumpkin Pie, Not Quite Navy, Old Olive, and Very Vanilla
Ink: Stazon Jet Black, Not Quite Navy, Pumpkin Pie, Old Olive, and Blushing Bride
Accessories: Neutrals Watercolor Wonder Crayons, AquaPainter, Sponge quarters, Basic Black 1/4" Grosgrain Ribbon, Champagne Shimmer Paint, Large and Small Oval Punches, Paper Snips, and Dimensionals


Thank heavens for those Paper Snips. It's the only way to cut out all those little pieces, especially that little girl. Her arms and legs are so skinny and then there's her hair and her broom. Whew. I think I need glasses that are a bit stronger to see that little detailed stuff now that I'm getting a little bit older. Notice I didn't actually say I was old, just getter older. There's a big difference there that I want to make very clear!!

Anyway, back to the card! The background was sponged on, just using different styles for the sky and grass. The grass was just sponging in from the edge, but the sky was lightly sponged all over and then layers of darkness built up. Still sponging lightly, just more layers.

Just a little side note here. When I heard SU! was taking away Blush Blossom and giving us Blushing Bride instead, I was really unhappy. But now that I've been using the Blushing Bride color for all skin tones instead, I'm so very happy with the new color! It works out just great. For my little girl, I used the Blushing Bride ink for both her skintone and the blush! It's really a great color and I have to say "kudos" to SU! for this new color.

I wish the picture showed the smidgeon of Shimmer Paint on the buckle of her hat. IRL it adds just a cute touch of glimmer. Hmmm... maybe I just might go back and add a touch to those stars on her little dress. That might be nice.

Hope you like my little witchy girl today and maybe get your Halloween stamps out to play. You know, time's running out to get these made and in the mail on time. Thanks for stopping by. Please leave your comments on my little witch - they are very appreciated.
Sharon

Wednesday, August 18, 2010

Greeting Girl in Blues

Did I mention lately how much I like cute little kids? And watercoloring too?? Well, I had a little bit of extra time on my hands yesterday, so I thought I'd get in a little stamping just for me. Not for a class or swap, or for a birthday that someone wanted a card for 'right now'. Just-for-fun stamping. Haven't had too much of that lately, so it was a real pleasure just perusing my stamps and trying to decide what to play with first. Since I had used the Fang-tastic set a couple times with that cute dracula, I thought it would be fun to change the season but stick with the kids. So that was my inspiration for my wintry old-fashioned little girl. I love these vintage-looking images. They make me feel so nostalgic (but sorta old too!) She's a real lil' charmer and so much fun to do.


Stamps: Greeting Card Kids, Snow Swirled, and Occasional Quotes (hostess level 3 set)
Cardstock: Bashful Blue, Bravo Burgundy, Whisper White and Night of Navy DSP
Ink: Stazon Jet Black, Bashful Blue pads, and Night of Navy marker
Accessories: Watercolor Wonder Crayons, AquaPainter, Snowflake Punch, Large Oval and Scallop Oval Punches, Scallop Trim Border Punch, Vanilla Shimmer Smooch Spritz, Champagne Mist Shimmer Paint, Basic Rhinestones, and Dimensionals


Isn't she a real cutie? Seems like I ended up using just a smidgeon of this and a little of that. When she was all finished I had a real mess on my table and lots of stuff to put away. But I think it was worth it all and I'm very pleased with how it turned out.

Don't know if you can tell from the picture, but the shimmery snowflake really turned out cute on this. I had tried a bow and brad in that corner, but it just didn't work for me. Thank goodness we still have that snowflake punch. I think it's a wonderful accent on winter cards.

For the sentiment, I ended up using only part of the stamp and inked it with the Navy marker. The whole sentiment seemed too big for the layout of this card.

Ok, that's all for today. So far it's been a good week and I've been able to post several days in a row. Hope to keep that up. At least that's my plan. We'll see how the week continues to unfold. Hope you're having a great week yourself.
Sharon

Saturday, August 7, 2010

Country Blessings

Ok ladies, I have a couple versions of a Thanksgiving card for you today. One is the original I made for the ladies to make on Tuesday night, and the second one is using up an extra stamped piece from Tuesday night. Got that? And I also need to apologize for the carpet background on the pictures. I'm all set up for a used stamp sale and there's not an inch of table space left anywhere! (where have all those stamps come from??? YIKES!) I haven't done a sale for the last 4 years, and it sure looks like it! I sure hope some of these sell so I can get a bit more organized. But I digress....
I did find two of the cards from Tuesday that missed the box that was mailed out, so I thought I'd share with you. One of my main plans with making these cards for the soldiers is to use up retired cardstocks, DSP, and accessories that I have on hand and just fill in with current products. Plus this gives me a chance to use some of my favorite retired stamp sets too! All in all it is a win-win situation for me and the soldiers, don't you think??
So for this first card, I used a special set we were able to buy from SU! and also get a magazine subscription too. Needless to say I was rather shocked when I looked at the copyright date to see how long ago it had been - 2006!! But I still love the artwork of this set and will probably keep it forever. Oh yeah, I was going to show it to you, wasn't I???
Stamps: Country Blessings, Holidays and Wishes, Itty Bitty Backgrounds, and Canvas (miss all of these so much!!)
Cardstock: Sahara Sand, Always Artichoke
Ink: Basic Brown, Always Artichoke, More Mustard, Cajun Craze, and Sahara Sand
Accessories: Aqua Painter, Metallic Eyelets, Crop-a-dile, Linen Thread, and Sponge Dauber
So on this card, about the only things current are the two cardstocks, most of the ink, and Linen Thread. The other goodies are all retired, but you can use this idea using current stamps quite nicely.
Now the 2nd card was just put together with a left-over stamped piece from Tuesday and extra cardstock I have sitting around. The ladies used one of our retired naturals cardstock - I think this one is the white tone. I had just a small strip of Always Artichoke and put the card together differently to utilize what I had. The background was changed to the current Sanded set. Not bad for using up what was available, was it?
I think the soldiers will enjoy using these cards to send Thanksgiving wishes home to their families. At least I hope they do! And speaking of Thanksgiving, I want to take a minute to thank you for stopping by and checking in with me. I'll try to be a little more consistent with my posting. Now, you noticed I said 'try', didn't you? Some days I'm just to 'fried' to get down to the stamp cave and try to create something. But I'm sure you all know how that goes in your own lives too. So take a bit of time to relax and enjoy the weekend.
Sharon

Saturday, June 26, 2010

Saturday Challenge

Hey it's Saturday, so there's a new Stamping 411 Sketch Challenge going on here. I truly cannot believe I'm actually checking it out, and stamping it on time!!! Woo Hoo!! I've been so behind the times lately that I've missed out on many of them. If you find the time today (or even later on in the week), why not give their challenge a try? The 411 ladies all have so much talent and come up with easily workable sketches that really do make up into lovely cards. Give them a try!
Since I've been working on designing cards for my ladies at church to make for our soldiers, my thoughts have been geared towards Halloween and Thanksgiving. I know, that's so far in advance I'm having a really, really hard time thinking pumpkins and ghosts! I got out one of my favorite sets for Thanksgiving though, and thought I could use it for today's sketch. Hope you like the finished product....
Stamps: Autumn Harvest
Cardstock: Very Vanilla, Pumpkin Pie, and Old Olive
Ink: Basic Brown, Pumpkin Pie, Old Olive, and (the very new) Cajun Craze pads, and Chocolate Chip Marker
Accessories: Big Shot with Square Lattice Embossing Folder, Aqua Painter, Vintage Brads, Old Olive 1 1/4" Striped Grosgrain Ribbon, Log Cabin Smooch Spritz, Color Spritzer Tool, and Dimensionals

Ok, if you've checked out the sketch already you know that I didn't follow it exactly. After I had all the components together, I just didn't like the ribbon going across the card, soooo.... Yeah, I improvised just a bit. I tried several different things, but nothing worked for me until I hit upon the ribbon loop. And then I thought it needed the brads to anchor it. So, there goes another opportunity to follow a sketch that I've blown. It seems to be a disease with me - I just can't do a sketch or case another card exactly!
On another note, does anyone have any suggestions on using the Log Cabin Smooch Spritz? It sprayed so blotchy I was happy to cover most of it with the main image. Help!! What am I doing wrong with it???? I turned to the Color Spritzer Tool and a marker to add the speckles onto the main image because I didn't want the whole thing blotched with the dark spray. I know there has to be a trick to this, but I haven't found it yet. If anyone knows, please share with me and I'll pass on the info here. TIA
Have a happy stampin' day!
Sharon

Monday, June 21, 2010

Sneak Peak Beauty

Morning all! Hope you had a great weekend and celebrated your dad. Since mine diedquite a number of years ago, I just remembered all the wonderful traits he had and thanked God that he had given me such a godly man for my father. Then I celebrated my husband and son-in-law who is a new dad. In fact, I thought I'd share with you a pic of the new daddy and baby. Wouldn't you love to see that?
Isn't this just precious? It looks like there is already a great bond between father and son. He just adores that little guy and is so willing to help take care of him. (Well, not so much a 2 and 3 o'clock in the morning.)
Carson is so blessed to have parents who love him so much and care about his every need. Looking at them reminds me about how much our Father God loves each one of us. Then I'm overwhelmed with thankfulness.
Ok, I know you didn't stop by to hear me get all mushy on you, did you? But who can resist a cute little baby face like that??? Certainly not I! Oh, grandma is going to be such a push-over!! lol
Ok, on to the lovely card I have to share today. This was designed by my downline Phyllis Dahlstrom who always designs the loveliest cards for our swaps! I love the use of pink and brown she used - so soft, yet substantial.
Stamps: new Level 1 Hostess set 'Because I Care'
Cardstock: Early Espresso, Pink Pirouette, and Whisper White
Ink: Pink Pirouette, Always Artichoke, and Stazon Brown (non SU!)pads, So Saffron marker
Accessories: Big Shot and Vintage Wallpaper Embossing Folder, AquaPainter, Scallop Trim Border Punch, Large Oval Punch, Pink Satin Ribbon, and Dimensionals.
Altogether a very lovely combination of color and layout. And don't you just love the new Hostess stamp set? All I can say about it is "Wow!" Well, actually I can say alot more, and I probably will over the coming months. There is something about these line-art stamps that just draw me to them and I can't wait to start coloring. Stampin' Up! really does make some simply fabulous stamps, and this is one of them!
Well, I just previewed what I'd been writing today, and the preview is all askew. It looks right when I'm typing, but the spacing is all wrong in the preview. Don't know what's going on with that, but I'm going to try to publish anyway. Hope it comes through ok, cuz my hubby is out of town and won't be able to help me fix it. As it is, the sight has been messed up the last week or so and we can't figure out how to get the sidebar up where it belongs. Why is this blog going spastic all of a sudden? Am I going to have to trash it and start all over??? Oh, I sincerely hope not! Stay tuned to see what happens next....
Frustratingly yours,
Sharon