Monday, July 29, 2013

Sneak Peek Thankful

I'm not sure why some weekends I just need to veg out and don't have an ounce of ambition to me at all.   Last weekend was one of those times and I feel like I missed an opportunity to get lots of things done.  Instead I only got around to doing the basics of some laundry, dishes, and picking up.  Most of the time I should have been creating, I was sitting and staring into space or wandering around trying to think of something fabulous and coming up with a big, huge blank.  Yuck!!  I finally made one card that I think is worthy of attention.  It was made with one of the new sets from the Holiday Catalog that you'll be able to order from in just a few more days (August 1st)!!  Here's the sneak peek for you...

Stamps:  Harvest of Thanks
Ink:  Cajun Craze pad, Cajun Craze, Always Artichoke, and Crushed Curry markers
Paper:  Naturals Ivory, Cajun Craze, Crushed Curry, Always Artichoke, and Very Vanilla
Accessories:   Big Shot with Apothecary Accents Framelits, Square Lattice TIEF,  Early Espresso 1/8" Taffeta Ribbon, Piercing Tool and Essentials Paper Piercing Pack, and Dimensionals
Thanksgiving is a favorite holiday of mine because the idea of taking time out to thank God for all the blessings He has given us is very important.  I know I get easily caught up in all the busyness of life and get lax in giving thanks, so this is a great reminder to be grateful.  So it's no surprise that this was the very first stamp set I purchased from the Holiday Catalog.  I wanted to have lots of texture and layers on the card without it being too overdone, and I think that worked out with the embossed Crushed Curry layer tucked between the other differently shaped layers.

I love how the main image looks colored in with the markers to enhance it.  I didn't really work on getting shading on the image because the way it's made the highlights happen automatically.  I also decided not to give it lots of sponging like I normally do for autumn cards, but kept it clean and simple. 

Hope you like this idea and give it a try.  I've got to get my creative juices going and come up with more ideas using this set.  Thanks for stopping by to see what's new.  Remember, ordering from the Holiday Catalog starts on August 1st!       See you again soon!     Sharon

Wednesday, July 24, 2013

Simply Sketched Hostess set

Today's card was made using the new Simply Sketched hostess set.  Do I 'simply love' this set?  Ohhh yeah!  It's one of my favorites from the whole catalog, so that's saying a lot!  I couldn't wait to get my hands on it and last night the ladies in my hostess club fell in love with it too!  We made a softly pretty card using 3 stamp sets and a couple of different techniques to make the card 'simply fabulous'.  Maybe you'll fall in love with it too.   Remember, you have to be a hostess to get this set.  If you'd like to book a party (or even a book-party!), let me know.  I'd love to plan one with you.  It'll be lots of fun.  OK, here we go with today's card...

 Stamps:  Simply Sketched, Papillion Potpourri, and Creative Elements
Ink:  Stazon Jet Black, Crisp Cantaloupe, Pistachio Pudding, Strawberry Slush, Coastal Cabana, and Baked Brown Sugar, and Illuminate
Paper:  Whisper White and Crisp Cantaloupe, and Cardstock Vellum
Accessories:  Bitty Butterfly Punch, Aqua Painters, Blender Pens, and Glue Dots
Do you like the overall look of the card?  I think it's just gorgeous!!   The pictures just don't do this card justice.  The lacy overstamping with Illuminate ink and the stamp from Creative Elements in the corner is such a soft, pretty touch.  I ended up taking about a dozen pictures trying to get it to show up better, but it just didn't come out as pretty as it is in real life.   Take my word for it - you've got to give this idea a try!

A trick I tried with this card is giving the stamped images a quick wash of color with the Aqua Painter.  Then go back over it where ever I wanted some shading using the Blender Pens.  I found it didn't raise the nap of the paper like repeated layers of using the Aqua Painter does at times.  That's a nice thing to know when layering colors!
Another fun addition to the card is the butterfly.  We stamped with Stazon on the Cardstock Vellum, punched it out, then colored on the back side.  This gives it a softer look whereby the color is shining through the front with the black ink nice and sharp - like a stained glass effect.  The butterfly was then attach with a Glue Dot on the body and the wings slightly curled.

What more can I say?  It's simply gorgeous and you need to make one (or a dozen!) too!!

Thanks for stopping by to see what's new.  Come and stamp with me again soon.  Sharon

Saturday, July 20, 2013

New Fun and Easy Technique!

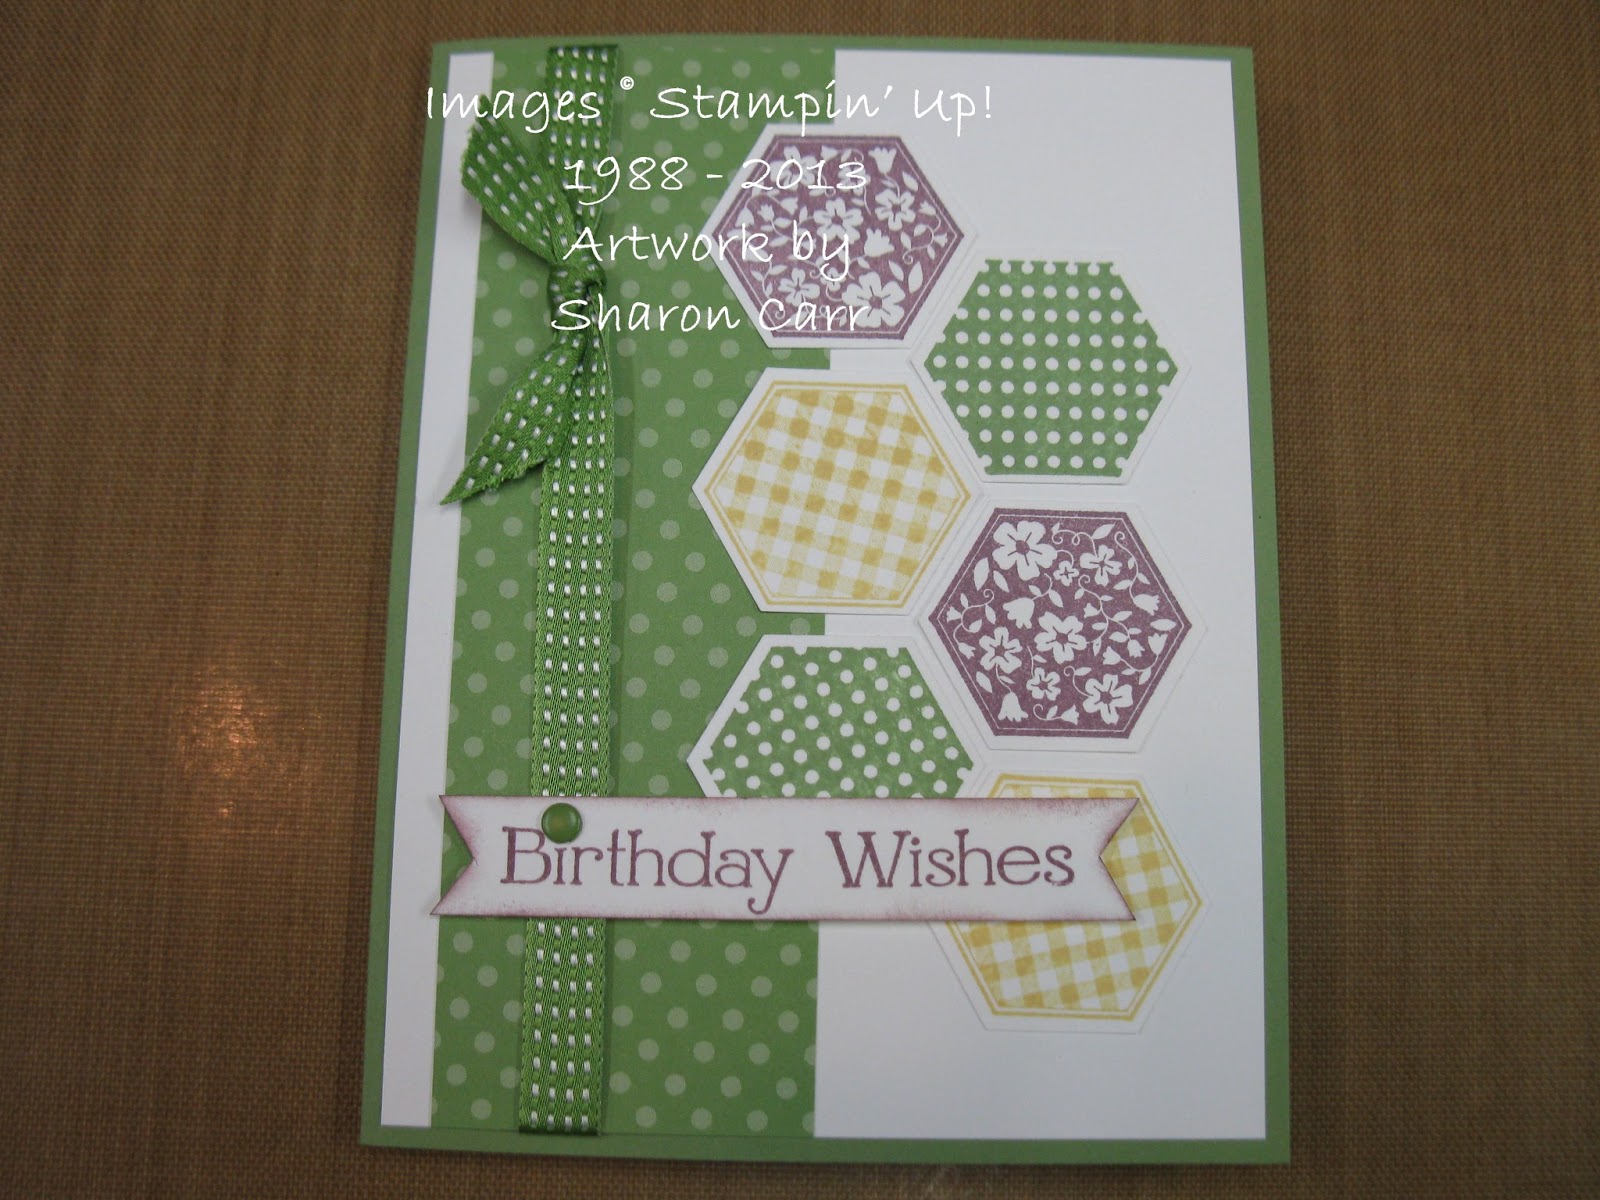
Oh my!  You're gonna love this quick and easy technique!  I just saw a card made with this masking tape technique and had to give it a try right away.   It's so quick and easy, but looks spectacular.  I'm going to share this with my Hostess Club ladies this week for sure.  But first...  Remember I had you finding the changes between two cards I made?  Here's the list of changes I made in case you didn't figure it out:
1.  same stamp set for sentiment, but different stamp used
2.  used a new Candy Dot on the 'i' in birthday
3.  added a layer of Wild Wasabi for the card base and a layer of Whisper White inside the card for the sentiment and note I wrote.
See, it was just little changes, but it makes each card unique.  Now on to this cool, new idea (at least it was all new to me!!)
 
Stamps:  Serene Silhouettes, Express Yourself,  and Wanderlust (one of the Photopolymer Stamp sets we sell)
Ink:  Bermuda Bay, Crisp Cantaloupe, Baked Brown Sugar, and Basic Black
Paper:  Crisp Cantaloupe, Bermuda Bay, Basic Black, and Whisper White
Accessories:  Dimensionals and painters tape
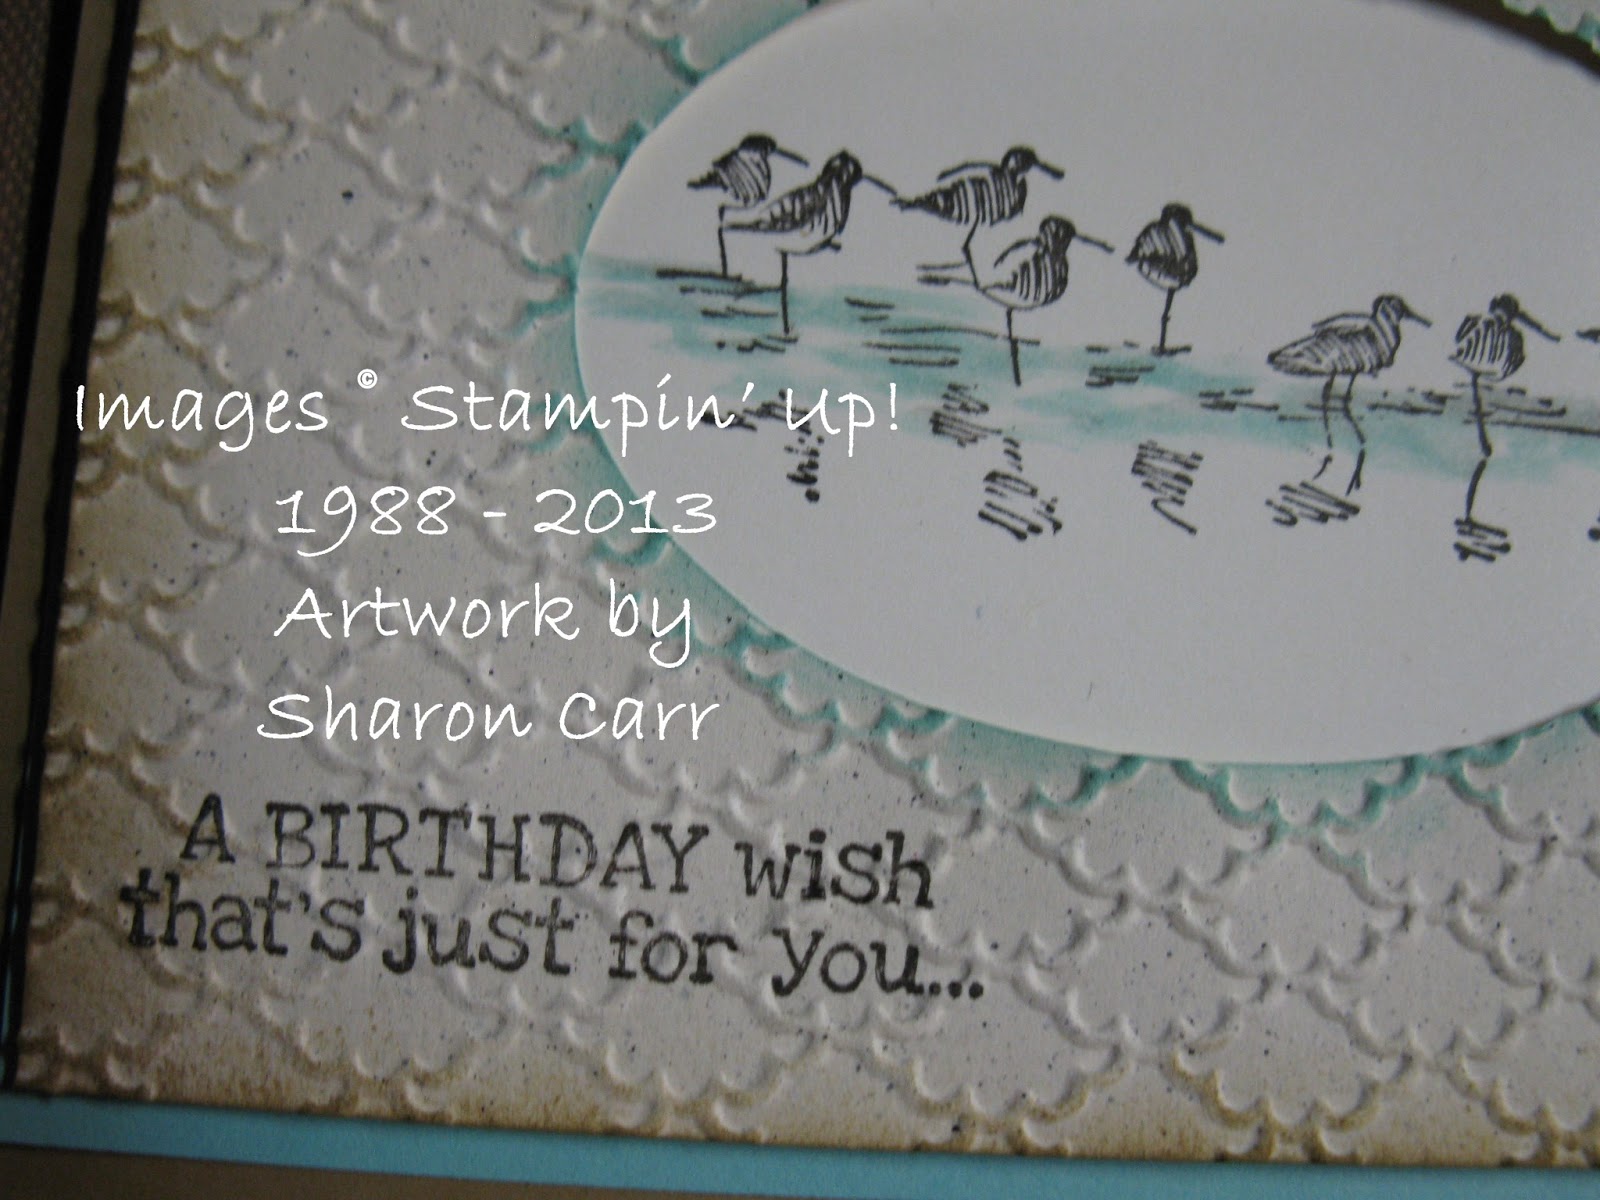
I ran across a tutorial on using masking tape to transfer ink to your cardstock here.  It looked really different for a background and I had to try it.  There are a couple things I learned while making this card.  First of all, the older 'classic' stamp pads seemed to give a softer transfer of color.  The new pads are pretty juicy which are wonderful when inking a stamp, but are a bit much for this technique.

Secondly, I think next time around I'd use a lighter color than the Baked Brown Sugar.  It looks kind of 'heavy' on this card.

Thirdly, make sure your black ink pad is thoroughly inked up.  I cut off the part that didn't look nice because it wasn't a nice crisp image, and inked up a smaller image to be able to use my paper.  Don't want to throw anything away, you know!

TIP:  The instructions said to use glossy cardstock and masking tape.  Since we don't sell glossy cardstock anymore, I thought I'd try it with Whisper White instead.  I used a low-tack painters tape so it wouldn't rip the cardstock when taking it off.  On this card, it worked perfectly. 

Also, did you  notice the little airplane in the sky?  That's from the Wanderlust stamp set and was the perfect addition to the card.  I was looking for something little to go up in the corner, a bird maybe.  But couldn't find anything.  Then I remembered this set - the airplane is just what was needed!  And it goes nicely with the sentiment too.

Well, there you have it for today.  Hope you give this a try and let me know how it works for you.  Happy stamping!  Sharon

Friday, July 19, 2013

Find the changes game

Ok, are you ready for something a little different today?  I had some card components left over from class last week and I was playing around with them.  I made the first card and then made a few changes on the second card.  Your challenge today (if you choose to take it) is to find how many changes were made between the two cards.  Come on, it's not too hard and will give you something a little different for a change.  Give it a try and let me know what you find!


Stamps:   Six-Sided Sampler, and Four You
Ink:  Wild Wasabi, So Saffron, and Perfect Plum
Paper:  Wild Wasabi, Whisper White cardstock and Subtles Collection DSP Stack
Accessories:  Hexagon Punch, Gumball Green 3/8" Stitched Satin Ribbon, Subtles Candy Dots, Sponge Dauber, and Dimensionals
Can you find the differences?  There's more than one, but less than 8.  Does that help any at all?   
 
By the way, did you notice how well the Gumball Green ribbon works with the Wild Wasabi DSP and ink?  It is different, but close enough that it works together. 
 
I made the 'Thinking of you" cards first (3 of them), then remembered I have a birthday party coming up on Sunday, so thought I'd change it up a bit for the last card.  Seemed to work out fine with the changes and will be perfect for Uncle Rey on Sunday.

Hope everyone is having a fabulous time at convention right now.  I'm so bummed I'm not there, but with more health issues last weekend, it's really good that I opted to stay home.  Guess I've got to start planning for next year and get all the health issues under control so I can go!  I miss all my friends sooooo very much!  You'll have to tell me all about all the fun things you saw and did!!!
Inky Hugs, Sharon
 
(If you want to know what the changes to the card are, I'll post tomorrow and let you know.)

Thursday, July 18, 2013

Serene Sandpipers

Okay, so I'm not at convention with my friends and I'm a little bummed out.  So I need to think happy thoughts.  And that makes me think of spending time with family at the ocean.  When I saw the Wetlands stamp set, the line of sandpipers reminded me of wonderful times visiting the ocean with my family.  I knew this would be one of the sets I needed to get.    This is a simple design that would work for many occasions, and for either male or female.  Just change up the sentiment on the card for whatever occasion you might need. 

Stamps:  Wetlands and Remembering Your Birthday
Ink:  Early Espresso, Baked Brown Sugar, and Coastal Cabana pads, Coastal Cabana marker
Paper:  Baked Brown Sugar, Cabana, Very Vanilla, and Naturals Ivory
Accessories:   Big Shot with Ovals Framelits, Fancy Fan TIEF, Aqua Painter, Sponge Daubers, and Dimensionals
I knew I wanted the sandpipers on an oval piece, but changed my mind and stamped it through the die-cut oval instead.  I chose the Fancy Fan TIEF because it reminded me of waves.  If it was embossed the other way, it reminded me of sea shells, so either way it was perfect.

The new In Colors used here are just too yummy!  I love how they go together nicely and give such a serene feeling to the card.  Fits right in with beach colors.

On this card I used an Aqua Painter to add just a bit of color to the water's edge where the birds are walking.  I thought of adding more color, but we'll just save that for another card on another day.  This has such a clean and simple look, I didn't want to spoil it with anything else.

Thanks for stopping by today.  If you're like me and not at convention right now, let's not feel sorry for ourselves, but get out our stamps and paper and create anyway!  Hugs,  Sharon

Wednesday, July 17, 2013

Pleasant Poppies

Hello again!  Today's card is another bright and summery card.  I was scoping out the fabulous cards on Stampin' Connection which is a showcase for demonstrators to share their creations with other demonstrators.  I came across a card that I thought was pretty made by Leathea Woodruff.  She cased it from last year's catalog.  So I thought I would case it from both!  Of course, I've added my own twists and touches to make it a little different.  But basically, it follows the ideas fairly closely.

Stamps:  Pleasant Poppies, Four Frames, Petite Pairs, and Papillon Potpourri
Ink:  Stazon Jet Black, Daffodil Delight, Tangerine Tango, and Old Olive
Paper: Daffodil Delight, Tangerine Tango, and Whisper White cardstock with Gingham Garden Designer Series Paper
Accessories:   Blender Pens, Daffodil Delight 1/4" Stitched Grosgrain Ribbon, Decorative Label Punch, Butterfly Punch,  Dotted Scallop Ribbon Border Punch, Glue Dots, and Dimensionals

This card was so much fun to color with the Blender Pens!  I haven't thought of using them for awhile, and forgot how easy they were to use.  Makes coloring these lovely poppies soooo easy!

When I was casing this card, first I added a card base of Daffodil Delight and changed the DSP to the new Gingham Garden.  Such pretty prints!  Then I added the sentiment on the cardfront differently from what I had seen.  I also added the little bow to the sentiment.  Thought it needed a little touch of ribbon. 

Now, the butterfly addition was another story.  During classes some time or another, the card landed on an open ink pad.  I surely didn't want to scrap the card.  Soooooo, the butterfly is covering the boo-boo.  Otherwise, I don't think I would have placed it in quite that place.  But it worked out just fine this way.  Thank goodness for these little butterflies!  Can't tell you how often they come to the rescue for those little problems!

That's it for today...  This has been a public service reminder to look at the samples in the catalog and use them for a jumping off place when you get stuck for ideas.  Believe me, there are great ideas just waiting for you to stamp them!!  Have fun stamping....     Sharon

ps - happy birthday to my sweet daughter!  Love you honey!!

Tuesday, July 16, 2013

Washi Tape Birthday

Have you given up on me yet?  Hope not, even though sometimes I'm ready to give up on me lately!  There's been some struggle lately to balance all the areas of my life, and I think all of the major areas are suffering as a result.  Still trying to get enough sleep so there's enough energy for playing with and watching our grandsons everyday.  I love spending time with them, but it sure is wearing me down sometimes!  Add to that some quirky car problems, and I'm getting overwhelmed a bit.  Anyway, I've got a card from last week's classes that I think you'll like.  It's so bright and summery that it feels like a summer day.  So it should fit right in as it's the middle of July, right?

Stamps:  Label Love and Simply Sketched(hostess)
Ink:  Basic Black and Always Artichoke
Paper:  Daffodil Delight, Whisper White, Strawberry Slush, Island Indigo, and Cardstock Vellum
Accessories:   Artisan Label Punch, Itty Bitty Shapes Punch Pak, Gingham Garden Washi Tape, Rhinestones Basic Jewels, Glue Dots, and Dimensionals
Love the bright, happy look of this card.  This is the first chance I'd had to use Washi Tape.  I had no idea why everyone was so taken with it.  That is, until I tried it myself.  Oh yeah, it's really wonderful!  It's so easy to use, just like using regular tape.  Put it on the card and cut when you have enough.  It is translucent, almost like vellum with an adhesive backing.  And such pretty colors and prints!  Yes, I'm lovin' this new product!!

I think the little punched flowers on the stamped vellum really make the card stand out.  It's an unexpected touch.  And I'm getting lots of use out of the new Label Love stamp set with the coordinating Artisan Label Punch.  It's the perfect size for adding sentiments to your cards.

Thanks for checking in on me.  Hope you enjoy this card.  To my friends who have departed to Utah for convention, have a wonderful time!  Hugs,  Sharon

Friday, July 5, 2013

Another Fish Tale

Today I've got another card to share with you using the By the Tide stamp set.  I wasn't too sure about getting this stamp set when it came out last January.  But the more things that I saw others making with this set, I knew I had to get it too.  It is such a versatile set with wonderful images that you can use for so many different occasions.  This card is a very simple monochromatic card.  See what you think...

Stamps:  By the Tide and Sweet Essentials
Ink:  Basic Gray and Basic Black
Paper:  Smoky Slate, Basic Black, Whisper White, with Neutrals Collection Designer Series Paper Stacks(ret)
Accessories:   2 1/2" Circle Punch, Piercing Mat and Piercing Tool, Neutrals Mini Brads(ret), Paper Snips, and Dimensionals
I've looked at a lot of samples using this set, and I love the simplest lines and clean look with this set.  This card is a cased idea that's been rolling around in my head and I can't remember where I saw the original.  So if you know who made one that looks similar, let me know so I can give credit where credit is due.

Usually my cards are very symmetrical with all the layers lined up just so.  On this one, the layering is all at angles and there's straight lines played against a circle and the cut out fish added for lots of different shapes.  Definitely gives it lots of interest.

My Hostess Club ladies made this card recently and each of them seemed to like it too.  It's always good to have another masculine card on hand, so I try to plan one every once in a while.  I hated to use a retired DSP for my club ladies, but my new papers aren't here yet, soooooo we made do with what I had on hand. 

That's it for today.  Hope you enjoyed this one.  It's one of my favorite cards in a while and hope you liked it too.  Hugs,     Sharon

Thursday, July 4, 2013

Happy 4th of July

Hope you're enjoying your holiday.  Today has turned out to be a lovely day and just perfect for spending time out of doors.  I'm certainly enjoying the no-stress day today.  Yesterday I was having some car troubles and they seem to be continuing on today.  Luckily my daughter isn't working the next 2 days so I could borrow her vehicle to get around and get a few things done.  Now it's time to share some cards the ladies made on Tuesday when we made cards for the military.  Here are some of the designs that we made....

These cards are all using Stampin'Up! products and stamps.  They are all a mix of current and retired stamps and designer papers.  I kind of use whatever is available for the sketch idea I come up with. 

All of the punches used (2 1/2" Circle, Artisan Label, 2 3/8" Scallop Circle, 1 3/4" Circle, Word Window, Bird Builder) are current.   The Labels Collection Framelits are current, but the Happy Whale Sizzlit is one of the retired accessories used.
For background texture, I used Stripes and Perfect Polka Dot TIEFs.  Oops, I forgot my friend Sue F. designed the bird card and she used a  non-SU! embossing folder.

Hope you are inspired by the ideas.  It's always fun when we get together and make these cards for our military.  This week we made 132 cards in the two hours we spent stamping.  Lots of fun and laughing going on along with the stamping.  That's one of the fabulous reasons to stamp - the great people you meet along the way.  Well, have a great day and find a friend or two to stamp with!  Hugs,  Sharon