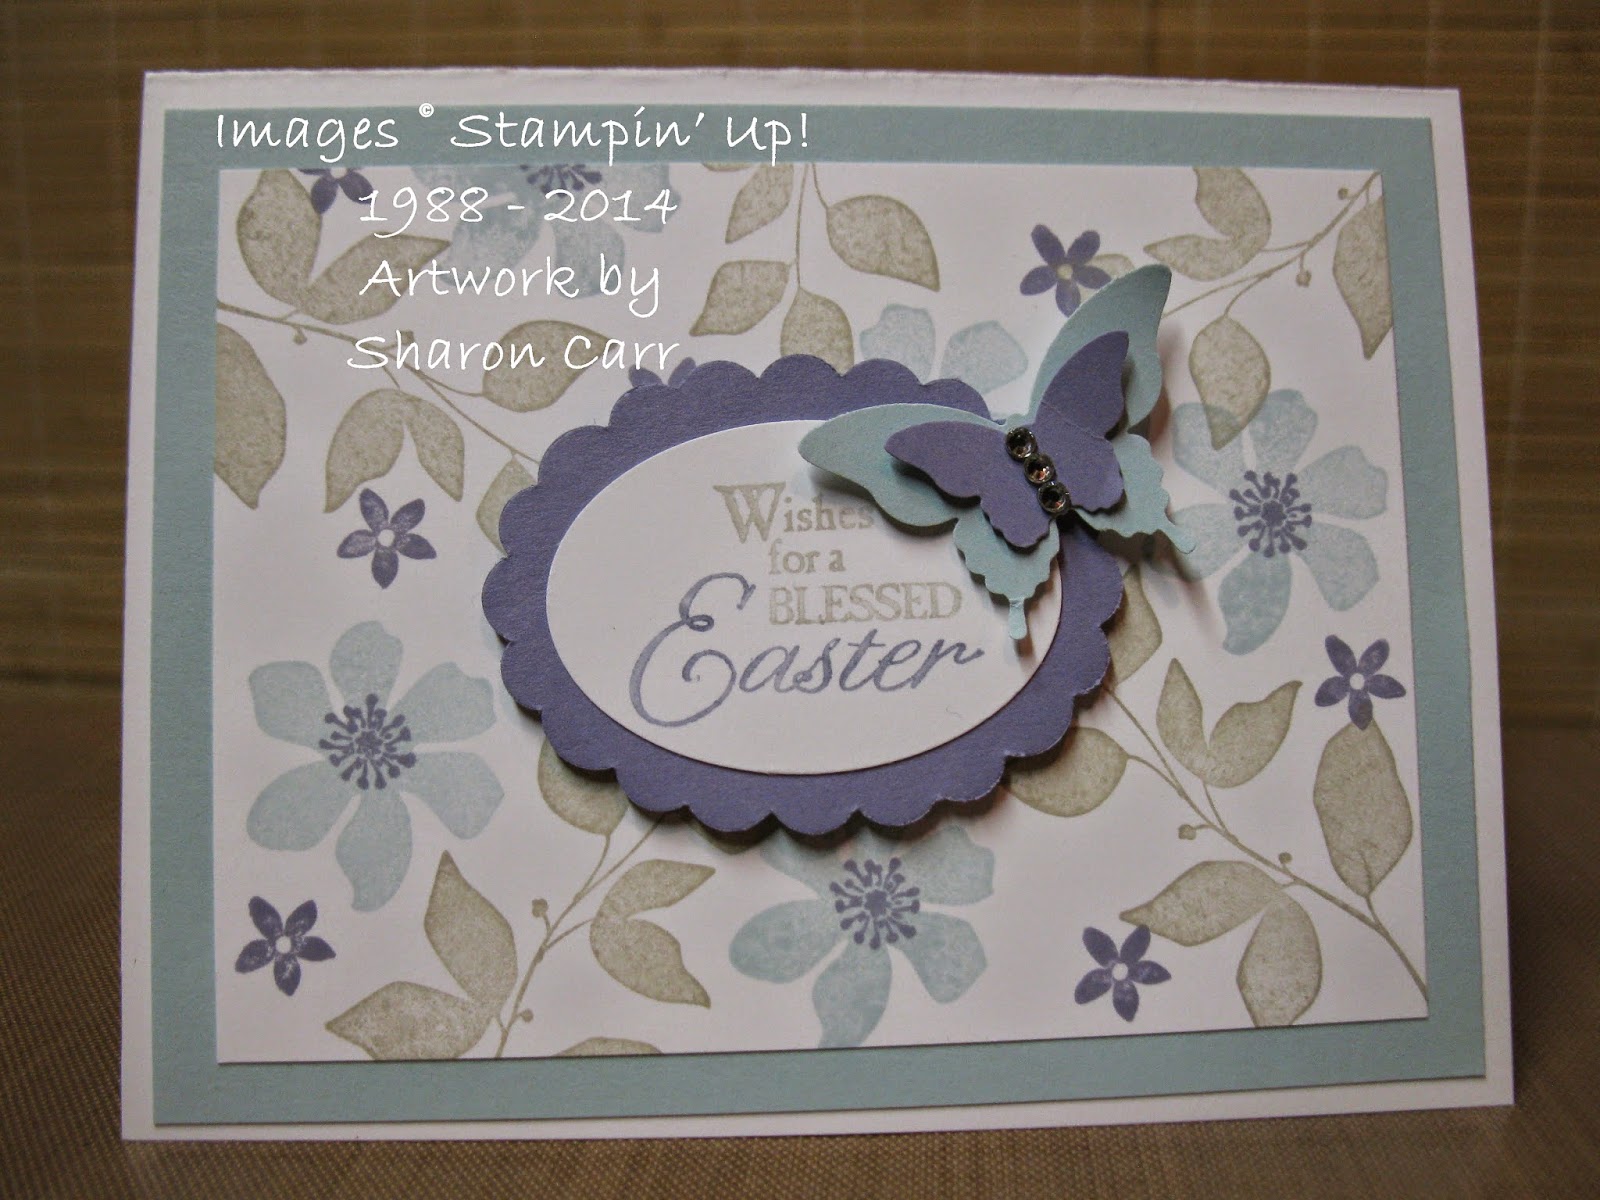
Have you ever had a week (or longer) that was crammed to the max with deadlines and you swore you couldn't fit another thing into your schedule? But then there was something else that needed doing, and then another thing, and still another!! That's the way it's been going for the last 14 days and I don't think I can hold out too much longer! There are so many cards I wanted to share with you that I hardly know where to start. Considering Easter is less than a week away, I guess we'll start with one of those cards today. Here's a simple card that I think is truly beautiful. Everyone in class just raved about it. So if you've got the 'ingredients' to make it, you might want to sit right down and make one for someone you care about.
Stamps: Blessed Easter, Summer Silhouettes
Ink: Soft Sky, Wisteria Wonder, and Sahara Sand pads, Sahara Sand and Wisteria Wonder markers
Paper: Whisper White, Soft Sky, Wisteria Wonder
Accessories: Elegant Butterfly and Bitty Butterfly Punches, Extra Large Oval Punch, Scallop Oval (non-SU!) punch, Rhinestone Basic Jewels, and Dimensionals
The pictures really don't do justice to the card. The colors are so soft and gentle-looking that it just makes you want to go ahhhhh. Changing the background layer to the Wisteria Wonder gives it a much more substantial look, but I really liked the airy look obtained with the Soft Sky layer.
Adding the two layers of butterfly in the same colors really makes it stand out. And of course, the rhinestones go with just about anything to give it a more elegant look.
Like I mentioned earlier, the ladies that made this in class last week were raving about the card, so it's really a winner in my book. I even went ahead and made a few more to get these in the mail to family members. I hope they like it as well. Enjoy your week ahead. Hope you find time to get everything done that you need done (without pulling out your hair in the process!!). Oops, I think I hear the little one. Break time must be over, so it's back to taking care of the grandkids. See you soon! Sharon
Showing posts with label Easter. Show all posts
Monday, April 14, 2014
Saturday, March 22, 2014
Another Easter Card
I promised yesterday that I would share another card using the Blessed Easter stamp, so here I am again. This one again is pretty quick to make when you have the pieces of DSP sitting on your worktable already cut and just sitting there waiting for me to come up with an idea. So here goes.....
Stamps: Blessed Easter
Ink: Stazon Jet Black, Pink Pirouette, Strawberry Slush, Wild Wasabi, and Pistachio Pudding
Paper: Whisper White, Pistachio Pudding, Pink Pirouette, and Strawberry Slush with Wild Wasabi paper from Subtles Designer Series Paper (ret)
Accessories: AquaPainter
Today's card uses a mix of pinks and greens that look really fresh and sweet. I had all these pieces of dotted Wild Wasabi DSP that has been retired sitting on my desk from another project. Since I still had all this leftover, I figured I needed to start using it up because I'm running out of space for it all and can't keep buying new without using the old! I just cut some up into rectangles to give a tiled effect to the background. Just a little different than a full layer of DSP.
I again used a watercolor technique to color the tulips. I started with a layer of Pink Pirouette ink on the flowers then added light touches of Strawberry Slush ink to add contrast and depth to them. The leaves are painted the same way with Pistachio Pudding first, then adding touches of Wild Wasabi ink. Love how delicate it all looks.
Well, that's it for today. While you're reading this I'm soaking up some teachings at our church retreat today. I'm expecting to come back tired but refreshed too! Hope you're enjoying your weekend so far. Remember to relax and find some time to stamp. I find that's always a good way to refresh myself and it puts me in a good frame of mind. Have a good day! Sharon
Stamps: Blessed Easter
Ink: Stazon Jet Black, Pink Pirouette, Strawberry Slush, Wild Wasabi, and Pistachio Pudding
Paper: Whisper White, Pistachio Pudding, Pink Pirouette, and Strawberry Slush with Wild Wasabi paper from Subtles Designer Series Paper (ret)
Accessories: AquaPainter
Today's card uses a mix of pinks and greens that look really fresh and sweet. I had all these pieces of dotted Wild Wasabi DSP that has been retired sitting on my desk from another project. Since I still had all this leftover, I figured I needed to start using it up because I'm running out of space for it all and can't keep buying new without using the old! I just cut some up into rectangles to give a tiled effect to the background. Just a little different than a full layer of DSP.
I again used a watercolor technique to color the tulips. I started with a layer of Pink Pirouette ink on the flowers then added light touches of Strawberry Slush ink to add contrast and depth to them. The leaves are painted the same way with Pistachio Pudding first, then adding touches of Wild Wasabi ink. Love how delicate it all looks.
Well, that's it for today. While you're reading this I'm soaking up some teachings at our church retreat today. I'm expecting to come back tired but refreshed too! Hope you're enjoying your weekend so far. Remember to relax and find some time to stamp. I find that's always a good way to refresh myself and it puts me in a good frame of mind. Have a good day! Sharon
Friday, March 21, 2014
Blessed Easter cards
When the Occasions catalog first came out, I fell in love with a single, simple Easter stamp. The tulip line-art is so pretty and the sentiment has a really nice font that fits it perfectly. I liked it so much that this stamp was on my first order! And yes, I have used it several times already, but haven't gotten around to sharing any with you yet. Today, that problem is being rectified. In fact, I will share a couple versions with you today and another one tomorrow. Does that work for you? Hope so, and hope you like these cards too!
Stamps: Blessed Easter, with Abundant Hope(ret) and Crosses of Hope(ret) inside
Ink: Stazon Jet Black, Daffodil Delight, Calypso Coral, and Garden Green
Paper: Watercolor Wonder Designer Notecards and Envelopes
Accessories: Pearls Basic Jewels, and AquaPainter
Don't you just love the look of the watercolor background on these notecards? There are 5 different watercolor designs in the packet and they're all soft and lovely. Of course, the oval inset on this first card is my very favorite and they've all been used up already. I sure wish I could do the backgrounds myself as nicely as these are done. But since I can't, I'm happy I can purchase them!! Woo hoo to Stampin'Up! for coming up with this product for us!! Yay!
For the sentiment inside my cards, I dug out some of my retired SU! sets to use. The sentiments come from the Abundant Hope set. I lined them up on a large block with enough room in between for stamping the lovely cross image from the Crosses of Hope stamp set. Together they work out perfectly for me. No wonder I hang on to so many of my retired stamps! (I just can't bear to part with so many of them!!)
This version of the card was made with the same stamps inside and out, but a different design from the Watercolor Wonder Designer Notecards set. I still went with the yellows and corals on this card because there are a few background dots in those colors. The Daffodil Delight Stitched Ribbon really brightens up this card! Either version of the card works for me and I'll be sending them out to family in a short while.
Hope you liked these cards. They're so quick and easy when you start out with the Watercolor Wonder Notecards. They literally just take minutes to make. Hope you find time to do a little stamping over the upcoming weekend. I'll be attending a church retreat tomorrow that I'm really looking forward to. It should be interesting and insightful. Have a great weekend! Sharon
Stamps: Blessed Easter, with Abundant Hope(ret) and Crosses of Hope(ret) inside
Ink: Stazon Jet Black, Daffodil Delight, Calypso Coral, and Garden Green
Paper: Watercolor Wonder Designer Notecards and Envelopes
Accessories: Pearls Basic Jewels, and AquaPainter
Don't you just love the look of the watercolor background on these notecards? There are 5 different watercolor designs in the packet and they're all soft and lovely. Of course, the oval inset on this first card is my very favorite and they've all been used up already. I sure wish I could do the backgrounds myself as nicely as these are done. But since I can't, I'm happy I can purchase them!! Woo hoo to Stampin'Up! for coming up with this product for us!! Yay!
For the sentiment inside my cards, I dug out some of my retired SU! sets to use. The sentiments come from the Abundant Hope set. I lined them up on a large block with enough room in between for stamping the lovely cross image from the Crosses of Hope stamp set. Together they work out perfectly for me. No wonder I hang on to so many of my retired stamps! (I just can't bear to part with so many of them!!)
This version of the card was made with the same stamps inside and out, but a different design from the Watercolor Wonder Designer Notecards set. I still went with the yellows and corals on this card because there are a few background dots in those colors. The Daffodil Delight Stitched Ribbon really brightens up this card! Either version of the card works for me and I'll be sending them out to family in a short while.
Hope you liked these cards. They're so quick and easy when you start out with the Watercolor Wonder Notecards. They literally just take minutes to make. Hope you find time to do a little stamping over the upcoming weekend. I'll be attending a church retreat tomorrow that I'm really looking forward to. It should be interesting and insightful. Have a great weekend! Sharon
Friday, March 14, 2014
Little Lamb for Easter
I ordered this cute little Easter set called Eggstra Spectacular, then couldn't figure out what to do with it. All the stamps in the set are pretty small, so I couldn't make something splashy and bright with it. So it sat for a couple weeks. :( sooo sad... Then I got an inspiration when I was sleeping and had to get up to make it right away! Now that it's finished, I'm just tickled pink with it. It uses several new items in the Occasions Mini Catalog that were not intended for the purpose I planned for them. But that's what makes creating really fun! Have a look and let me know what you think...
Stamps: Eggstra Spectacular
Ink: Basic Gray, Smoky Slate, Island Indigo, Calypso Coral, So Saffron, and Pink Pirouette
Paper: Soft Sky, Wild Wasabi, So Saffron, Whisper White, Calypso Coral cardstock with Sweet Sorbet and Watercolor Wonder Designer Series Papers
Accessories: Big Shot with Word Bubbles Framelits, Starburst Framelits, Extra Large Oval Punch, Itty Bitty Shapes Punch Pack, Fringe Scissors, AquaPainter, Glue Dots, and Dimensionals
Can you find all the items that were used? The obvious first - the eggs were punched from cute pastel Designer prints with the Extra Large Oval Punch. And it was just big enough to fit the little lamb and Easter basket stamp too! The cloud was made from the puffy word bubble die. I'm so happy I came across that idea. Then the genius idea that woke me up in the morning was using the smallest Starburst Framelit die to make the sun peeking out behind the cloud. It was just perfect in both size and shape! Woo Hoo!!
The new Fringe Scissors worked great to cut all those blades of grass and then I trimmed them at angles to make it more interesting. The grass looked boring by itself, so it needed a few flowers growing added for spring.
There was very little stamping or coloring on this card. The DSP prints and all the punched and die-cut pieces were all that were needed. This card is going to be sent to my grandsons next month. I think they'll like the little lamb for Easter!
Thanks for stopping by to see what's new here. It still looks like winter outside, but I'm trying to create my very own spring inside! Enjoy!!
Sharon
Stamps: Eggstra Spectacular
Ink: Basic Gray, Smoky Slate, Island Indigo, Calypso Coral, So Saffron, and Pink Pirouette
Paper: Soft Sky, Wild Wasabi, So Saffron, Whisper White, Calypso Coral cardstock with Sweet Sorbet and Watercolor Wonder Designer Series Papers
Accessories: Big Shot with Word Bubbles Framelits, Starburst Framelits, Extra Large Oval Punch, Itty Bitty Shapes Punch Pack, Fringe Scissors, AquaPainter, Glue Dots, and Dimensionals
Can you find all the items that were used? The obvious first - the eggs were punched from cute pastel Designer prints with the Extra Large Oval Punch. And it was just big enough to fit the little lamb and Easter basket stamp too! The cloud was made from the puffy word bubble die. I'm so happy I came across that idea. Then the genius idea that woke me up in the morning was using the smallest Starburst Framelit die to make the sun peeking out behind the cloud. It was just perfect in both size and shape! Woo Hoo!!
The new Fringe Scissors worked great to cut all those blades of grass and then I trimmed them at angles to make it more interesting. The grass looked boring by itself, so it needed a few flowers growing added for spring.
There was very little stamping or coloring on this card. The DSP prints and all the punched and die-cut pieces were all that were needed. This card is going to be sent to my grandsons next month. I think they'll like the little lamb for Easter!
Thanks for stopping by to see what's new here. It still looks like winter outside, but I'm trying to create my very own spring inside! Enjoy!!
Sharon
Sunday, March 24, 2013
Serene Silhouettes Done Softly
Happy Sunday to you. Today was a special Easter party at church for the little ones. Of course, I had to go along to have fun with my grandsons. Both boys had fun 'looking' for the eggs. I use that term very loosely, as a barely one year old doesn't have a clue. He just had fun shaking them and crawling after them when the eggs rolled away from him. And the older one - almost 3yr old - found some trucks and trains to play with and that was more interesting than plastic eggs! All in all, it was enjoyable for grandma to watch the boys have fun.
Now on to the card for today. For your sakes, I hope you haven't been needing too many sympathy cards lately, but seems like I need another one almost every week. I find it very hard to make these cards as needed, so try to keep a small stash on hand. This is one of the sympathy cards I've made recently for my stash...
Stamps: Serene Silhouettes, Trust God, Papillon Potpourri, and Thoughts and Prayers
Ink: Early Espresso and Marina Mist ink pads, Marina Mist and Old Olive markers
Paper: Early Espresso, Bashful Blue, and Naturals White cardstock
Accessories: Big Shot with Fancy Fan TIEF and Apothecary Accents Framelits, Bitty Butterfly Punch, Linen Thread, Pearls Basic Jewels, Sponge quarter, Glue Dots, and Dimensionals
Love the texture on the background layer with the Fancy Fan embossing. So pretty. I added just a light touch of Early Espresso sponging on the edges to soften the look.
The flowers were colored on the stamp with markers and then did the heavy breathing before stamping. The butterfly was stamped on a scrap of Naturals White cardstock, then stamped again on the die-cut piece without re-inking. This gives just a light shadow look behind the punched and layered main butterfly. Pearls were added to the butterfly for elegance. The Linen Thread was added to keep it from getting too frilly. For the inside of the card, one of the sentiments from Thoughts and Prayers worked nicely.
Hope you like this idea. If you don't need sympathy cards, you could easily change it by using a different set of sentiments. It would be pretty no matter what you used it for. Enjoy the day. Looking forward to Easter and all the blessings God has in store for us! Oh happy day! Sharon
Now on to the card for today. For your sakes, I hope you haven't been needing too many sympathy cards lately, but seems like I need another one almost every week. I find it very hard to make these cards as needed, so try to keep a small stash on hand. This is one of the sympathy cards I've made recently for my stash...
Stamps: Serene Silhouettes, Trust God, Papillon Potpourri, and Thoughts and Prayers
Ink: Early Espresso and Marina Mist ink pads, Marina Mist and Old Olive markers
Paper: Early Espresso, Bashful Blue, and Naturals White cardstock
Accessories: Big Shot with Fancy Fan TIEF and Apothecary Accents Framelits, Bitty Butterfly Punch, Linen Thread, Pearls Basic Jewels, Sponge quarter, Glue Dots, and Dimensionals
Love the texture on the background layer with the Fancy Fan embossing. So pretty. I added just a light touch of Early Espresso sponging on the edges to soften the look.
The flowers were colored on the stamp with markers and then did the heavy breathing before stamping. The butterfly was stamped on a scrap of Naturals White cardstock, then stamped again on the die-cut piece without re-inking. This gives just a light shadow look behind the punched and layered main butterfly. Pearls were added to the butterfly for elegance. The Linen Thread was added to keep it from getting too frilly. For the inside of the card, one of the sentiments from Thoughts and Prayers worked nicely.
Hope you like this idea. If you don't need sympathy cards, you could easily change it by using a different set of sentiments. It would be pretty no matter what you used it for. Enjoy the day. Looking forward to Easter and all the blessings God has in store for us! Oh happy day! Sharon
Saturday, March 23, 2013
Everybunny and Shimmer Mist
Hi there! What a time we've been having over here. The 'cold of the month' has hit again and knocked us for a loop. How is it possible to get a cold of some sort once a month for 5 months in a row? It hits one of the little ones first, and then hubby and/or I get it another couple of days later. This has got to stop soon 'cuz I just can't handle being under the weather and cancelling all the fun stuff we plan on doing!! NOT FAIR! Yes, that was me venting there. Sorry!! Anyway, back to why you're here. This card was one of the cards made during class week that I had planned to share with you a week ago. It uses one of my stamp sets from last year that is still in the current catalog. Usually I'm using new products during class, but I know several of my students had purchased this set last year so it needed to get revamped and updated. You know what I mean? Here it is for your viewing pleasure...
Stamps: Everybunny
Ink: Stazon Jet Black pad, Crumb Cake, Baja Breeze, Pretty in Pink, and Daffodil Delight re-inkers
Paper: Whisper White, Certainly Celery, Pool Party, So Saffron, Wisteria Wonder, Bashful Blue, Pretty in Pink
Accessories: Big Shot with Framed Tulips TIEF, Ovals Collection Framelits, Small Oval Punch, Frost White Shimmer Mist Paint, AquaPainter, Piercing Tool and Mat, Occasions Paper-Piercing Pack, and Dimensionals
The idea of mixing drops of re-inker into Shimmer Mist has been done before, in fact I might have done it sometime in the last bunch of years. But it hasn't been done in the classes, so it was something new for the ladies. The colors the bunny and shell were painted all had the Shimmer Mist base, some had heavier applications of paint to get a solid color. I used only a dime-size amount of Shimmer Mist to 1 - 2 drops of ink color, except for the bunny. The Crumb Cake was too light so I added another large drop to the mix. That worked out nicely.
On my original card here, I didn't use any yellow when painting, but knew the ladies would want to, so I made a mixture of Shimmer Mist and Daffodil Delight re-inker to get a soft yellow shade. The So Saffron re-ink looked too brownish to be pretty on this card, so it was disposed of properly by throwing out.
Another wonderful side note, as long as you keep your mixtures in an air-tight container (I used empty embossing powder containers), the paint mixtures are still wet and useable over a week later! I just checked to be sure, and I'm quite surprised! Think I'll make a couple more cards now that I've got some energy again. I've got a few kids to send cards to and these would be perfect.
That's it for this message. Glad you're not sitting any closer to me because I've been sneezing and coughing again while writing this. Oh boy, guess I'm not quite over this like I was hoping. At least you can't catch anything over the internet!! Stay healthy and find some time to stamp - it's good therapy!
Sharon
Stamps: Everybunny
Ink: Stazon Jet Black pad, Crumb Cake, Baja Breeze, Pretty in Pink, and Daffodil Delight re-inkers
Paper: Whisper White, Certainly Celery, Pool Party, So Saffron, Wisteria Wonder, Bashful Blue, Pretty in Pink
Accessories: Big Shot with Framed Tulips TIEF, Ovals Collection Framelits, Small Oval Punch, Frost White Shimmer Mist Paint, AquaPainter, Piercing Tool and Mat, Occasions Paper-Piercing Pack, and Dimensionals
The idea of mixing drops of re-inker into Shimmer Mist has been done before, in fact I might have done it sometime in the last bunch of years. But it hasn't been done in the classes, so it was something new for the ladies. The colors the bunny and shell were painted all had the Shimmer Mist base, some had heavier applications of paint to get a solid color. I used only a dime-size amount of Shimmer Mist to 1 - 2 drops of ink color, except for the bunny. The Crumb Cake was too light so I added another large drop to the mix. That worked out nicely.
On my original card here, I didn't use any yellow when painting, but knew the ladies would want to, so I made a mixture of Shimmer Mist and Daffodil Delight re-inker to get a soft yellow shade. The So Saffron re-ink looked too brownish to be pretty on this card, so it was disposed of properly by throwing out.
Another wonderful side note, as long as you keep your mixtures in an air-tight container (I used empty embossing powder containers), the paint mixtures are still wet and useable over a week later! I just checked to be sure, and I'm quite surprised! Think I'll make a couple more cards now that I've got some energy again. I've got a few kids to send cards to and these would be perfect.
That's it for this message. Glad you're not sitting any closer to me because I've been sneezing and coughing again while writing this. Oh boy, guess I'm not quite over this like I was hoping. At least you can't catch anything over the internet!! Stay healthy and find some time to stamp - it's good therapy!
Sharon
Friday, March 15, 2013
Another Ears to You
Have I mentioned how much I'm enjoying the single stamps that Stampin' Up! is offering lately? My newest obsession seems to be the Ears to You stamp. When I first saw it, I thought it was just too cute, and I still feel that way after using it several times. Here's the project the classes made this week with one of the little bunnies.
Stamps: Ears to You
Ink: Pretty in Pink pad, Crumb Cake marker
Paper: Very Vanilla, Baja Breeze
Accessories: Big Shot with Honeycomb TIEF and Designer Frames TIEF, Extra-Large Oval Punch, Brayer, Word Window Punch, Modern Label Punch, Itty Bitty Shapes Punch Pack, Pearls Basic Jewels, Baja Breeze Seam Binding Ribbon, and Dimensionals
Wish you could see this card in person. The colors are so subtle, but very beautiful. I had seen this card (sort of) some place and knew I had to make something similar. Thought about it a few days, and then couldn't find the original card. And I'm not too sure how the original looked exactly (and can't give credit where due!), but this is my version anyway.
The Honeycomb embossing folder was brayered with Pretty in Pink ink before inserting the cardstock and embossing it. This leaves a pale pink color inside each of the hexagon shapes. Very pretty. To coordinate, the bunny oval and sentiment layer were both sponged lightly with pink on the edges. Very subtle. Don't know why I don't use the small Frames TIEF more often. It really is the perfect frame for this little bunny.
And speaking of the bunny, I only used the middle bunny of the trio. He was colored with a Crumb Cake marker to single him out. For a variation, this card could have been made landscape style and used one of the other bunnies that are more crouching down and then used the oval on it's side. Just an idea....
I liked the addition of the tiny flower and pearl. This keeps it looking sort of vintage and feminine too. Hope you like this idea. Sorry I can't give credit to the person that inspired me to try brayering on the embossing folder and using this stamp with it. It's a winner, isn't it! Thanks for stopping in today. It's been a crazy week trying to watch grandkids everyday and hold classes three evening too. Can't wait for tomorrow for my workshop with some lovely ladies. Then, relax.......ahhhhhhhh
See you soon, Sharon
Stamps: Ears to You
Ink: Pretty in Pink pad, Crumb Cake marker
Paper: Very Vanilla, Baja Breeze
Accessories: Big Shot with Honeycomb TIEF and Designer Frames TIEF, Extra-Large Oval Punch, Brayer, Word Window Punch, Modern Label Punch, Itty Bitty Shapes Punch Pack, Pearls Basic Jewels, Baja Breeze Seam Binding Ribbon, and Dimensionals
Wish you could see this card in person. The colors are so subtle, but very beautiful. I had seen this card (sort of) some place and knew I had to make something similar. Thought about it a few days, and then couldn't find the original card. And I'm not too sure how the original looked exactly (and can't give credit where due!), but this is my version anyway.
The Honeycomb embossing folder was brayered with Pretty in Pink ink before inserting the cardstock and embossing it. This leaves a pale pink color inside each of the hexagon shapes. Very pretty. To coordinate, the bunny oval and sentiment layer were both sponged lightly with pink on the edges. Very subtle. Don't know why I don't use the small Frames TIEF more often. It really is the perfect frame for this little bunny.
And speaking of the bunny, I only used the middle bunny of the trio. He was colored with a Crumb Cake marker to single him out. For a variation, this card could have been made landscape style and used one of the other bunnies that are more crouching down and then used the oval on it's side. Just an idea....
I liked the addition of the tiny flower and pearl. This keeps it looking sort of vintage and feminine too. Hope you like this idea. Sorry I can't give credit to the person that inspired me to try brayering on the embossing folder and using this stamp with it. It's a winner, isn't it! Thanks for stopping in today. It's been a crazy week trying to watch grandkids everyday and hold classes three evening too. Can't wait for tomorrow for my workshop with some lovely ladies. Then, relax.......ahhhhhhhh
See you soon, Sharon
Monday, March 11, 2013
Ears to You Bunnies
Have you seen and stamped with this adorable single stamp called Ears to You yet? If not, you don't know what you're missing! These cute bunnies are all patterned differently and just a clean silhouette of each one, so they can be used in so many different ways. The card today was going to be one of the class projects for this week until I realized I didn't have enough Pool Party cardstock or satin ribbon on hand. Dog-gone it! It's such a pretty card and I know everyone would have loved making it. Oh, well. I guess I'll just let them 'look' at it instead. Aren't I nasty? ha ha Here you go. You get to 'look' at it too!
Stamps: Ears to You
Ink: VersaMark, Pool Party and Wisteria Wonder
Paper: Pool Party, Wisteria Wonder, and Shimmer White
Accessories: Big Shot with Lacy Brocade TIEF, Heat Embossing Tool, Clear Embossing Powder, Sponge Daubers, Sycamore Street Ribbons and Buttons(SAB)
I took several pictures to try and show the lovely look of the Shimmer Paper underneath the sponging and embossing, but couldn't get it to show up. Needless to say, this card is so ymmy and soft looking - just like pretty Easter candy colors.
The bunnies and sentiment were embossed first and color sponged over using the ink-resist technique. Thought this would look nice because of each of the different prints on the bunnies. Sponging over the embossing makes all the tiny details just pop.
I loved the texture of the Lacy Brocade embossing on the background. It just fits with all the other prints. And I can't imagine what I'll do when this pretty ribbon isn't available after Sale-A-Bration. Boo hoo! I think I need to get another order in before SAB is over on March 22nd. Have to get me some more of this ribbon!!!
Thanks for stopping by. I spent the weekend stamping and I've got lots to share with you, so come on back soon. Happy stamping, Sharon
Stamps: Ears to You
Ink: VersaMark, Pool Party and Wisteria Wonder
Paper: Pool Party, Wisteria Wonder, and Shimmer White
Accessories: Big Shot with Lacy Brocade TIEF, Heat Embossing Tool, Clear Embossing Powder, Sponge Daubers, Sycamore Street Ribbons and Buttons(SAB)
I took several pictures to try and show the lovely look of the Shimmer Paper underneath the sponging and embossing, but couldn't get it to show up. Needless to say, this card is so ymmy and soft looking - just like pretty Easter candy colors.
The bunnies and sentiment were embossed first and color sponged over using the ink-resist technique. Thought this would look nice because of each of the different prints on the bunnies. Sponging over the embossing makes all the tiny details just pop.
I loved the texture of the Lacy Brocade embossing on the background. It just fits with all the other prints. And I can't imagine what I'll do when this pretty ribbon isn't available after Sale-A-Bration. Boo hoo! I think I need to get another order in before SAB is over on March 22nd. Have to get me some more of this ribbon!!!
Thanks for stopping by. I spent the weekend stamping and I've got lots to share with you, so come on back soon. Happy stamping, Sharon
Sunday, April 8, 2012
Happy Easter
On this blessed Easter day, I want to extend my caring and best wishes to you and your family. I pray God would bless and enrich your lives with His abounding love and unmerited grace.


I should be back in the swing of things in the the next day or two. Thanks for stopping in to see what's been going on. Today I'm spending Easter with my sister and my kids and grandkids. What could be better than that? Hope your day is wonderful.
Alleluia! He is Risen!!
Easter Blessings, Sharon
Thursday, April 5, 2012
Easter Basket Card
Have you seen the cute punchie basket card that looks so real? I just love all the texture it has, but it's so easy to make. Just get out your Big Shot and a few dies and punches and you're done. What could be quicker than that? Here's what it looks like when I made it...
Stamps: Solid Stripes, Fine Flourish, and Dot,Dot,Dot
Cardstock: Baja Breeze, Whisper White, Crumb Cake, Certainly Celery, Pretty In Pink, Bashful Blue, and So Saffron
Ink: Regal Rose, Peach Parfait, Marina Mist, and Crumb Cake
Accessories: Big Shot with Scallop Oval Frame Die, Tasteful Trim Die, Square Lattice Embossing Folder, Extra Large Oval Punch, Itty Bitty Shapes Punch Pack, Baja Breeze Seam Binding Ribbon, Dazzling Details, Paper Snips, Sponge, and Mini Glue Dots
Whew, lots of little goodies went into making this awesome piece of punch art. But all of the items together add up to a card with lots of texture and layers for a child to touch. The components of the basket are all sponged to make the details stand out. The stamping on the eggs was added to give them more appeal. I originally tried punching DSP for the eggs, but didn't like it as well. Give it a try and see which way you prefer your eggs!
This is my grandson's card for Easter. I hope he likes it, because it was made specially for him! I don't know though - he might still be too young to care about baskets and eggs at all. We'll see. Hope your week is going great. Did some grocery shopping so I'm all set to do some cooking on Saturday for Easter dinner at my sister's house. It'll be nice getting together for the day with her, and our kids will all be there too. I'll try to get another post in before Sunday, but don't hold your breath, okay? Sharon
Stamps: Solid Stripes, Fine Flourish, and Dot,Dot,DotCardstock: Baja Breeze, Whisper White, Crumb Cake, Certainly Celery, Pretty In Pink, Bashful Blue, and So Saffron
Ink: Regal Rose, Peach Parfait, Marina Mist, and Crumb Cake
Accessories: Big Shot with Scallop Oval Frame Die, Tasteful Trim Die, Square Lattice Embossing Folder, Extra Large Oval Punch, Itty Bitty Shapes Punch Pack, Baja Breeze Seam Binding Ribbon, Dazzling Details, Paper Snips, Sponge, and Mini Glue Dots
Whew, lots of little goodies went into making this awesome piece of punch art. But all of the items together add up to a card with lots of texture and layers for a child to touch. The components of the basket are all sponged to make the details stand out. The stamping on the eggs was added to give them more appeal. I originally tried punching DSP for the eggs, but didn't like it as well. Give it a try and see which way you prefer your eggs!This is my grandson's card for Easter. I hope he likes it, because it was made specially for him! I don't know though - he might still be too young to care about baskets and eggs at all. We'll see. Hope your week is going great. Did some grocery shopping so I'm all set to do some cooking on Saturday for Easter dinner at my sister's house. It'll be nice getting together for the day with her, and our kids will all be there too. I'll try to get another post in before Sunday, but don't hold your breath, okay? Sharon
Wednesday, March 21, 2012
Happy Easter Bunny
I've mentioned that I've been working on my Easter cards lately as I'm sure most of you have too. I have another one that I'd like to share with you today. I'd seen this idea and then lost the link, so just went with whatever worked for me. Thought it was cute enough to share.
Stamps: Everybunny
Cardstock: Whisper White, Baja Breeze, Certainly Celery, Prety in Pink, and Pool Party cs with Subtles Paper Stacks
Ink: Basic Black, Certainly Celery, Crumb Cake, Pretty in Pink, and Baja Breeze inks with Baja Breeze marker
Accessories: Big Shot with Labels Collection Framelits Dies, Little Leaves Sizzlit Die, AquaPainter, Itty Bitty Shapes Punch Set, Lace Ribbon Border Punch, Modern Label Punch, Baja Breeze Pleated Satin Ribbon, Basic Pearls, Mini Glue Dots, and Dimensionals
Isn't this little card cute? Oh, actually it's not quite so little - it's a 5 1/4" square card. I don't usually go for the square cards 'cuz the Postal Service seems to require more postage on these. But this one needed the larger size to fit all the goodies on it.
Now have you figured out where I used the Lace Ribbon Border Punch? Hmmm? I'd saved a few of the teensy flowers that were scrap after punching some Pool Party for another card. Aren't they the perfect size to add a couple to the card here? (and my hubby wonders why I have to save everything!)
Anyway, hope you love the card as much as I do. Thanks for stopping by again. Let me know you're out there. grin - Sharon
Stamps: EverybunnyCardstock: Whisper White, Baja Breeze, Certainly Celery, Prety in Pink, and Pool Party cs with Subtles Paper Stacks
Ink: Basic Black, Certainly Celery, Crumb Cake, Pretty in Pink, and Baja Breeze inks with Baja Breeze marker
Accessories: Big Shot with Labels Collection Framelits Dies, Little Leaves Sizzlit Die, AquaPainter, Itty Bitty Shapes Punch Set, Lace Ribbon Border Punch, Modern Label Punch, Baja Breeze Pleated Satin Ribbon, Basic Pearls, Mini Glue Dots, and Dimensionals
Isn't this little card cute? Oh, actually it's not quite so little - it's a 5 1/4" square card. I don't usually go for the square cards 'cuz the Postal Service seems to require more postage on these. But this one needed the larger size to fit all the goodies on it.Now have you figured out where I used the Lace Ribbon Border Punch? Hmmm? I'd saved a few of the teensy flowers that were scrap after punching some Pool Party for another card. Aren't they the perfect size to add a couple to the card here? (and my hubby wonders why I have to save everything!)
Anyway, hope you love the card as much as I do. Thanks for stopping by again. Let me know you're out there. grin - Sharon
Friday, March 16, 2012
Little Bunny Easter
I've been making cards for Easter lately and one of my favorite sets is Everybunny. The images are just so sweet that you gotta love 'em. So I thought I'd share one of them with you today. It's simple and sweet with a few twists to make it special. Hope you like it.
Stamps: Everybunny
Cardstock: So Saffron, Certainly Celery, and Whisper White with Subtles Paper Stack DSP
Ink: Stazon Jet Black, Pretty in Pink, Certainly Celery, and So Saffron
Accessories: Big Shot with Finial Press Embossing Folder, AquaPainter, Certainly Celery Satin Ribbon, and Dimensionals
Did you notice how the right edge of the card was cut an inch shorter and the striped DSP was layered on the inside? I thought that added a cute little touch to it. The satin, celery ribbon coordinates with the layer behind the main image. And the little egg shell was watercolored with the same color to tie it all together.
I had thought of coloring the bunny this time, but decided I liked a white bunny for this card. This way everything stayed very soft and pastel. The embossing on the front of the card keeps it from looking too plain. All in all, it's a very simple card to make, but altogether I think it's pretty darn cute.
Thanks for stopping by to see what I've been up to. As always, I appreciate your comments. Have a great weekend! Sharon
Saturday, February 4, 2012
Easter Blessings 411 Challenge
I've been up to my eyeballs last night and today getting cards designed and ready for the ladies at church to stamp and put together next Tuesday night. That's our monthly night for making cards for our service men and women to show them our support in a small way. Anyway, I was struggling to come up with an idea using one of our retired cross stamps, and there it was! A new challenge from the Stamping 411 Operators here that was the perfect layout for the stamp. I got to work right away and the card came together nicely. So today you're going to see a card using lots of retired stamps, cardstock, and even non-SU! ribbon. If you're a purist and can't stand seeing contraband supplies, click out of here right now!! Don't take a chance on maybe liking it! But for those of you that have some of these sets, hope you like the idea. Stamp on!!
I told you not to look if you were a SU! purist. When I'm making up card kits to make for our soldiers, anything goes as far as I'm concerned. I'm more worried about the numbers of cards I need to get ready than in whether everything is current SU! This seems to be a wonderful way to use my retired stash and giving back to our service men and women at the same time.
Cardstock: Naturals White, Pale Plum (retired), and Pretty in Pink
Ink: Perfect Plum, and Pale Plum (retired)
Accessories: Scallop Oval Punch, Itty Bitty Shapes Punch Set, Basic Pearls, Sponge Dauber, Dimensionals, and skinny plum ribbon
I told you not to look if you were a SU! purist. When I'm making up card kits to make for our soldiers, anything goes as far as I'm concerned. I'm more worried about the numbers of cards I need to get ready than in whether everything is current SU! This seems to be a wonderful way to use my retired stash and giving back to our service men and women at the same time.So there you have it. The card is fairly simple because the ladies will be making 24 of these. Sure hope our service personnel like these, 'cause that's what really counts. Thanks for stopping by to see what I have today. Hopefully, the next card I share will be a bit more current. Have a wonderful weekend! Sharon
Saturday, January 28, 2012
Dove Easter Card
I had some time to do a little stamping today. Actually I've been working on samples to take to a workshop on Monday and just playing around with some new stamps I have. What could be more fun on a Saturday afternoon? The card today is clean and simple, but I love the look and colors. Hope you like it too!
Stamps: Easter Dove
Cardstock: Whisper White, Calypso Coral, and Certainly Celery cs with Everyday Enchantment Designer Series Paper (SAB)
Ink: Marina Mist, Calypso Coral
Accessories: Big Shot with Labels Collection Framelits, Perfect Polka Dot Embossing Folder, Floral Fusion Sizzlits, Sponge Dauber, Basic Pearls, Mini Glue Dots, and Dimensionals
First of all, I love this new Everyday Enchantment DSP!! And it's free during Sale-a-bration. Which, I guess, makes it even better! The colors and prints are so lovely I just want to eat 'em up. Oh, so yummy!! Ok, sorry. Was that over the top a bit?? Let's get back to the card here. This card is a mixture of soft, pretty colors and textures. Not all of the colors I chose were part of the striped DSP strip, but they worked well together anyway. It's not always necessary to use the colors that are 'supposed' to work with any of the printed papers, but try other colors and branch out with your creativity. You never know what fun combinations you might find.
Instead of my usual squared-up layering on the focal point of the card, I used the new Labels Collection Framelits from the current Occasions Mini Catalog. I'm so happy we now carry nesting dies that are so very easy to use. Hurray!
I love the added flower on the card. It looks like many layers of cardstock, but it's only two. I distressed the two pieces of flower with a bone folder and fingernails until I could peel away another layer. Thus four layers from only 2 flowers. Adding more texture without a lot of heaviness here. The pearl was the perfect finishing touch.
Hope you enjoy this card idea. It really gets me in the mood for spring. Sharon
Stamps: Easter DoveCardstock: Whisper White, Calypso Coral, and Certainly Celery cs with Everyday Enchantment Designer Series Paper (SAB)
Ink: Marina Mist, Calypso Coral
Accessories: Big Shot with Labels Collection Framelits, Perfect Polka Dot Embossing Folder, Floral Fusion Sizzlits, Sponge Dauber, Basic Pearls, Mini Glue Dots, and Dimensionals
First of all, I love this new Everyday Enchantment DSP!! And it's free during Sale-a-bration. Which, I guess, makes it even better! The colors and prints are so lovely I just want to eat 'em up. Oh, so yummy!! Ok, sorry. Was that over the top a bit?? Let's get back to the card here. This card is a mixture of soft, pretty colors and textures. Not all of the colors I chose were part of the striped DSP strip, but they worked well together anyway. It's not always necessary to use the colors that are 'supposed' to work with any of the printed papers, but try other colors and branch out with your creativity. You never know what fun combinations you might find.Instead of my usual squared-up layering on the focal point of the card, I used the new Labels Collection Framelits from the current Occasions Mini Catalog. I'm so happy we now carry nesting dies that are so very easy to use. Hurray!
I love the added flower on the card. It looks like many layers of cardstock, but it's only two. I distressed the two pieces of flower with a bone folder and fingernails until I could peel away another layer. Thus four layers from only 2 flowers. Adding more texture without a lot of heaviness here. The pearl was the perfect finishing touch.
Hope you enjoy this card idea. It really gets me in the mood for spring. Sharon
Sunday, April 17, 2011
Palm Sunday Thoughts and Thanks
Hope you're enjoying this Sunday and taking time to reflect on the events that happened so long ago on this Holy Week. It's been a quiet day today and I've been working on getting my Easter cards finished and addressed. If I'm lucky, my friends and family will actually get their cards on time this time around! Hooray! So thought I'd share this card with you before the stack gets in the mail tomorrow. Here's my card idea. Hope you like it!
Stamps: Something to Celebrate and God Bless 2 (retired)
Cardstock: Perfect Plum, Pink Pirouette, and Whisper White
Ink: Perfect Plum
Accessories: Big Shot with Lattice Die and Square Lattice Embossing Folder, 1" Circle Punch, Boho Blossoms Punch, Modern Label Punch, Basic Pearls, Sponge Dauber, and Dimensionals
I've been hearing about making a cross from the Lattice Die, but hadn't tried it yet. My downline Phyllis came to the rescue. She borrowed my Lattice Die and then showed my how to cut out the cross. Thanks Phyllis!! The die-cut lattice is held diagonally and then it's easy to see the cross design. As soon as you know where to look, it just jumps out at you. At least it did for me. If you have any problems figuring it out, email me and I'll email you .
I wanted to keep the card design very simple with the empty cross as the focal point. This fit exactly what I had in mind.
When you trim the cross, you end up with extra pieces and I just couldn't bear to throw them all away. So I trimmed one up to make the open leaf design on the inside of the card. Hope this gives you some ideas. I love how this card turned out and I'm thrilled to be sending them on to those I love and care about.
Thanks for stopping by today. All comments are so very appreciated. It's nice to know what you think of my creations. Have a blessed, peaceful Sunday!
Sharon
Friday, April 1, 2011
My Thoughts - Eggsactly
Good morning! I seem to have a few 'eggstra' minutes on my hands this morning. Can you guess why? It's because grandpa and grandson fell asleep on the lazy boy recliner just a bit ago. How very sweet they look napping together. Anyway, that means I have about 30 minutes to get this blog posted and back on the job, so here goes... Here's the other card the ladies made at Hostess Club in March. Since we're getting near the Easter season, it's time to think of those Easter cards we want to send out. Usually I go for a more Christ related theme, but thought this one would be fun and 'eggsactly' right.
Stamps: Easter Blossoms Cardstock: Crumb Cake, Confetti White, with Springtime Vintage Designer Series Paper Ink: Soft Suede, Daffodil Delight, Marina Mist, and Pretty In Pink Accessories: choices of Very Vanilla Seam Binding Ribbon or 5/8" Satin Ribbon, Basic Pearls or Rhinestones, Subtle Collection Designer Buttons, Hemp Twine, and Mini Glue Dots
Oops, looks like I messed up and took a pic of my sample for the 'before' choices and not the finished one. Each of the ladies used either rhinestones or pearls in the center of their eggs. Really cute, but you'll just have to imagine them on my sample card! Then there was the choice of ribbon. With the seam binding ribbon being fairly new, I wanted to use it on this card. After this one was made, I got the idea for the Vanilla Satin Ribbon. Oooh, so much more rich and elegant looking. And with it being a little wider and heavier, it scrunches up in the middle nicer than the seam binding. There was a choice of the blue or rose buttons also. Both looked very nice with the card. It was a hard choice. I wish I would have taken a picture of the ladies' cards when they were all finished. With the many options and how the 'eggs were laid' out, I don't think any two cards were totally alike! One of the ladies even made her card a landscape style and moved the components all around. So I guess you could say this card has the possibility to be 'eggstraordinarily' different! And that's enough egg jokes for today. Happy April 1st! Don't get fooled too much. Have a fabulous day! Sharon
Stamps: Easter Blossoms Cardstock: Crumb Cake, Confetti White, with Springtime Vintage Designer Series Paper Ink: Soft Suede, Daffodil Delight, Marina Mist, and Pretty In Pink Accessories: choices of Very Vanilla Seam Binding Ribbon or 5/8" Satin Ribbon, Basic Pearls or Rhinestones, Subtle Collection Designer Buttons, Hemp Twine, and Mini Glue Dots
Oops, looks like I messed up and took a pic of my sample for the 'before' choices and not the finished one. Each of the ladies used either rhinestones or pearls in the center of their eggs. Really cute, but you'll just have to imagine them on my sample card! Then there was the choice of ribbon. With the seam binding ribbon being fairly new, I wanted to use it on this card. After this one was made, I got the idea for the Vanilla Satin Ribbon. Oooh, so much more rich and elegant looking. And with it being a little wider and heavier, it scrunches up in the middle nicer than the seam binding. There was a choice of the blue or rose buttons also. Both looked very nice with the card. It was a hard choice. I wish I would have taken a picture of the ladies' cards when they were all finished. With the many options and how the 'eggs were laid' out, I don't think any two cards were totally alike! One of the ladies even made her card a landscape style and moved the components all around. So I guess you could say this card has the possibility to be 'eggstraordinarily' different! And that's enough egg jokes for today. Happy April 1st! Don't get fooled too much. Have a fabulous day! Sharon
Saturday, March 12, 2011
Spring Forward!
Here it is late at night and I should be tucked up in bed. But I couldn't sleep tonight. Why is it when we're going to lose an hour with the time change tonight and I should be getting to bed early to get enough sleep, I can't keep my eyes closed? Arrrrrgh! So frustrating! So I figured if I wasn't going to sleep anyway, I might as well get a post on here.
I got a couple cards made while trying to figure out what the class projects were going to be for this week. I kept running into problems - like not enough ribbon or dsp to make all the cards, or being short a couple of brads in the right color. Do you ever run into that problem? It was giving me fits! But it did result in a few more samples to show the ladies at my next workshop coming up soon. So that's a good thing, isn't it? Anyway, I finally got my Easter set put together and started creating with it. Hope you like it....

Stamps: Easter Blossoms
Cardstock: Pear Pizzazz, Basic Black, and Confetti White
Ink: Pear Pizzazz
Accesssories: Big Shot with Square Lattice Embossing Folder, Scallop Trim Corner Punch, Pear Pizzazz 1/2" Stitched-Poly Ribbon, Basic Pearls, Sponge quarter, and Dimensionals
I love how subtle the flower stems look on the background because of the embossing. Makes it look sort of like toile fabric which I love.
Did you notice the cute little pearls in the basket? Does this make it look like eggs? Or could this card be used for something besides Easter because I didn't use any sentiment whatsoever on the front? I haven't decided yet if it will be for Easter or not. What do you think??
No matter the reason I choose to send this card, I think it'll be well received. The soft mono-chromatic colors give just a gentle reminder that spring is on it's way. And after the winter we've been having, this reminder is really needed!
Thanks for stopping by. Don't forget to change your clocks and watches forward!
Sharon
I got a couple cards made while trying to figure out what the class projects were going to be for this week. I kept running into problems - like not enough ribbon or dsp to make all the cards, or being short a couple of brads in the right color. Do you ever run into that problem? It was giving me fits! But it did result in a few more samples to show the ladies at my next workshop coming up soon. So that's a good thing, isn't it? Anyway, I finally got my Easter set put together and started creating with it. Hope you like it....

Stamps: Easter Blossoms
Cardstock: Pear Pizzazz, Basic Black, and Confetti White
Ink: Pear Pizzazz
Accesssories: Big Shot with Square Lattice Embossing Folder, Scallop Trim Corner Punch, Pear Pizzazz 1/2" Stitched-Poly Ribbon, Basic Pearls, Sponge quarter, and Dimensionals
I love how subtle the flower stems look on the background because of the embossing. Makes it look sort of like toile fabric which I love.
Did you notice the cute little pearls in the basket? Does this make it look like eggs? Or could this card be used for something besides Easter because I didn't use any sentiment whatsoever on the front? I haven't decided yet if it will be for Easter or not. What do you think??
No matter the reason I choose to send this card, I think it'll be well received. The soft mono-chromatic colors give just a gentle reminder that spring is on it's way. And after the winter we've been having, this reminder is really needed!
Thanks for stopping by. Don't forget to change your clocks and watches forward!
Sharon
Thursday, April 1, 2010
Are you ready for Easter?
Of course, I'm not ready yet - there's still salads and dessert to make yet. But you'll be happy to note that I actually got my Easter cards mailed yesterday! For me that's a really big woo-h00!! I always get the cards made and then not mailed til the last minute. This time, I'd say I had a minute or two to spare! lol I know, there's just no hope for me at all, is there?
Anyway, I have a silly chick card to share with you today. We made this during the punch class in March. Everyone thought the little chick might have had just a little too much of something, but I think she's just so dog-gone happy it's Easter that's she's got to dance around. I guess you can decide for yourself what's going on here, but it was fun to make and we all had our laughs.

Stamps: Inspired by Nature
Cardstock: Whisper White, So Saffron, Taken with Teal, Certainly Celery, Pumpkin Pie, Pretty in Pink, and Barely Banana with Welcome Neighbor Designer Series Paper Pad (SAB)
Ink: Certainly Celery and Basic Black pads, Regal Rose, Summer Sun, and Basic Black Markers
Accessories: 1 3/8" Circle Punch, 5 Petal Flower Punch, Large Oval Punch, Paper Snips, White Gel Pen, Sponge quarters, Distressing Tool, and Dimensionals
I've got to admit, there was quite abit of cutting and trimming to get everything to work out. You can't tell from the picture, but the grass was all snipped down anywhere from 1/2" to 1" so it would be flexible and stand away from the clouds a little. The beak, ears, chick, and sentiment all have line work done with markers to make them more interesting and not so flat looking. And the chick's body was heavily distressed to give her a 'fluffier' look.
Hope this gets you happy about Easter being right around the corner. And if I don't talk to you before then, let me wish you a very blessed Easter as you celebrate the resurrection of our Lord and Savior Jesus Christ! He is risen! He is risen indeed, hallelujah!!
Sharon
Anyway, I have a silly chick card to share with you today. We made this during the punch class in March. Everyone thought the little chick might have had just a little too much of something, but I think she's just so dog-gone happy it's Easter that's she's got to dance around. I guess you can decide for yourself what's going on here, but it was fun to make and we all had our laughs.

Stamps: Inspired by Nature
Cardstock: Whisper White, So Saffron, Taken with Teal, Certainly Celery, Pumpkin Pie, Pretty in Pink, and Barely Banana with Welcome Neighbor Designer Series Paper Pad (SAB)
Ink: Certainly Celery and Basic Black pads, Regal Rose, Summer Sun, and Basic Black Markers
Accessories: 1 3/8" Circle Punch, 5 Petal Flower Punch, Large Oval Punch, Paper Snips, White Gel Pen, Sponge quarters, Distressing Tool, and Dimensionals
I've got to admit, there was quite abit of cutting and trimming to get everything to work out. You can't tell from the picture, but the grass was all snipped down anywhere from 1/2" to 1" so it would be flexible and stand away from the clouds a little. The beak, ears, chick, and sentiment all have line work done with markers to make them more interesting and not so flat looking. And the chick's body was heavily distressed to give her a 'fluffier' look.
Hope this gets you happy about Easter being right around the corner. And if I don't talk to you before then, let me wish you a very blessed Easter as you celebrate the resurrection of our Lord and Savior Jesus Christ! He is risen! He is risen indeed, hallelujah!!
Sharon
Friday, March 26, 2010
Easter Treat
Good morning! I've had an ugly week here and I'm so far behind on things it's disgusting. So I've only got a few minutes to share an idea with you. Are you one of those Starbuck's Frappuccino fans that get their fix on a regular basis? Ever wonder what to do with all those lovely bottles that you've saved for an idea that you know you're gonna have as soon as you throw all those bottles out???? Come on now, I know there's got to be a few of you out there! I'm admitting that I'm one of those people. And have a friend who has saved even more than me!!

Well, today I have the perfect use for those bottles! It can hold the traditional jelly beans (or gourmet ones if you have them!), or my favorite - pastel M&M's! Since I didn't have the aforementioned M&M's, I used some Jolly Rancher jelly beans that matched my cardstock colors wonderfully.
As you can see, the decorations on the bottle used the awesome Tea Party Designer Series Paper. The colors are perfect for Easter with all the pinks, purples, yellow, and green. For this application, I stayed with the jelly bean colors and used the polka dot prints.

Punches used:
2" Circle (non SU!), Scallop Circle, Large and Small Ovals, Round Tab, and Lots of Hearts
Colors of cardstock used:
Almost Amethyst, Barely Banana, Close To Cocoa
I forgot to take a picture of the top. That used a 1 3/4" Circle, 1 1/4" Circle, and 1" Circle Punches and the bunny from Eggcoutrements stamp set.
Hope you enjoy this idea. You can make a belly band and medallion to match so many different themes and then it's easy to put together. Have fun, and happy stamping!
Sharon

Well, today I have the perfect use for those bottles! It can hold the traditional jelly beans (or gourmet ones if you have them!), or my favorite - pastel M&M's! Since I didn't have the aforementioned M&M's, I used some Jolly Rancher jelly beans that matched my cardstock colors wonderfully.
As you can see, the decorations on the bottle used the awesome Tea Party Designer Series Paper. The colors are perfect for Easter with all the pinks, purples, yellow, and green. For this application, I stayed with the jelly bean colors and used the polka dot prints.

Punches used:
2" Circle (non SU!), Scallop Circle, Large and Small Ovals, Round Tab, and Lots of Hearts
Colors of cardstock used:
Almost Amethyst, Barely Banana, Close To Cocoa
I forgot to take a picture of the top. That used a 1 3/4" Circle, 1 1/4" Circle, and 1" Circle Punches and the bunny from Eggcoutrements stamp set.
Hope you enjoy this idea. You can make a belly band and medallion to match so many different themes and then it's easy to put together. Have fun, and happy stamping!
Sharon
Sunday, March 14, 2010
Easter Chickie
Are you in the mood for Easter with all the little chickies, and jelly beans, and chocolate??? Yes? Me too! But I don't have and jelly beans or chocolate today. Oh bummer!! So what am I left with? Yup, just those little chickies. So that's what I'm sharing with you today. This is the fourth and very last card from classes last week.
Isn't it just too darn cute? Even before you know that it flips open, it's darling just like that. But then the top of the egg flips up and you get your little chickie smiling at you. (Do chicks actually smile?? hmmm...) Anyway, everyone just thought this was the cutest card ever. And there wasn't even too much grumbling about all the cutting out they had to do either!!
Stamps: A Good Egg
Cardstock: Certainly Celery, Pretty in Pink, Barely Banana, Whisper White, with Tea Party and Sweet Pea Designer Series Paper packs
Ink: Stazon Jet Black pad, Certainly Celery, Apricot Appeal, Barely Banana, Only Orange Markers
Accessories: Soft Subtle Mini Brads, 2-Way Glue Pen, Dazzling Diamonds Glitter, Word Window Punch, Modern Label Punch, and Paper Snips
Cute, right? Too bad the glitter doesn't really show up on this picture. It's really sparkly and very spring-y looking! How do you like the two different DSP's together? Match nicely, don't they?
Now, I just wish I had a young child to send this card to. Maybe it would work for Uncle Rey - he's in his 80's but is definitely a child at heart and would probably get a kick out of this!
Hope you enjoyed visiting with my little chickie. Have a serene and rejuvenating Sunday so you're ready to face the coming week.
God bless,
Sharon
Subscribe to:
Posts (Atom)


