It always amazes me how differently cards will look just by changing the colors used. I had originally made a card for the ladies to make for our military last month. I used a retired designer print that was Cherry Cobbler which I just love for Christmas. I liked the simplicity of the card so I redid it using current DSP. The difference is almost like day and night, so I thought you'd like to see the two versions. The first card uses the current products and here it is...
Stamps: Bright & Beautiful
Ink: Lost Lagoon
Paper: Lost Lagoon, Whisper White, Silver Glitter Paper, with All Is Calm Specialty Designer Paper
Accessories: Big Shot with Stars Framelits, Itty Bitty Accents Punch Pack, Glue Dots, and Dimensionals
This version of the card is very frosty and serene with the snowflake printed paper with multiple blues for a background. The star layer of glitter paper in silver adds to the look with extra stars in the glitter paper to accent the whole card. I liked the small stars added to the sentiment strip on the bottom to brighten it up too.
Here's the original card using Cherry Cobbler for the card base and Very Vanilla Champagne Glitter Paper for the accents. This card looks very rich and elegant compared to the other card shown.
All in all, this is a simple card sketch to work with and is very versatile. Just change the images and paper used and you can use this idea for almost any occasion. Hope you give this idea a try. I'm sure you'll find lots of uses for this sketch. Thanks for stopping in today to see what's new. See you soon...... Sharon
Showing posts with label Christmas. Show all posts
Saturday, October 4, 2014
Monday, September 29, 2014
White Christmas
Ok, here we are with a Christmas card idea. I loved the White Christmas stamp set as soon as I laid eyes on it. Of course it didn't hurt that I loved each of the ideas shared with this set in the Holiday Catalog either! So I went with those same soft colors from the Catalog and made my first card with this set. Here's what I came up with. What do you think??
Stamps: White Christmas and Good Greetings
Ink: Stazon Jet Black, Soft Suede, Real Red, Pool Party, and Sahara Sand
Paper: Whisper White and Pool Party
Accessories: Big Shot with Lucky Stars TIEF, AquaPainter, Glue Dots, Frosted Sequins, and Dimensionals
This turned out to be a soft and serene winter scene. The color washed into the background is so delicate. I kept the color softer on the trees and bird too. All the sequins are attached with Glue Dots. That seems to be the easiest way to attach them.
This set is so easy to use because it's made from photopolymer. That way you can easily see where you're placing different items, like the bird and bear. So simple - wish we'd had photopolymer to work with years and years ago!! Hope you give this set a try - it's fabulous!!
Thanks for stopping by again. I want to wish you all a fantastic fall! Sharon
Stamps: White Christmas and Good Greetings
Ink: Stazon Jet Black, Soft Suede, Real Red, Pool Party, and Sahara Sand
Paper: Whisper White and Pool Party
Accessories: Big Shot with Lucky Stars TIEF, AquaPainter, Glue Dots, Frosted Sequins, and Dimensionals
This turned out to be a soft and serene winter scene. The color washed into the background is so delicate. I kept the color softer on the trees and bird too. All the sequins are attached with Glue Dots. That seems to be the easiest way to attach them.
This set is so easy to use because it's made from photopolymer. That way you can easily see where you're placing different items, like the bird and bear. So simple - wish we'd had photopolymer to work with years and years ago!! Hope you give this set a try - it's fabulous!!
Thanks for stopping by again. I want to wish you all a fantastic fall! Sharon
Labels:
Big Shot,
Christmas,
Stampin'Up!,
TIEF,
Winter
Friday, November 1, 2013
Easy Christmas #6
Yes, it is really November 1st already and that means the Christmas craze has officially started. So let's get going! Okay, continuing on with our Christmas ideas, I have another quick card for you today. This card uses the lovely colors Pool Party and Smoky Slate together along with the Winter Frost Specialty Designer Paper. These colors are so soft and pretty together. They remind me of the cool, crisp winter days with a bit of snow thrown in for good measure. Here's what I mean.....
Stamps: Festive Flurry and Christmas Messages
Ink: Smoky Slate
Paper: Whisper White, Smoky Slate, Pool Party, and Winter Frost Specialty Designer Series Paper
Accessories: Big Shot with Festive Flurry Framelits, Stylish Stripes TIEF, Decorative Label Punch, Rhinestone Basic Jewels, and Dimensionals
Doesn't this have the look of a cool, crisp, winter day? When you have all the tools to make this card, it's so easy to put it together. I don't know what I would have done this fall without having the Festive Flurry stamp set and coordinating Framelits set. And on top of that you get a discount when you get them together in a bundle. Now, that's the way to shop!!
I debated about using the Northern Flurry TIEF for the Pool Party layer, but liked the look of the diagonal stripes better. You could also use more rhinestones on the die-cut snowflake, but I liked the clean and simple look with just the single rhinestone in the center of the snowflake. I think this would fall under the 'less is more' theory here. But if you go for this idea, you can make any changes you would like. That's the fun of making your own cards, right?!
That's it for today. There's more to come, so check back in soon. Hope you're having a great week. And yes, I think I need to say TGIF!! Have a good one... Sharon
Stamps: Festive Flurry and Christmas Messages
Ink: Smoky Slate
Paper: Whisper White, Smoky Slate, Pool Party, and Winter Frost Specialty Designer Series Paper
Accessories: Big Shot with Festive Flurry Framelits, Stylish Stripes TIEF, Decorative Label Punch, Rhinestone Basic Jewels, and Dimensionals
Doesn't this have the look of a cool, crisp, winter day? When you have all the tools to make this card, it's so easy to put it together. I don't know what I would have done this fall without having the Festive Flurry stamp set and coordinating Framelits set. And on top of that you get a discount when you get them together in a bundle. Now, that's the way to shop!!
I debated about using the Northern Flurry TIEF for the Pool Party layer, but liked the look of the diagonal stripes better. You could also use more rhinestones on the die-cut snowflake, but I liked the clean and simple look with just the single rhinestone in the center of the snowflake. I think this would fall under the 'less is more' theory here. But if you go for this idea, you can make any changes you would like. That's the fun of making your own cards, right?!
That's it for today. There's more to come, so check back in soon. Hope you're having a great week. And yes, I think I need to say TGIF!! Have a good one... Sharon
Wednesday, October 30, 2013
Easy Christmas #5
Sorry I missed posting the last couple of days. There were too many Halloween possibilities to attend with the little ones, so this got put on the back burner. I do have another easy Christmas card to share with you today though. Hope you're enjoying these quick ideas for multiple cards in a hurry. Have you gotten started on your cards yet?? If not, I might have an idea that will fit the bill for you. Keep checking back with me to see what's new.
Stamps: Joyful Christmas, and More Merry Messages(ret)
Ink: Pink Pirouette, Strawberry Slush, Pistachio Pudding, and VersaMark
Paper: Pink Pirouette, Strawberry Slush, and Whisper White
Accessories: Heat Tool, Winter White Embossing Powder, Rhinestone Basic Jewels, Sponge Daubers, and Dimensionals
This card doesn't look like it should be included in a quick and easy Christmas card collection, but I think it's much easier to make than it looks. Instead of trying to watercolor the poinsettia and leaves, I just sponged color on over the embossing. So quick and you can get such a delicate color too!
I will admit that cutting out the embossed images will take some time, but I do things like that while watching all those Christmas specials on the Hallmark Channel. In fact, those movies are starting up soon, so I need to get some busy work ready to take advantage of that time!!
I chose to use a retired sentiment on this card because the font looked like it should go with this card. I hang on to all my retired sentiments, 'cuz you never know when you're going to need just that special one to fit your card.
Thanks for checking back with me today. Hope you like these ideas I've been sharing with you and this one in particular. I think it's one of the prettiest cards in the batch. Come on back for more ideas throughout the next week or so. And be sure to leave a comment! Sharon
Stamps: Joyful Christmas, and More Merry Messages(ret)
Ink: Pink Pirouette, Strawberry Slush, Pistachio Pudding, and VersaMark
Paper: Pink Pirouette, Strawberry Slush, and Whisper White
Accessories: Heat Tool, Winter White Embossing Powder, Rhinestone Basic Jewels, Sponge Daubers, and Dimensionals
This card doesn't look like it should be included in a quick and easy Christmas card collection, but I think it's much easier to make than it looks. Instead of trying to watercolor the poinsettia and leaves, I just sponged color on over the embossing. So quick and you can get such a delicate color too!
I will admit that cutting out the embossed images will take some time, but I do things like that while watching all those Christmas specials on the Hallmark Channel. In fact, those movies are starting up soon, so I need to get some busy work ready to take advantage of that time!!
I chose to use a retired sentiment on this card because the font looked like it should go with this card. I hang on to all my retired sentiments, 'cuz you never know when you're going to need just that special one to fit your card.
Thanks for checking back with me today. Hope you like these ideas I've been sharing with you and this one in particular. I think it's one of the prettiest cards in the batch. Come on back for more ideas throughout the next week or so. And be sure to leave a comment! Sharon
Sunday, October 27, 2013
Easy Christmas #4
Welcome to my series of quick and easy Christmas cards. Today is a quiet Sunday afternoon and I'm just enjoying all the peace and quiet around the house. No little grandsons running, jumping around, and playing extra loud in the background. I love the little guys, but yes, I'm enjoying the quiet today. Today's card is very clean and simple and super-duper fast to create. Just a couple of layers, a few rhinestones and you're done. Can't get much simpler than that.
Stamps: Christmas Star, and Greetings of the Season
Ink: Cherry Cobbler and Gold Encore
Paper: Very Vanilla and Cherry Cobbler
Accessories: Rhinestone Basic Jewels
Didn't I tell you this was a simple card? It could easily be embossed with gold if desired, but I wanted the look of a softer golden color. I also debated about using pearls for a softer look, but liked the rhinestones on the finished card better. The only thing I might change is the center rhinestone. I think I might like a dark red one there instead. I'll have to see about finding a dark red Sharpie marker to do that.
Ok, that's it for today's post. I'm going to settle down with my Nook and just chill for the rest of the afternoon. I've got to recharge my energy for when the grandsons show up tomorrow morning ready to go full speed ahead! Enjoy your Sunday - or whatever day it is when you get around to reading this post! Sharon
Stamps: Christmas Star, and Greetings of the Season
Ink: Cherry Cobbler and Gold Encore
Paper: Very Vanilla and Cherry Cobbler
Accessories: Rhinestone Basic Jewels
Didn't I tell you this was a simple card? It could easily be embossed with gold if desired, but I wanted the look of a softer golden color. I also debated about using pearls for a softer look, but liked the rhinestones on the finished card better. The only thing I might change is the center rhinestone. I think I might like a dark red one there instead. I'll have to see about finding a dark red Sharpie marker to do that.
Ok, that's it for today's post. I'm going to settle down with my Nook and just chill for the rest of the afternoon. I've got to recharge my energy for when the grandsons show up tomorrow morning ready to go full speed ahead! Enjoy your Sunday - or whatever day it is when you get around to reading this post! Sharon
Saturday, October 26, 2013
Quick Christmas #3
Ok, back again with another fast and fabulous Christmas card for you. I love the new stamp set called O Holy Night. It gives the whole Christmas story in just a few words and no images. Quite different from the usual stable scene depicting the Christmas story. Anyway, here's my take on the 'greatest story ever told'!
Stamps: O Holy Night, Festive Flurry, and Gorgeous Grunge
Ink: Midnight Muse, and Whisper White Craft Ink
Paper: Smoky Slate, Midnight Muse, and Silver Glitter Paper
Accessories: Big Shot with Adorning Accents Edgelits, Whisper White 3/8" Taffeta Ribbon, Glue Dots, and Dimensionals
Whoever thought that Grunge would work on a Christmas card?? But it does make for a lovely smattering of snowflakes, doesn't it?
When I first made the card, I worried that it was all a little dark looking. It was just what I had planned, but I started second guessing myself as usual. But after looking at it awhile, I love the muted, night-time feel of the card and that's the way it's staying. The fancy strip of silver glitter paper along the edge brightens it enough and makes it look festive instead of gloomy. I debated about a silver ribbon instead of the white, but liked the softness of the taffeta ribbon for this card.
There you have it. Another card in the quick and easy Christmas card series I'm doing. Please feel free to leave your comments and let me know how you like these ideas. I love to hear what you have to say. If you're interested in getting a head start on your Christmas cards and would like to get the materials for 10 of these cards all cut and ready to stamp and put together, just contact me and I'd be happy to give you the information on how you can get it all sent right to your door.
Thanks for stopping in today. Keep watching for more of these quick and easy Christmas card ideas. I've got more up my sleeve for you! Sharon
Stamps: O Holy Night, Festive Flurry, and Gorgeous Grunge
Ink: Midnight Muse, and Whisper White Craft Ink
Paper: Smoky Slate, Midnight Muse, and Silver Glitter Paper
Accessories: Big Shot with Adorning Accents Edgelits, Whisper White 3/8" Taffeta Ribbon, Glue Dots, and Dimensionals
Whoever thought that Grunge would work on a Christmas card?? But it does make for a lovely smattering of snowflakes, doesn't it?
When I first made the card, I worried that it was all a little dark looking. It was just what I had planned, but I started second guessing myself as usual. But after looking at it awhile, I love the muted, night-time feel of the card and that's the way it's staying. The fancy strip of silver glitter paper along the edge brightens it enough and makes it look festive instead of gloomy. I debated about a silver ribbon instead of the white, but liked the softness of the taffeta ribbon for this card.
There you have it. Another card in the quick and easy Christmas card series I'm doing. Please feel free to leave your comments and let me know how you like these ideas. I love to hear what you have to say. If you're interested in getting a head start on your Christmas cards and would like to get the materials for 10 of these cards all cut and ready to stamp and put together, just contact me and I'd be happy to give you the information on how you can get it all sent right to your door.
Thanks for stopping in today. Keep watching for more of these quick and easy Christmas card ideas. I've got more up my sleeve for you! Sharon
Friday, October 25, 2013
Christmas Card #2
Ok, today's card is the 2nd in my quick and easy Card Make-a-thon series. Again if you're interested in making these cards yourself and you're not in the area, I'd be happy to sell you the cut cardstock and embellishments needed to make 10 cards at a reasonable price. All you'd need would be the stamps, punches etc, and adhesive. Contact me if you are interested. OK, enough of the commercial, today I'm sharing a lovely card in navy and white. That's always a beautiful and serene color combo, so it's perfect for Christmas cards in my humble opinions. Here you go.....
Stamps: Christmas Collectibles, and Joyful Christmas
Ink: Night of Navy
Paper: Whisper White, Night of Navy
Accessories: Big Shot with Delicate Designs TIEF, Silver 1/8" Ribbon, Christmas Ornament Punch, and Dimensionals
In spite of being a simple card, I think it looks very elegant and is just the style of card I like to make for Christmas myself. It has a crisp, clean look to it, but it's really not too plain. Just my speed and easy enough to make multiples quickly when you're under a deadline to get all those cards in the mail!
I love the combo of navy and white with just a smidgeon of silver to fancy it up. And I think the embossed lace across the card is the perfect touch. Again, rhinestones, glitter, extra layers could all be added, but that's not my aim with this card.
Hope you're enjoying my quick and easy Christmas ideas so far. Check in tomorrow for the next one in the series. Happy stamping! Sharon
Stamps: Christmas Collectibles, and Joyful Christmas
Ink: Night of Navy
Paper: Whisper White, Night of Navy
Accessories: Big Shot with Delicate Designs TIEF, Silver 1/8" Ribbon, Christmas Ornament Punch, and Dimensionals
In spite of being a simple card, I think it looks very elegant and is just the style of card I like to make for Christmas myself. It has a crisp, clean look to it, but it's really not too plain. Just my speed and easy enough to make multiples quickly when you're under a deadline to get all those cards in the mail!
I love the combo of navy and white with just a smidgeon of silver to fancy it up. And I think the embossed lace across the card is the perfect touch. Again, rhinestones, glitter, extra layers could all be added, but that's not my aim with this card.
Hope you're enjoying my quick and easy Christmas ideas so far. Check in tomorrow for the next one in the series. Happy stamping! Sharon
Thursday, October 24, 2013
Easy Christmas #1
Have you looked at the calendar lately? Whew! It's almost the end of October so the countdown to Christmas is ramping up already! Along with my regular classes, I have a Christmas card make-a-thon coming up next month. That means checking Pinterest, Stampin' Connection, blogs and lots of card ideas floating around in my head. Totally overwhelming most of the time! But that means I have ideas to share with you, right? And that's always a good thing. Here's my first card for the Christmas line-up...

Stamps: Christmas Collectibles and Joyful Christmas
Ink: Real Red, Old Olive, and Gold Encore
Paper: Whisper White, Real Red cardstock, and Season of Style Designer Series Paper
Accessories: Christmas Ornament Punch, 1/8" Real Red Taffeta Ribbon, Glue Dots, and Dimensionals
Stamps: Christmas Collectibles and Joyful Christmas
Ink: Real Red, Old Olive, and Gold Encore
Paper: Whisper White, Real Red cardstock, and Season of Style Designer Series Paper
Accessories: Christmas Ornament Punch, 1/8" Real Red Taffeta Ribbon, Glue Dots, and Dimensionals
This was a quick and easy card to make. Since it's one of the card choices for the card make-a-thon I'm hosting in November, it needs to be easily duplicated in multiples. The most time consuming part of it was making the bows, and that can always be done ahead of time whenever there's some free time (whatever that is!!).
I like the skinny strip of Real Red cardstock the gives the ornaments something to hang from in a manner of speaking. I tried using Old Olive cardstock, but didn't like it as well.
I also made a decision not to emboss the gold ornament to keep it quick and easy to make. Granted there are several additions and embellishments that could be added to make it more stunning like more layers, embossing, rhinestones, etc., but I liked the clean look of this without a lot of other distractions.
That's it for the first quick and easy Christmas card idea I have for you. Check back tomorrow for the next one in the series. If you're interested in purchasing packets of 10 cards already cut and ready to stamp and put together, contact me and I'll be happy to give you the information. Happy stamping today! Sharon
Monday, October 7, 2013
Festive Flurry Snowflakes
Have you used the Festive Flurry snowflakes and the coordinating Framelits and Designer Paper that Stampin' Up! has in the Holliday Catalog? If not, you really don't know what you are missing out on! I love how it all comes together and you really don't have to fret about what will go with what else at all. Just grab those few items and sit down to stamp. I guarantee you'll come up with something lovely! Here's one of the first cards I made using just some of the coordinating items.
Stamps: Festive Flurry
Ink: Pool Party and Smoky Slate
Paper: Pool Party, Whisper White cardstock with Winter Frost Specialty DSP
Accessories: Big Shot, Northern Flurry TIEF, Magnetic Platform, Festive Flurry Framelits Die, Rhinestone Basic Jewels, and Dimensionals
I love the pretty, soft colors for this Christmas card. Definitely not traditional at all, but quite lovely just the same. I used two sizes of snowflake stamps to layer up and give more dimension to the card. The rhinestones were added to the center of the snowflake and the center of each of the embossed snowflakes too.
Two small strips of the Winter Frost DSP worked out to balance the card. Actually the strips are the same paper, just different sides showing.
This is a really quick card to make multiples for sending out at Christmas. At this time of year, I'm always looking for a card that looks a lot more involved than it really is - and this card really fits that criteria. Hope you like this idea. I got on a roll making other cards with these same components and colors. I'm not tired of them yet. I hope you'll like to see more of these colors and snowflakes together too.
Happy stamping - Sharon
Stamps: Festive Flurry
Ink: Pool Party and Smoky Slate
Paper: Pool Party, Whisper White cardstock with Winter Frost Specialty DSP
Accessories: Big Shot, Northern Flurry TIEF, Magnetic Platform, Festive Flurry Framelits Die, Rhinestone Basic Jewels, and Dimensionals
I love the pretty, soft colors for this Christmas card. Definitely not traditional at all, but quite lovely just the same. I used two sizes of snowflake stamps to layer up and give more dimension to the card. The rhinestones were added to the center of the snowflake and the center of each of the embossed snowflakes too.
Two small strips of the Winter Frost DSP worked out to balance the card. Actually the strips are the same paper, just different sides showing.
This is a really quick card to make multiples for sending out at Christmas. At this time of year, I'm always looking for a card that looks a lot more involved than it really is - and this card really fits that criteria. Hope you like this idea. I got on a roll making other cards with these same components and colors. I'm not tired of them yet. I hope you'll like to see more of these colors and snowflakes together too.
Happy stamping - Sharon
Wednesday, November 28, 2012
Snowflake Mug Card
Have I fallen off the face of the earth you ask? Well, almost - but I'm clawing my way back up again. The whole strep infection and ensuing sinus, coughing, etc has been exhausting and not over yet. Maybe if I'd settle down and quit running around like a chicken with my head cut off, I'd have a better chance of beating this whole infection thingy. But since when have I ever done what was the smartest thing? Not often! Anyway, enough of the fretting and whining, I've got a little card to share with you today. I made my sister a gift that I can't show you yet because another sister checks this blog every once in awhile and I don't want to give away Christmas secrets too soon, ya know? But the "gifted" sister adores purple in any and all of it's wonderfulness. Since we don't have any DSP that's in shades of purples to use, I had to purchase some from one of the 'other' stores. Thought she'd like a card that coordinated with the gift. If the idea of contraband paper bothers you, don't look any farther. If you think you can handle it, then this is what I made...
Stamps: Scentsational Season, All Holidays(retired)
Ink: Eggplant Envy
Paper: Midnight Muse, Whissper White and otherDSP
Accessories: Scallop Trim Border Punch, Big Shot with Holiday Collection Framelits, Scribbles Sizzlit (retired), Rhinestone Basic Jewels, and Dimensionals
This card is very simple with just a little lacy trim on both sides of the printed paper center strip. The paper has both blue and light purple snowflakes in the tiny white circles.
I love the glittery steamy swirls on this card. It just makes this card so very cute in person. I tried the steam that comes with the set, but it didn't stand out and catch your eye like this does.
Give me a couple more weeks and I'll share the gift that goes along with this card. I think it's just gorgeous and makes me want to decorate my house in blues and purples too!
Please stay healthy during this busy time of the year. Take some time for yourself to relax and enjoy the season! Sharon
Stamps: Scentsational Season, All Holidays(retired)
Ink: Eggplant Envy
Paper: Midnight Muse, Whissper White and otherDSP
Accessories: Scallop Trim Border Punch, Big Shot with Holiday Collection Framelits, Scribbles Sizzlit (retired), Rhinestone Basic Jewels, and Dimensionals
This card is very simple with just a little lacy trim on both sides of the printed paper center strip. The paper has both blue and light purple snowflakes in the tiny white circles.
I love the glittery steamy swirls on this card. It just makes this card so very cute in person. I tried the steam that comes with the set, but it didn't stand out and catch your eye like this does.
Give me a couple more weeks and I'll share the gift that goes along with this card. I think it's just gorgeous and makes me want to decorate my house in blues and purples too!
Please stay healthy during this busy time of the year. Take some time for yourself to relax and enjoy the season! Sharon
Friday, November 9, 2012
Evergreen in Cherry Cobbler
While perusing the Stampin' Connection site for demonstrators, I happened upon a lovely card by Gerry MacSporran that I just had to CASE. Thanks Gerry for your inspiration! It had all the hallmarks of the type of cards I've been drawn to lately. I made very little in the way of changes, and here is my version of Gerry's card.
Stamps: Evergreen
Ink: Cherry Cobbler
Paper: Cherry Cobbler and Whisper White
Accessories: Big Shot with Northern Flurries TIEF, and Rhinestone Basic Jewels
Well, you can't get too much more basic than this card. So very simple with only one extra layer on the front, but still elegant. There's just something about those embossed snowflakes on white cardstock - love it! Then you just add some rich Cherry Cobbler ink and some lovely trees and there you have it. Oh yes, don't forget the rhinestone to top the tree. (Gerry used a star she cut out and layered on.)
So what's not to like about this card? I can see making a few more of these (maybe trying other colors too) in my near future! Thanks again Gerry for a fabulous card idea! It is terrific. And thank you for checking in again today. I'm still under the weather with this strep throat thing that's hanging on, but the antibiotics are working and I'll be at the Regional coming to Lansing this Saturday. Wouldn't miss it! Maybe I'll see you there too. Sharon
Stamps: Evergreen
Ink: Cherry Cobbler
Paper: Cherry Cobbler and Whisper White
Accessories: Big Shot with Northern Flurries TIEF, and Rhinestone Basic Jewels
Well, you can't get too much more basic than this card. So very simple with only one extra layer on the front, but still elegant. There's just something about those embossed snowflakes on white cardstock - love it! Then you just add some rich Cherry Cobbler ink and some lovely trees and there you have it. Oh yes, don't forget the rhinestone to top the tree. (Gerry used a star she cut out and layered on.)
So what's not to like about this card? I can see making a few more of these (maybe trying other colors too) in my near future! Thanks again Gerry for a fabulous card idea! It is terrific. And thank you for checking in again today. I'm still under the weather with this strep throat thing that's hanging on, but the antibiotics are working and I'll be at the Regional coming to Lansing this Saturday. Wouldn't miss it! Maybe I'll see you there too. Sharon
Wednesday, November 7, 2012
Simple Greeting Card Kids
One of the sets in the catalog is a favorite of mine because the kids are so dog-gone cute. I'm talking about the Greeting Card Kids set. Each one of them is adorable and I find myself using this set every season I can. So here's my Christmas card using the cuddly little girl with her wagon and tree. Hope you like it as much as I do!
Stamps: Greeting Card Kids and Greetings of the Season
Ink: Stazon Jet Black and Watercolor Wonder Crayons
Paper: Whisper White, Raspberry Ripple, and Old Olive
Accessories: Big Shot with Window Frames Framelits, AquaPainter, White Organza Ribbon, Old Olive 1/8" Taffeta Ribbon, and Dimensionals
I've really been leaning towards the cleaner, leaner looking cards lately without lots of layers and doodads on them. This still looks like it has the clean lines that I like even though there are several layers of cardstock and 2 layers of ribbon.
I'd thought of using the die-cut layers lined up straight, but decided it was more interesting with them set at angles instead. I used both the Subtles and Regals Watercolor Wonder Crayons for this card. They're so simple to use just by touching the tip of the AquaPainter to the crayon and painting away. I always did like to color when little, and still haven't outgrown it yet!
Thanks for checking it again! I appreciate any and all of your comments. Leave me an email address so I can reply to you personally. When you comment you really inspire me want to do even better! Thanks,
Sharon
Stamps: Greeting Card Kids and Greetings of the Season
Ink: Stazon Jet Black and Watercolor Wonder Crayons
Paper: Whisper White, Raspberry Ripple, and Old Olive
Accessories: Big Shot with Window Frames Framelits, AquaPainter, White Organza Ribbon, Old Olive 1/8" Taffeta Ribbon, and Dimensionals
I've really been leaning towards the cleaner, leaner looking cards lately without lots of layers and doodads on them. This still looks like it has the clean lines that I like even though there are several layers of cardstock and 2 layers of ribbon.
I'd thought of using the die-cut layers lined up straight, but decided it was more interesting with them set at angles instead. I used both the Subtles and Regals Watercolor Wonder Crayons for this card. They're so simple to use just by touching the tip of the AquaPainter to the crayon and painting away. I always did like to color when little, and still haven't outgrown it yet!
Thanks for checking it again! I appreciate any and all of your comments. Leave me an email address so I can reply to you personally. When you comment you really inspire me want to do even better! Thanks,
Sharon
Tuesday, November 6, 2012
Another Blue Lodge Card
Did I mention we had a great time visiting family a couple weeks ago? Seems like we enjoyed ourselves so much we brought some extra stuff home with us - like germs! One of our nephew's children was just getting over tonsilitis when we arrived. When we returned home, our 2year old grandson came down with it and now his baby brother, my daughter and I all have gotten it too. Now doesn't that sound like fun? Seems like everybody is cranky and out of sorts with it and we all need a couple days to just sleep it off! Don't you love it when the good times just keep on coming? Now enough of the whining and on to a card for you. I promised I'd be working on another version of the blue Christmas Lodge card I posted last. And here it is - a little simpler, and I think I like it even better. What's your opinion?
Stamps: Christmas Lodge and Petite Pairs
Ink: Midnight Muse
Paper: Midnight Muse, Bashful Blue, and Whisper White
Accessories: Big Shot with Labels Collection Framelits, Stamp-a-ma-jig, and Midnight Muse Stitched Ribbon
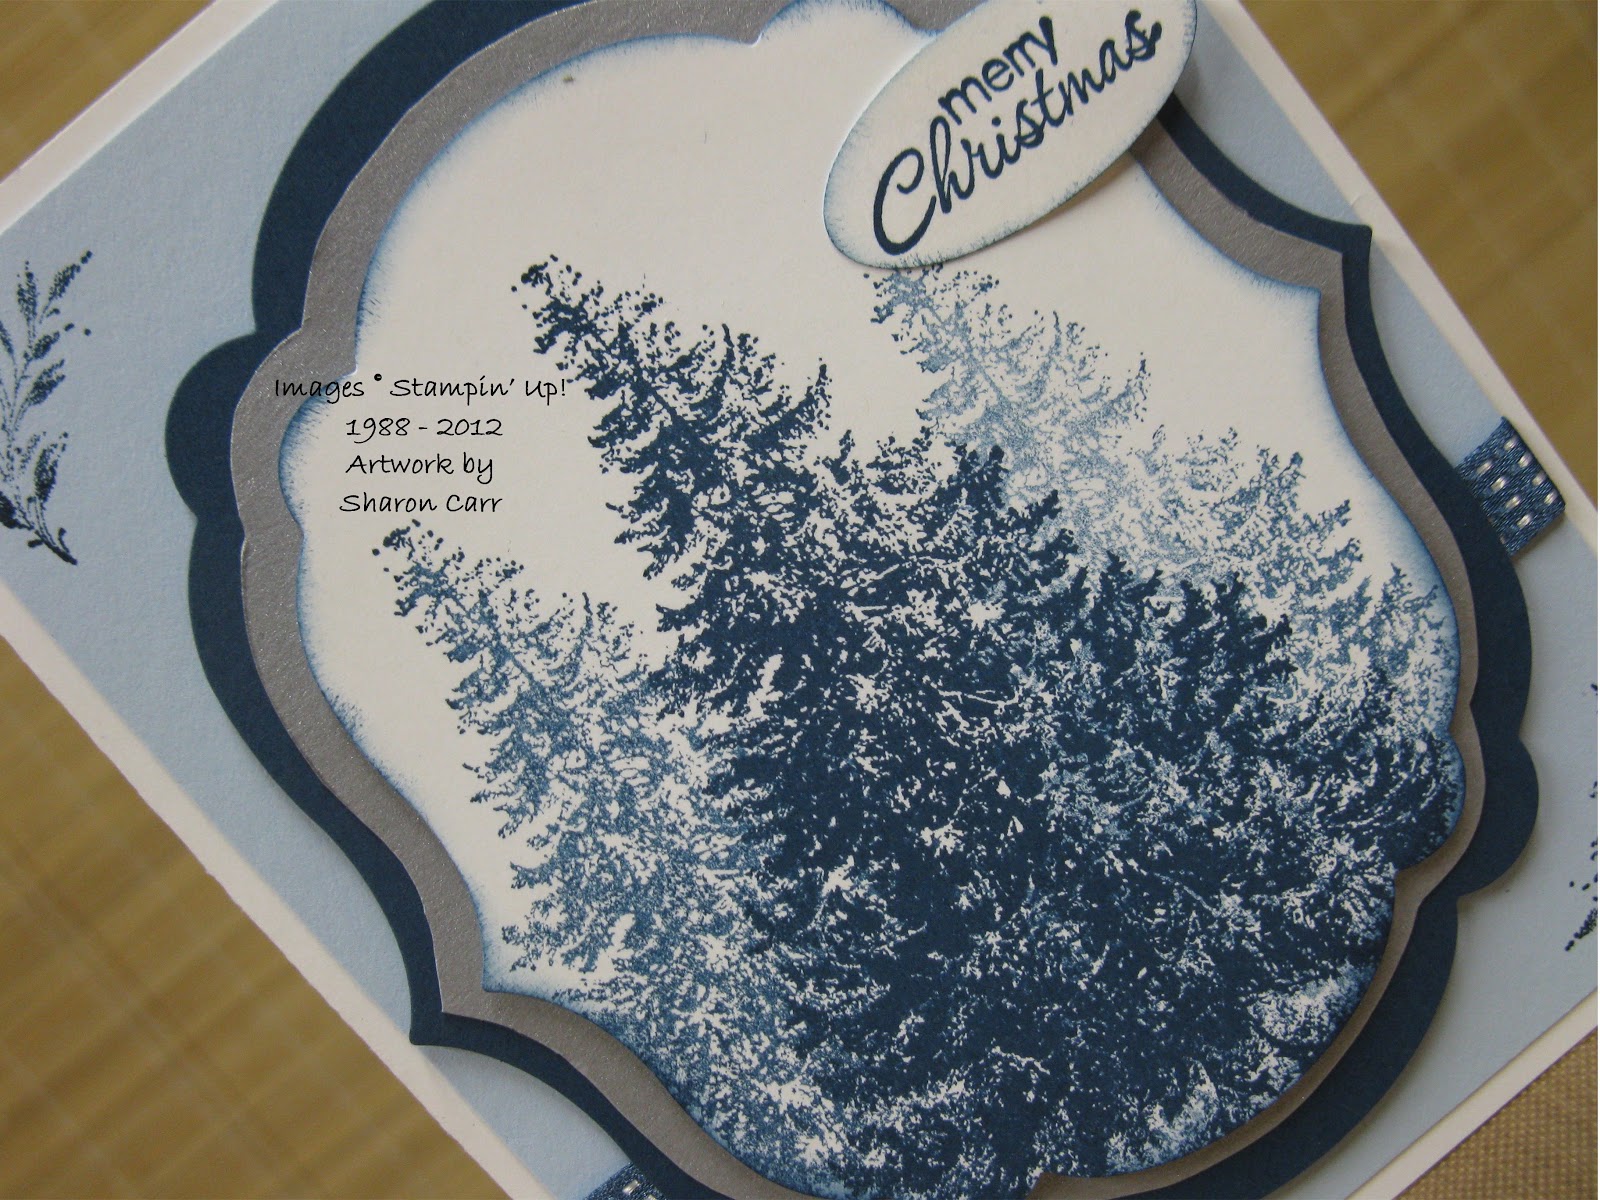
I just love this tree done with multiple stamping to give it a "foresty" look. What, there's no word like that? Oh well, you all know exactly what I mean, don't you? So that's 5 stampings from just one inking. That ink is really intense! And each one of the stamped trees are all great different blues. Love it!
The cut from the Labels Collection Framelit perfectly frames these trees and allows just a little room for the sentiment without having to add another layer. That's a help when you're having to mail bunches of cards at Christmas time.
Hope you like this version of the tree from the Christmas Lodge set. And right now you can order just the tree separately as one of the Single Stamps that Stampin'Up! has available. These single stamps will only be available until January 2, 2013, so it you want just the tree and not the rest of this set, now is the perfect time to order. Just click on my 'order now' button and have fun! There are plenty of other single stamps available too, so don't miss out.
Thanks for stopping by today. Don't think any of these nasty germs can get to you through the computer so you're safe for now. I've got more to share with you tomorrow, so come on back. Sharon
Stamps: Christmas Lodge and Petite Pairs
Ink: Midnight Muse
Paper: Midnight Muse, Bashful Blue, and Whisper White
Accessories: Big Shot with Labels Collection Framelits, Stamp-a-ma-jig, and Midnight Muse Stitched Ribbon
I just love this tree done with multiple stamping to give it a "foresty" look. What, there's no word like that? Oh well, you all know exactly what I mean, don't you? So that's 5 stampings from just one inking. That ink is really intense! And each one of the stamped trees are all great different blues. Love it!
The cut from the Labels Collection Framelit perfectly frames these trees and allows just a little room for the sentiment without having to add another layer. That's a help when you're having to mail bunches of cards at Christmas time.
Hope you like this version of the tree from the Christmas Lodge set. And right now you can order just the tree separately as one of the Single Stamps that Stampin'Up! has available. These single stamps will only be available until January 2, 2013, so it you want just the tree and not the rest of this set, now is the perfect time to order. Just click on my 'order now' button and have fun! There are plenty of other single stamps available too, so don't miss out.
Thanks for stopping by today. Don't think any of these nasty germs can get to you through the computer so you're safe for now. I've got more to share with you tomorrow, so come on back. Sharon
Sunday, October 28, 2012
Midnight Christmas Lodge
I'm baaack! What a great time we had with family last week! So much fun watching the little ones getting to know each other and having fun together. They were actubg so silly as they got more comfortable with each other. We got back last night and did the unpacking thing and sorted all the dirty clothes into piles of laundry. It sure does add up quickly! Today after church I got started on those piles and did some stamping. I'd had this idea playing around in my mind and I set to work to see how it would look in reality. It wasn't quite what I was looking for so I'll be reworking it tomorrow. But this is what I did today. Here it is, and then let's discuss it...
Stamps: Christmas Lodge and Petite Pairs
Ink: Midnight Muse
Paper: Whisper White, Bashful Blue, Midnight Muse, and Brushed Silver
Accessories: Big Shot with Labels Collection Framelits, Stamp-a-ma-jig, Midnight Muse Stitched Ribbon, Small Oval Punch(ret), Sponge Daubers, and Dimensionals
I'm happy with the overall idea of the card and the colors are exactly as I'd planned. The one problem I ran into was getting a really good outline on the Brushed Silver cardstock layer. I used the outside edge of the Framelit that I had cut the white out with, but it's really not a true copy of the cut edge. So I spent quite a bit of time fussing around trying to get a good fit on the silver layer. It's ok, but not great. Has anyone out there found a good way to get a tighter layer on these? I really love the look, but it would be a pain to make 50 of these for Christmas. Any ideas???
The Stamp-a-ma-jig made stamping the little corner accents a breeze. What would I ever do without this tool? I think it's a must have item in any stamper's stash. I might not use it every time I stamp, but I'm glad to have it when needed.
After I made the card I remembered that this small oval punch was retired - bummer. But the card was done already and that was that. Actually I haven't figured out what I would have used instead. Hmmmm, guess that's something to figure out for the next version of this card. Hope I'll have it done for tomorrow so you can compare and let me know what you think. See you soon.... Sharon
Stamps: Christmas Lodge and Petite Pairs
Ink: Midnight Muse
Paper: Whisper White, Bashful Blue, Midnight Muse, and Brushed Silver
Accessories: Big Shot with Labels Collection Framelits, Stamp-a-ma-jig, Midnight Muse Stitched Ribbon, Small Oval Punch(ret), Sponge Daubers, and Dimensionals
I'm happy with the overall idea of the card and the colors are exactly as I'd planned. The one problem I ran into was getting a really good outline on the Brushed Silver cardstock layer. I used the outside edge of the Framelit that I had cut the white out with, but it's really not a true copy of the cut edge. So I spent quite a bit of time fussing around trying to get a good fit on the silver layer. It's ok, but not great. Has anyone out there found a good way to get a tighter layer on these? I really love the look, but it would be a pain to make 50 of these for Christmas. Any ideas???
The Stamp-a-ma-jig made stamping the little corner accents a breeze. What would I ever do without this tool? I think it's a must have item in any stamper's stash. I might not use it every time I stamp, but I'm glad to have it when needed.
After I made the card I remembered that this small oval punch was retired - bummer. But the card was done already and that was that. Actually I haven't figured out what I would have used instead. Hmmmm, guess that's something to figure out for the next version of this card. Hope I'll have it done for tomorrow so you can compare and let me know what you think. See you soon.... Sharon
Monday, October 22, 2012
Embossing Again
In case you haven't noticed, I've gotten totally hooked on the Holiday Frame TIEF in the Holiday Catalog. It works out so nicely using different sets and ideas. And here's another idea using the embossing folder for you. It's another simple card with not too much going on which I really prefer for my Christmas cards. But I still think it's beautiful. What do you think about it?
Stamps: Ornament Keepsakes and Tiny Tags
Ink: Cherry Cobbler and Old Olive
Paper: Whisper White, Cherry Cobbler Core'dinations
Accessories: Big Shot with Holiday Frame TIEF and Holiday Ornaments Framelits, Jewelry Tag Punch, Sanding System and Dust Buddy, Old Olive 1/8" Taffeta Ribbon, and Dimensionals
This is the first card I made using the new Core'dinations cardstock and I have to tell you that I just love this paper! The embossing stands out so perfectly when lightly sanded. It gives your project a completely different look than regular cardstock. And the Sanding System and Dust Buddy are must have items to get the best results. The Dust Buddy cleans all the little traces of 'dust' away as quick as a wink.
This ornament set and coordinating Framelit set are some of my favorites from the Holiday Catalog! I've done the ornaments in different colors and all the different sizes on several projects. Whatever did I do before we had these Framelits??? I don't even want to think about having to cut out all the ornaments I've made in the last month! I think my fingers would have fallen off by now or I'd have lots of calluses!!
That's it for this post. Hope you like it. Of course, what's not to like here?? Have a great week. I'm enjoying my time in North Carolina with family. It sure it great to be relaxing and getting all caught up with all the news. Sharon
Stamps: Ornament Keepsakes and Tiny Tags
Ink: Cherry Cobbler and Old Olive
Paper: Whisper White, Cherry Cobbler Core'dinations
Accessories: Big Shot with Holiday Frame TIEF and Holiday Ornaments Framelits, Jewelry Tag Punch, Sanding System and Dust Buddy, Old Olive 1/8" Taffeta Ribbon, and Dimensionals
This is the first card I made using the new Core'dinations cardstock and I have to tell you that I just love this paper! The embossing stands out so perfectly when lightly sanded. It gives your project a completely different look than regular cardstock. And the Sanding System and Dust Buddy are must have items to get the best results. The Dust Buddy cleans all the little traces of 'dust' away as quick as a wink.
This ornament set and coordinating Framelit set are some of my favorites from the Holiday Catalog! I've done the ornaments in different colors and all the different sizes on several projects. Whatever did I do before we had these Framelits??? I don't even want to think about having to cut out all the ornaments I've made in the last month! I think my fingers would have fallen off by now or I'd have lots of calluses!!
That's it for this post. Hope you like it. Of course, what's not to like here?? Have a great week. I'm enjoying my time in North Carolina with family. It sure it great to be relaxing and getting all caught up with all the news. Sharon
Friday, October 19, 2012
Joyous Celebrations Take 3
Just a quick post with another card using the versatile Joyous Celebrations stamp set. It's been easy to use and come up with fabulous ideas. This idea came from the Stampin' Connection which is a demonstrator only website. Sandy Mathis made this lovely card and I seriously CASEd it! Thank you for the great card idea Sandy! Love it!!
Stamps: Joyous Celebrations
Ink: Cherry Cobbler
Paper: Cherry Cobbler, Very Vanilla, and Festival of Prints DSP Stack
Accessories: Big Shot with Apothecary Accents Framelits, Holiday Frame TIEF, Large Oval Punch, 1" Square Punch, Pearls Basic Jewels, and Dimensionals
I really love the simplicity of this card, but it looks so pretty in hand. There's lots of texture and layers going on here, so it doesn't look plain at all. There are several other prints in that Festival of Prints DSP that would work well with this idea. You'd just need to change the cardstock and ink color to match whichever print you choose.
That's it for tonight. We're leaving to visit family early tomorrow morning. I'm trying to get a couple posts ready for when I'm vacationing. Hope it works out! Have a great weekend. Sharon
Stamps: Joyous Celebrations
Ink: Cherry Cobbler
Paper: Cherry Cobbler, Very Vanilla, and Festival of Prints DSP Stack
Accessories: Big Shot with Apothecary Accents Framelits, Holiday Frame TIEF, Large Oval Punch, 1" Square Punch, Pearls Basic Jewels, and Dimensionals
I really love the simplicity of this card, but it looks so pretty in hand. There's lots of texture and layers going on here, so it doesn't look plain at all. There are several other prints in that Festival of Prints DSP that would work well with this idea. You'd just need to change the cardstock and ink color to match whichever print you choose.
That's it for tonight. We're leaving to visit family early tomorrow morning. I'm trying to get a couple posts ready for when I'm vacationing. Hope it works out! Have a great weekend. Sharon
Wednesday, October 17, 2012
Another Joyous Celebrations Card
Today's card version is a CASE of my good friend and downline Phyllis Dahlstrom. Her card was lovely and I just wanted to be able to look at it again and again, so I copied it! At least I think I did. I saw it at a get-together and thought to take a picture. Unfortunately, I forgot to check the settings on my camera and I got an awful image. So I just winged it and came up with what I thought she had made. We'll see what she says about it later this week when I see her! Anyway, here it is...
Stamps: Joyous Celebrations
Ink: Baja Breeze and Riding Hood Red
Paper: Baja Breeze and Whisper White, Silver Glitter Paper, and Festival of Prints Designer Paper Stack
Accessories: Big Shot with Holiday Frame TIEF, 1 3/4" Scallop Circle Punch, Large Oval Punch, Rhinestone Basic Jewels, Sanding System, and Dimensionals
I don't usually sand embossed DSP. But doing that on this card really makes the embossing show up nicely. The colors are all really soft and not your usual Christmas colors, but I think it turned out gorgeous!
I liked the added bit of Silver Glitter Paper tucked in behind the focal image. Most of it's hidden with just a bit peeking out. But that little bit of glitz is just the right amount for this card. The added rhinestone on the stamped ornament is the perfect finishing touch.
After using all the Framelits for my cards lately, it was crazy cutting out that tiny bow again. But I thought it was better to add it as another layer instead of stamping it directly on the ornament. You can do it as you see fit, but I thought the extra layer was needed.
That's it for today. Yup, another short and sweet post. But at least it got posted!! Hurray! Keep you fingers crossed that I can get at least one more posted this week. See you soon! Sharon
Stamps: Joyous Celebrations
Ink: Baja Breeze and Riding Hood Red
Paper: Baja Breeze and Whisper White, Silver Glitter Paper, and Festival of Prints Designer Paper Stack
Accessories: Big Shot with Holiday Frame TIEF, 1 3/4" Scallop Circle Punch, Large Oval Punch, Rhinestone Basic Jewels, Sanding System, and Dimensionals
I don't usually sand embossed DSP. But doing that on this card really makes the embossing show up nicely. The colors are all really soft and not your usual Christmas colors, but I think it turned out gorgeous!
I liked the added bit of Silver Glitter Paper tucked in behind the focal image. Most of it's hidden with just a bit peeking out. But that little bit of glitz is just the right amount for this card. The added rhinestone on the stamped ornament is the perfect finishing touch.
After using all the Framelits for my cards lately, it was crazy cutting out that tiny bow again. But I thought it was better to add it as another layer instead of stamping it directly on the ornament. You can do it as you see fit, but I thought the extra layer was needed.
That's it for today. Yup, another short and sweet post. But at least it got posted!! Hurray! Keep you fingers crossed that I can get at least one more posted this week. See you soon! Sharon
Tuesday, October 16, 2012
Joyous Celebrations
Whoa! Is it really the middle of October already? Sheesh, where has the time gone? I've been busy with commitments and have squeezed in some stamping time around things. But, I've been lax about posting anything. So today, I'm going back to a card I made a couple weeks ago. It was the first time playing around with this set and the Holiday Frame TIEF. Several ladies wanted to know how to make the card in the Holiday Catalog, so I did a CASE of that one and then made another version. Today I'm sharing my version with you.
Stamps: Joyous Celebrations
Ink: Cherry Cobbler and Garden Green
Paper: Whisper White and Cherry Cobbler
Accessories: Big Shot with Holiday Frame TIEF, Extra Large Oval Punch, Rhinestone Basic Jewels, Cherry Cobbler Seam Binding Ribbon, Glue Dots, and Dimensionals
On this version, I used the embossed cardstock with the back facing front. It seemed to show off the embossing on the White cardstock with more detail using it this way.
As you can see, it's a very clean and simple card, but sometimes those are the most elegant. I'm sure I'll be making more of these to mail out myself. And a couple of other ladies I know are using this very same idea too!
Thanks for checking things out today. Come back tomorrow. I'll have another look at this stamp set for you. Sharon
Stamps: Joyous Celebrations
Ink: Cherry Cobbler and Garden Green
Paper: Whisper White and Cherry Cobbler
Accessories: Big Shot with Holiday Frame TIEF, Extra Large Oval Punch, Rhinestone Basic Jewels, Cherry Cobbler Seam Binding Ribbon, Glue Dots, and Dimensionals
On this version, I used the embossed cardstock with the back facing front. It seemed to show off the embossing on the White cardstock with more detail using it this way.
As you can see, it's a very clean and simple card, but sometimes those are the most elegant. I'm sure I'll be making more of these to mail out myself. And a couple of other ladies I know are using this very same idea too!
Thanks for checking things out today. Come back tomorrow. I'll have another look at this stamp set for you. Sharon
Friday, September 28, 2012
Ornament Keepsake Card
Good grief! I can't believe it's Friday night already. Where has the week gone? And for that matter, the whole month of September has just flown by! I need to really buckle down and get making more cards! Of course, that's always the plan, but seems like it doesn't really happen too often. Oh well, I can still dream, can't I? Ok, enough fussing and let's get down to business here. This card took me two days to finish. I knew the layout I wanted to use and what color to stamp the ornaments. The problem came trying to decide what color to use for the background. This is what I came up with...
Stamps: Ornament Keepsakes and Petite Pairs
Ink: Cherry Cobbler, Old Olive
Paper: Whisper White, Night of Navy
Accessories: Big Shot with Lacy Brocade TIEF and Holiday Ornaments Framelits, Old Olive and Real Red 1/8" Taffeta Ribbon, retired oval punch, Glue Dots, and Dimensionals
Have you tried out this stamp set and coordinating framelit set yet? I'm telling you, you're gonna fall in love with it! The framelits make it so easy to add layers of ornaments to your Christmas cards. I want to add a whole tree-ful of them!! Yes, it really is addicting making all these ornaments. Can you tell?
I love the richness of these dark colors together, and the Lacy Brocade TIEF is a fitting background for the card. I really debated about using rhinestones or glitter on the ornaments. At this point I've decided not to add them, but that could change sometime in the future as I continue to look at the card. Sometimes you just have to go back and give it a little sparkle, you know?
Well, that's it for today. Hope you like the idea. Make time to do some stamping this weekend. It's good for you! Hugs, Sharon
Stamps: Ornament Keepsakes and Petite Pairs
Ink: Cherry Cobbler, Old Olive
Paper: Whisper White, Night of Navy
Accessories: Big Shot with Lacy Brocade TIEF and Holiday Ornaments Framelits, Old Olive and Real Red 1/8" Taffeta Ribbon, retired oval punch, Glue Dots, and Dimensionals
Have you tried out this stamp set and coordinating framelit set yet? I'm telling you, you're gonna fall in love with it! The framelits make it so easy to add layers of ornaments to your Christmas cards. I want to add a whole tree-ful of them!! Yes, it really is addicting making all these ornaments. Can you tell?
I love the richness of these dark colors together, and the Lacy Brocade TIEF is a fitting background for the card. I really debated about using rhinestones or glitter on the ornaments. At this point I've decided not to add them, but that could change sometime in the future as I continue to look at the card. Sometimes you just have to go back and give it a little sparkle, you know?
Well, that's it for today. Hope you like the idea. Make time to do some stamping this weekend. It's good for you! Hugs, Sharon
Sunday, September 23, 2012
Scentsational Season Christmas
This is one of my favorite sets - and the reason is the Framelits set that matches it! This duo makes your cardmaking quick and soooo much easier than cutting everything out. Oh yes, I just love playing with these matching stamp and Framelit sets!! It's one of the bestest things that Stampin' Up! has been doing as far as I'm concerned. Here's what I worked on last week with it...
Stamps: Scentsational Season, Joyous Celebrations, and More Merry Messages
Ink: Garden Green and Daffodil Delight
Paper: Whisper White, Real Red, Garden Green, and Be Of Good Cheer Designer Series Paper
Accessories: Big Shot with Holiday Collection Framelits and Perfect Polka Dot TIEF, 1" Circle Punch, 1 1/4" Scallop Circle Punch, 1" Square Punch, 2 1/2" Circle Punch, Rhinestones Basic Jewels, Cherry Cobbler Baker's Twine, Glue Dots, and Dimensionals
Isn't this a bright and happy Christmas card? I love using unusual color combos for Christmas cards, but then I have to come back to the traditional reds and greens. It just reminds me of all the happy Christmases spent with my family growing up. And this card has a whimsical feeling that would be just fine for kids and Christmas memories, don't you think?
I love all the different bits and pieces of the design coming together here. With the circles and strips, and layers and embellishments, there's lots of interest to keep you looking.
Okay, here I go with another picture flipped on it's side. I'm going to scream if this doesn't quit, 'cuz I can't get it right side up! Anyway, I used a skinny strip of the Real Red cardstock inside the card to mimic the strips of DSP on the front of the card to give it a different look.
That's it for today. Hope you're enjoying your Sunday and finding time to relax and refresh yourself. It's important to give yourself a break and just have a little fun stamping! Hugs, Sharon
Stamps: Scentsational Season, Joyous Celebrations, and More Merry Messages
Ink: Garden Green and Daffodil Delight
Paper: Whisper White, Real Red, Garden Green, and Be Of Good Cheer Designer Series Paper
Accessories: Big Shot with Holiday Collection Framelits and Perfect Polka Dot TIEF, 1" Circle Punch, 1 1/4" Scallop Circle Punch, 1" Square Punch, 2 1/2" Circle Punch, Rhinestones Basic Jewels, Cherry Cobbler Baker's Twine, Glue Dots, and Dimensionals
Isn't this a bright and happy Christmas card? I love using unusual color combos for Christmas cards, but then I have to come back to the traditional reds and greens. It just reminds me of all the happy Christmases spent with my family growing up. And this card has a whimsical feeling that would be just fine for kids and Christmas memories, don't you think?
I love all the different bits and pieces of the design coming together here. With the circles and strips, and layers and embellishments, there's lots of interest to keep you looking.
Okay, here I go with another picture flipped on it's side. I'm going to scream if this doesn't quit, 'cuz I can't get it right side up! Anyway, I used a skinny strip of the Real Red cardstock inside the card to mimic the strips of DSP on the front of the card to give it a different look.
That's it for today. Hope you're enjoying your Sunday and finding time to relax and refresh yourself. It's important to give yourself a break and just have a little fun stamping! Hugs, Sharon
Subscribe to:
Posts (Atom)